Decades Set #7 of 8 – Downtown Disney, CA

Another few weeks have past and it’s that time for the next Decades set to make an appearance onstage.  We are creeping ever closer to the final few pennies in the Disneyland 60th Anniversary set.  As a reminder Disney had planned to release 60 unique (and limited) penny and quarter designs to help Celebrate their 60th Diamond Celebration.  Which by the way is almost over.

This machine is located in the same location as the other Decades sets, by the middle set of doors in the World of Disney mega gift shop at Downtown Disney.

DTD - World of Disney Decades 7

It’s an election machine with three designs celebrating the next decade in this set 1995 – 2004.

IMG_9500

The first penny has images of the Disneyland Hotel, Winnie the Pooh, and the Hollywood Tower Hotel.

IMG_9502

The next penny has Grizzly Peak from California Adventure, and Aladdin on his magic carpet with the Genie.  Aladdin is one of my all-time favorite Disney movies.

IMG_9501

The last image celebrates Disney California Adventure park that opened in 2001.  There are designs of Mickey’s Fun Wheel, and the California Screamin’ roller coaster.

Updated set count 57 of 60.  Only one set to go and covering the most recent decade should be very cool to see what designs they come up with.  As always remember that these sets are only available for a short time so get your set before they are gone.

Flashback – 100 Years of Magic 2002 WDW

Every few years Disney has a celebration that extends through the theme parks and of course their merchandise.  Thankfully for us pressed coin collectors this can also mean special limited designs are available for only a few months or if we are lucky up to a year.  With some of the new coins for this year already showing up I have noticed that 2016 apparently is the year Disney will celebrate Music, Magic and Memories.

This got me thinking about another celebration that was going on during one of my visits to Walt Disney World.  As we flashback to 2002 the resort was celebrating 100 Years of Magic.  This was to commemorate 100 years since Walt’s birth.

I visited the resort in the summer of 2002 just on a small vacation with some friends. In preparing for this post I went through some old pictures trying to find anything that had the 100 Years of Magic designs but couldn’t find anything.  However what does stick in my mind was the huge assortment of pressed quarters that were available throughout the theme parks and resorts.  I must admit that at this time I wasn’t as obsessed with collecting pressed coins and would only use my spare change to pick a few random designs, and this pains me to this day.  Especially as I look back at this special set which I really think was a great collection.  I only picked up a few of the coins during that trip, and the years since I have spent trying to fill in the missing designs.

IMG_8665

In total there were about 50 designs available during this celebration.  As you can see from the above picture I have 11 so far, but I keep searching and trading whenever I come across another design needed to finish this set.  I’m not sure what it is exactly about this set, but I just really enjoy it and think the designs are great.

IMG_8666

These designs covered all aspects of the parks as well as each resort and other areas of the property.  The above design was what I considered the main design for the celebration.  It has Mickey sitting on top of the 100 Years of Magic logo.

IMG_8667

One of my personal favorites the monorail was also available to press.  Another nice detail on each of these coins is the established date.  Monorail Est 1971.

IMG_8668

Here is definitely a flashback, Pleasure Island Est 1989.  For those young ones out there this is the original Downtown Disney area.  I remember after a certain time of night you had to show ID that you were over 21 to access the numerous clubs and bars.  Next up the resorts.

IMG_8669

The Polynesian Resort Est. 1971.

IMG_8670

Animal Kingdom Lodge Est. 2001

IMG_8671

Wilderness Lodge Est. 1994

IMG_8671

Beach Club Resort Est. 1990

IMG_8673

Pop Century Resort Est. 2002

IMG_8674

Coronado Springs Resort Est. 1997

IMG_8675

Port Orleans Resort French Quarter Est. 1991

IMG_8676

Port Orleans Resort Riverside Est. 1992

I still have quite a way to go before completing this set, but the hunting and searching is part of the fun.  Be on the lookout whenever you are out collecting for special edition designs you just never know when you may come across them.  However make sure you have enough pocket change to get the entire set because you just never know when you may be able to find those coins again.

How to scan your pennies

Every so often I get messages from readers asking about how I scan my pennies onto the computer.  For this blog I actually don’t scan but instead just photograph them, and to be totally honest I don’t have a fancy professional camera but instead just use my smart phone.  The cameras on the latest phones are really pretty good and it saves me having to buy any additional hardware.  But for my website and the database on my computer that I use to inventory my collection I do like to scan the pennies as I can more easily edit and manipulate the pictures for the purpose I need.

Scanner 01

As you can see in the above picture I have an all-in-one printer/scanner/copier made by HP (Hewlett-Packard) and the model is Photosmart Premium c309g-m.  Don’t let the multi-function unit fool you there really isn’t anything special to this machine.  When I bought this 4 or 5 years ago it was probably around $200.  I don’t know if this model is still available but these types of units are always changing and I’m sure there is something similar out there.  But this doesn’t mean you have to use this exact unit and now a days unless your scanner is more than 10 years old most scanners will be able to handle capturing your coins.

Scanner 02

Once you are ready to start scanning there is always some discussion about where the coins should be straight up and down (vertical) so the scanner will pass the coins horizontally, or if the coins should be at a slight angle.  I’ve done a few tests below so you can see some of the differences.

Penny 01 Compare

Above is a comparison of a coin pressed on a pennycollector.com machine.  You can click on the above image for a larger view to compare the two scans.  Please note these images were scanned separately and I combined them for easier comparison.  In my experience the pennycollector machines for the most part roll really nicely with even pressure that makes for a great final product.  When scanning coins from these machines if the coin is fairly flat (I’ll get into this more below) the scanning doesn’t change much and I don’t see that one way is considerably better than the other.

Penny 02 Compare

Next is a coin that was pressed on a RockyRockhold machine.  As you can see in the vertical scan there are some very noticeable lines that show up.  My only guess is that this type of machine presses the coins in a way that causes them to stretch more.  I know these machines usually require a little more arm power to turn and I don’t know if this causes inconsistent pressure on the coin or if it’s just the type of die used in the machine.  Whatever the reason I always find that coins from these machines get these lines on them when scanned.  Now take a look at the angle scan and you will see that the lines are not as noticeable.

Bent Curved

Another common issue I get with some machines is curving of the finished pressed coin.  I don’t usually worry about straightening them but it does make a difference when scanning.  When trying to straighten a coin I’ve tried a few different methods and the one that works best for me is just using a pair of needle nose pliers.  I gently apply press to the curved section of the coin and try to bend it straight.  This is a risky thing to do as you can bend it too far in the opposite direction, or more common I find is you get a crease on the coin that is pretty hard to ignore.  For this example I had an extra coin and in the above picture you can see the original coin on the left had two curves to it, and on the right was after I attempted to straighten it.

Bent Curved Compare

The above image has several comparisons.  On the eft I have the original coin with the curves and you can see a light area in the middle of the scan (between the two curved areas) which is where the scanner light reflected more than the rest of the coin.  Now in my opinion this isn’t completely terrible and I would probably be okay with using it for my records especially since I don’t link straightening my coins.  For the sake of science I bent the coin to show the difference which is the set of coins on the right.  I also included the vertical scans and angle scans for a complete comparison.  The straightened coins don’t have that light bands running through the middle and in my opinion the vertical scan seems a little more detailed.

DPI Comparison

Now lets talk about scanning resolution.  This is primarily listed by what is knows as dpi or dots per inch (also sometimes listed as ppi which stands for pixels per inch).  I scanned one coins which you will see below in 4 different resolutions and combined them in the above comparison image.  The lowest I tested was 72 dpi and when up to 1200 dpi.  My scanner could go higher but for these types of scans really aren’t necessary.  As you can probably guess the more dpi you scan at the more detail (dots/pixels) there are in the final image.

Penny 04 72 dpiPenny 04 300 dpiPenny 04 600 dpiPenny 04 1200 dpi

The above images from left to right are the same penny just scanned at different resolutions.  Starting on the left the images are 72 dpi, 300 dpi, 600 dpi and finally 1200 dpi.  Clicking on each image above you can see how the detail is so much better with the high resolutions.  However this comes at a cost when it comes to file size, it should come as no surprise that the more detail in an image file the larger that file will be.  In the images above I also included the size of each file.  Years ago computer hard drive costs were very expensive and may have because a major factor in the resolution you would need to scan large quantities of images.  But today the cost of storage is pretty cheap, and there are even some online cloud storage solutions that give you huge amounts of space for free.  For me, even though file size isn’t really a factor I find that I scan my coins at 300 dpi.  This gives me enough detail for what I need, anytime more than that is really overkill at least for what I use.

pngjpg

The last topic I wanted to review was file type.  There are numerous different file types that are associated with digital pictures (JPEG, PNG, GIF, TIFF, BMP etc).  In my examples I’m only really going to go over two types JPEG (Joint Photographic Experts Group) and PNG (Portable Networks Graphics).

JPEG’s compresses (shrinks) image data by reducing sections of images to blocks of pixels.  This type of compression unfortunately is permanent and when you zoom in close to these types of files you will notice some blurring around edges and transitions between colors.  But this file type was created for storing large photographic images in a small amount of space, and was not intended for photo editing purposes

PNG was developed to use a different compression algorithm (fancy word for the steps a computer takes to perform a task) than what is used for JPEG’s.  PNG supports 24-bit RGB color palette just like JPEG, but there is much better compression without degrading the image quality.  However, PNG is not supported by all internet web browsers although this is primarily only an issue for older browser versions.

Penny 05 PNGPenny 05 JPEG

In my last comparison above these are both the exact same scan just saved as a PNG on the left, and a JPEG on the right.  As you can see these are pretty similar even when you blow them up to a larger scale.  If I was forced to choose I tend to go towards the PNG which is what I have been saving my images as lately.  Most of the pictures on my website are JPEG’s, but I have over time slowly been converting them to PNG’s.

As with anything all the above comparisons are subjective to the viewer.  What I think looks better may not be what you prefer and that’s perfectly fine.  All I can say is do some tests of your own and see what comes out best for you.  I hope this helps in some way, it did take some time to set up and perform the tests but was it fun in its own strange way.  Good luck scanning.

Super Hero Headquarters – Disney Springs, FL

Has anyone gone to see the new Captain America Civil War movie?  If not you may be one of the few that hasn’t seen this huge blockbuster.  Marvel is certainly a huge commodity and Disney is cashing in on that investment.  I had visited Disney Springs a few weeks ago and one of the new stores I found was called Super Hero Headquarters.

SH HQ Front

This place was filled from corner to corner with everything to fill Marvel needs.  T-Shirts, plush, posters, figures, you name it they have it.

SH HQ Store

 Unfortunately for me I found out afterwards that they had recently placed a new touch screen multi-design penny machine in this store only a few days after I had been there.  Thankfully a Florida friend of mine was able to visit the store and press a set for my collection.

DS - SuperHero HQ Photo

This is an 8 design set all themed around Marvel’s Avengers.  Each design is numbered and includes images of: Iron Man, Hulk, Captain America, Thor, Hawkeye, Black Widow, the Avengers Logo, and Loki.  On a side note after you go pick yourself up a set of these be sure to go check out the new Town Center at Disney Springs.  This brand new shopping and dining area just opened on May 15th and looks really nice.

DS Town Center 01

I’m excited to check this place out the next time we are in Florida later this year, and hopefully there will be some new penny machines by then.

Gettysburg, PA – Part 2

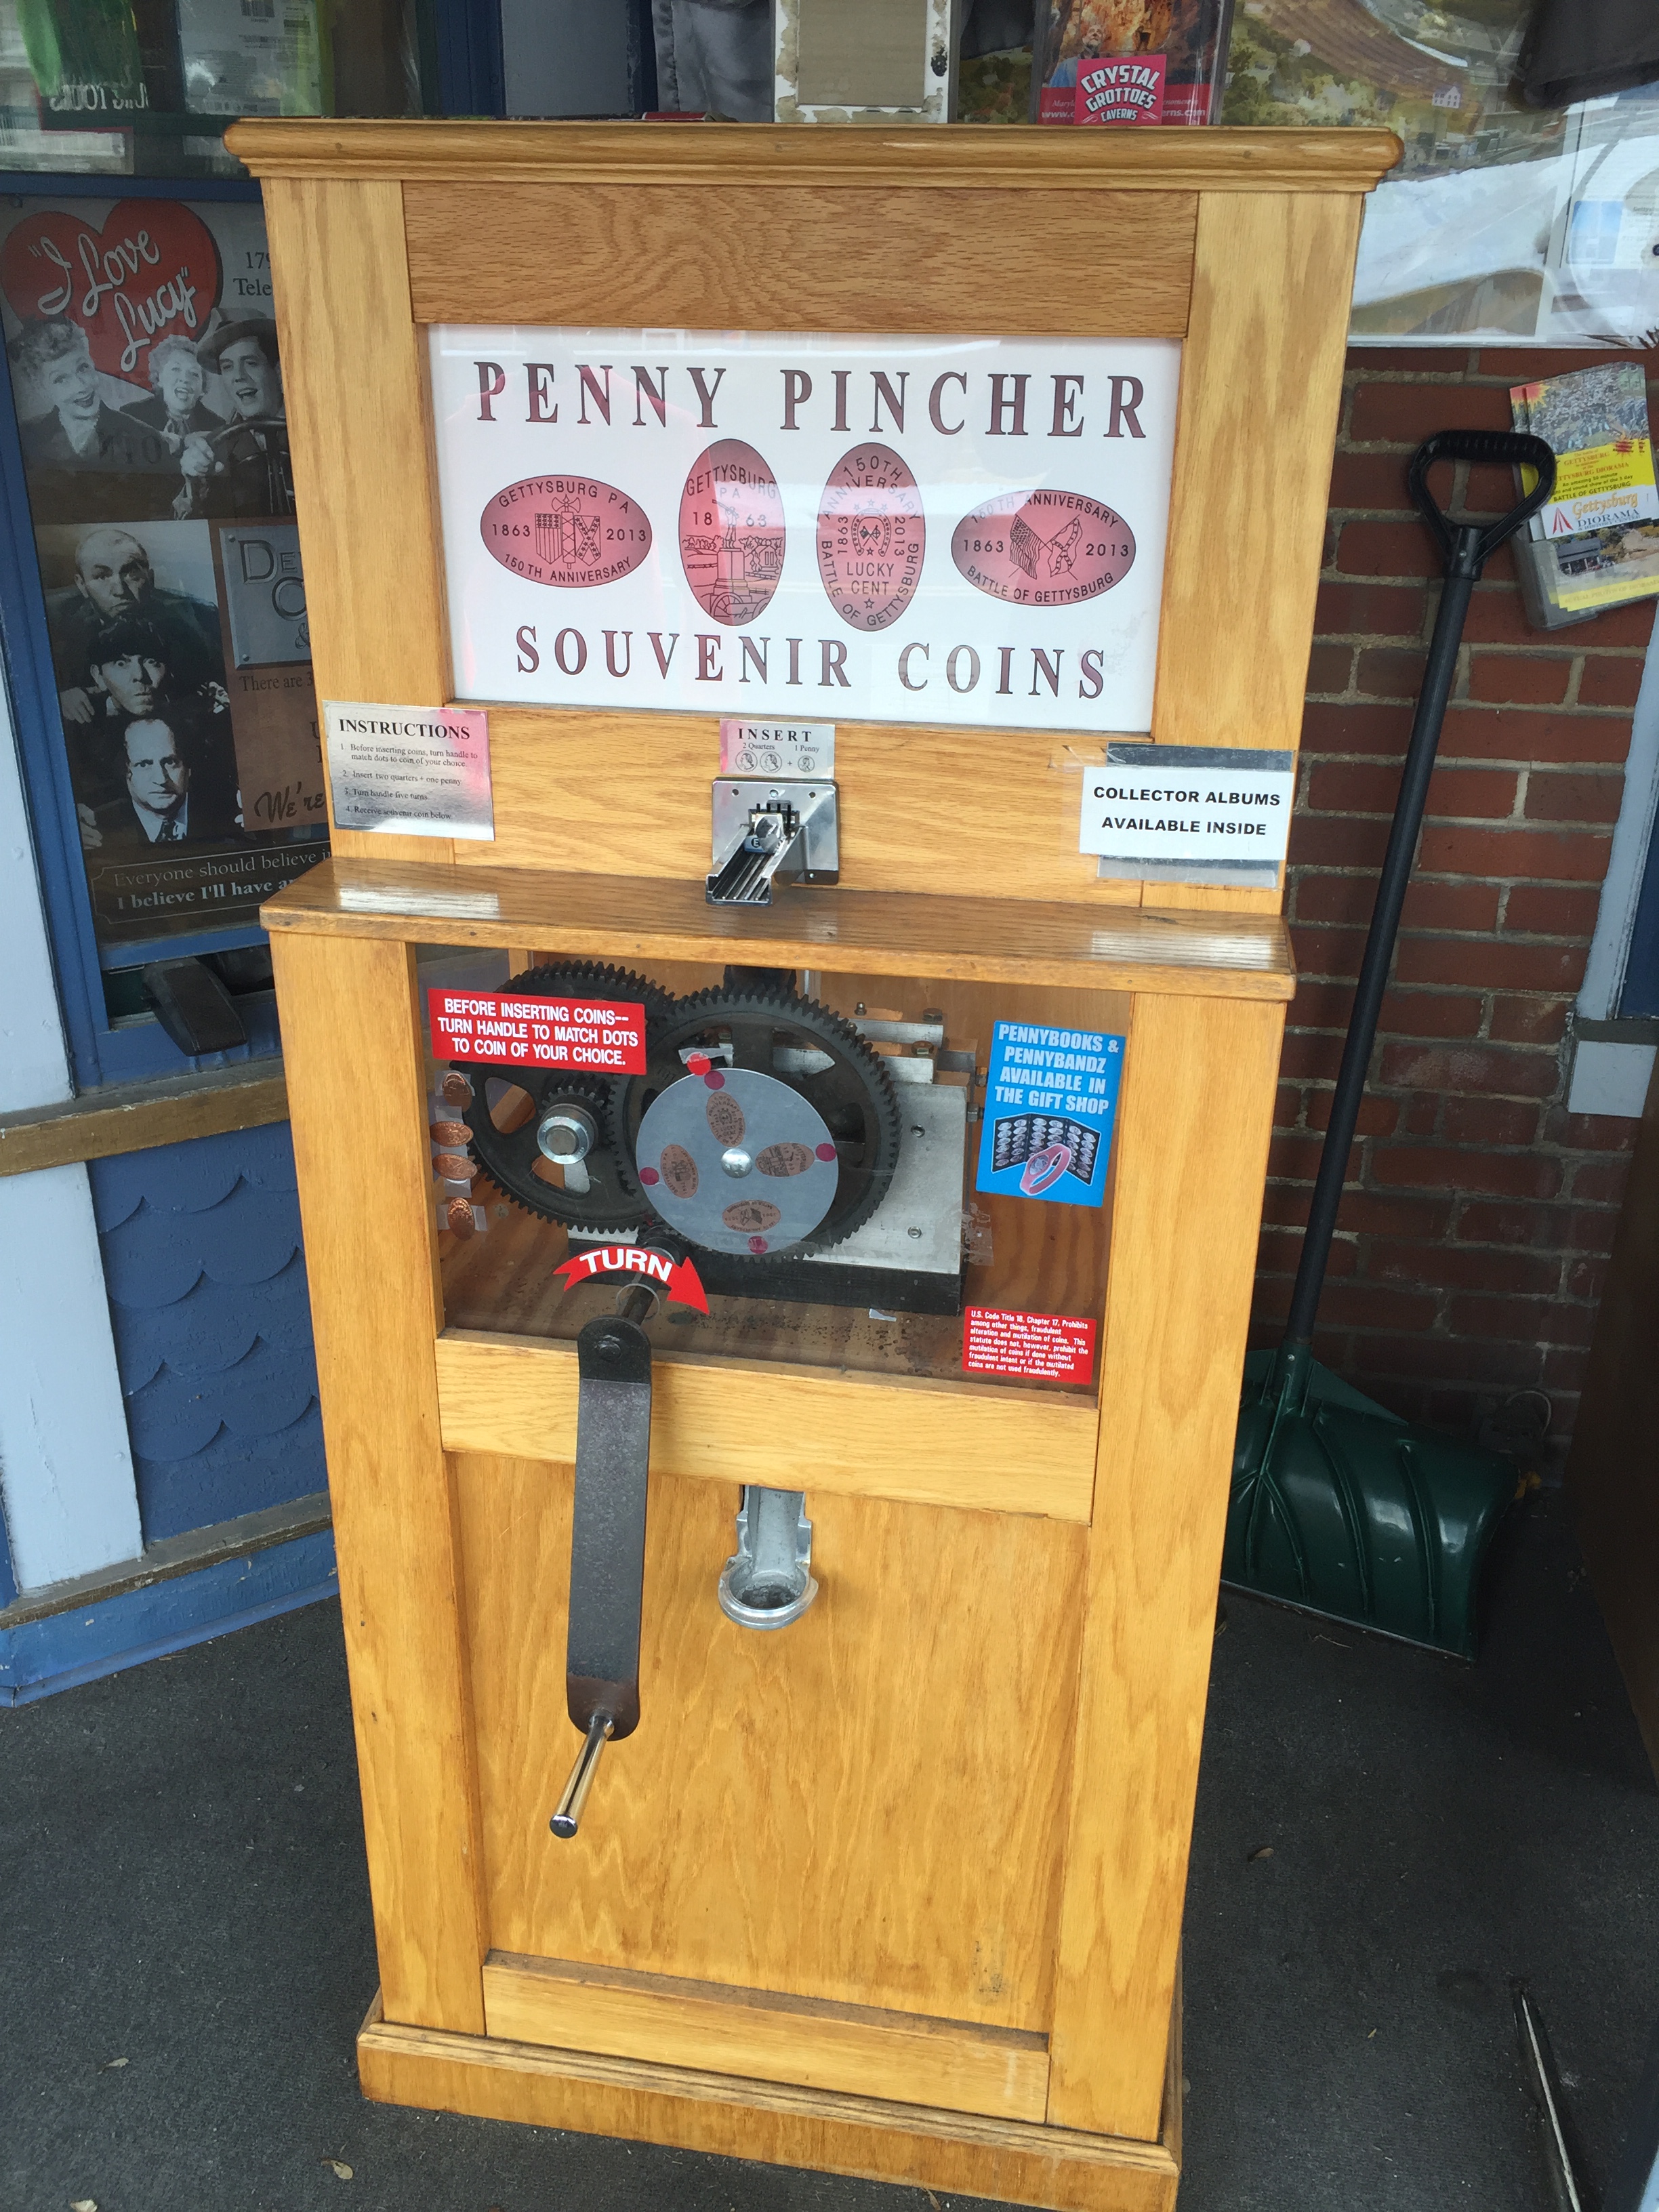
With the first half of my Gettysburg trip completed, and a longer than anticipated stop in an antique store I was ready … for some food.  I made a quick stop for a very late lunch and then made it over to my next destination.

Jennie Wade House 01

The Jennie Wade House.  For just a little history, Jennie at the age of 20 was the only direct civilian casualty of the battle.  This is the house where she was hit by a stray bullet on July 3rd, 1863.  They do offer tours but unfortunately when I visited they were closed for the season.

PA - Jeanie Wade House

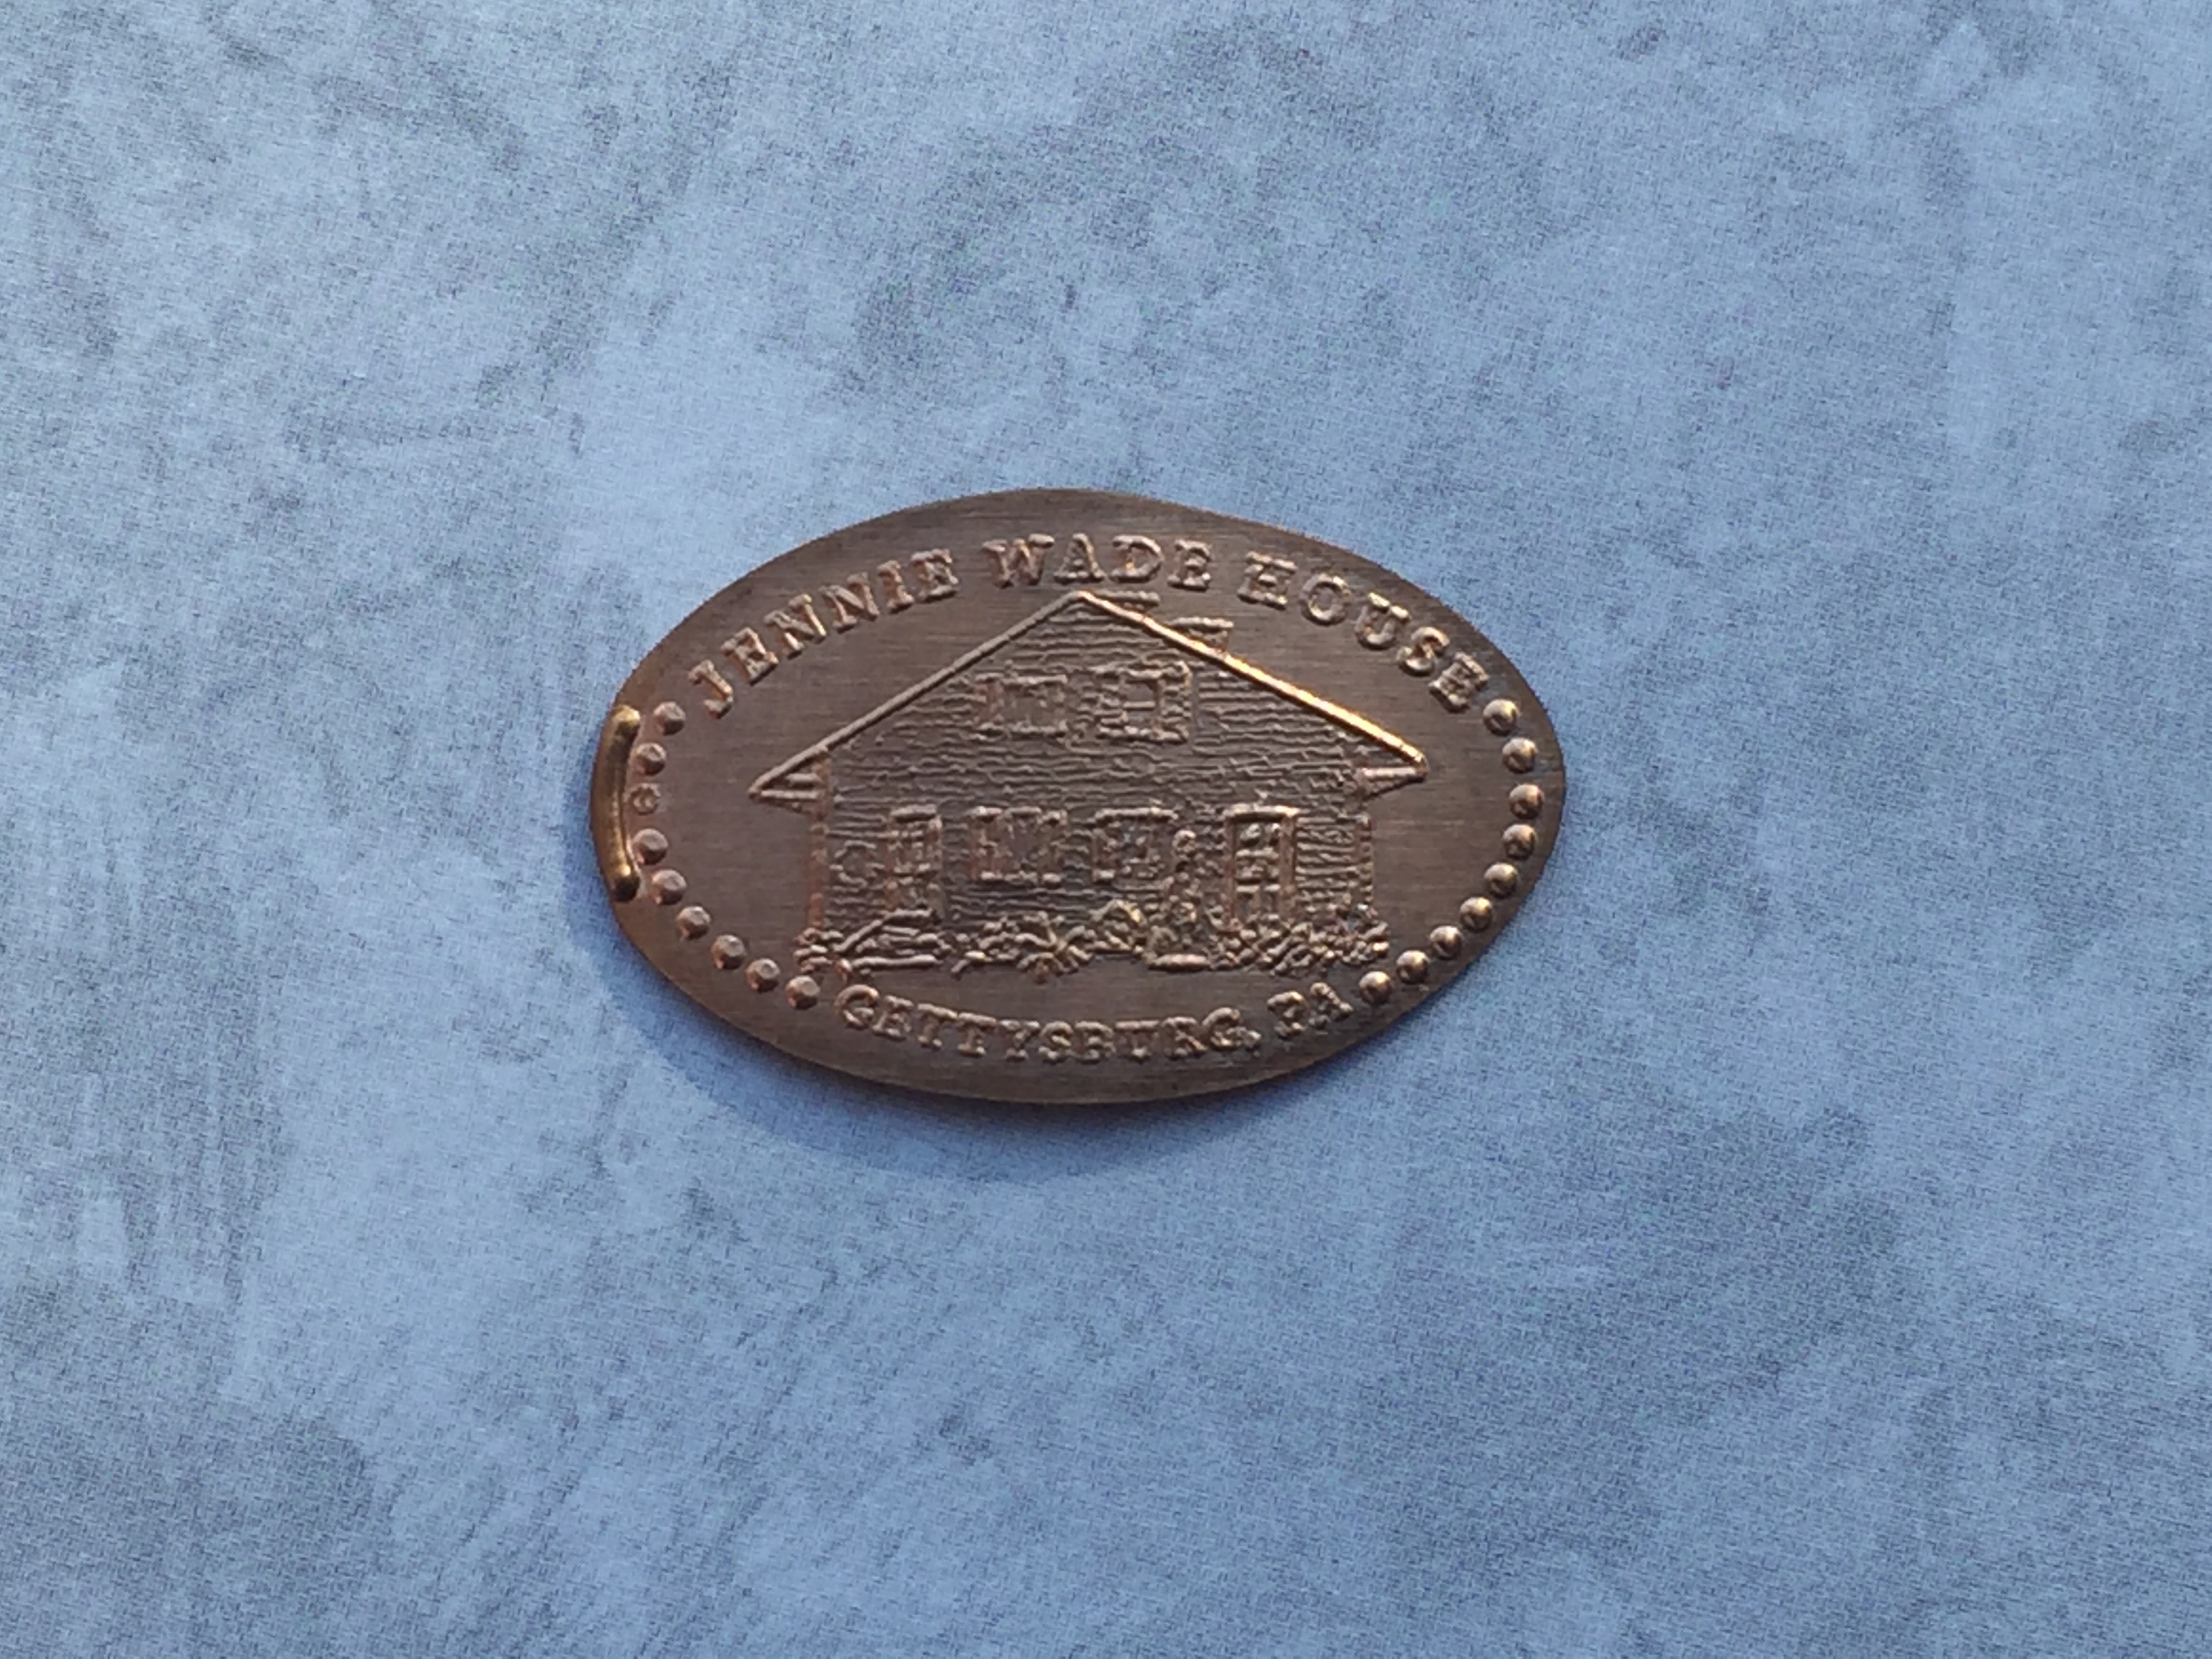
At the end of the tour you enter the gift shop.  This shop is available to anyone and do not need to take the tour to go inside.  At the back of the store is a one die electric penny machine.

Jennie Wade House Penny

The image on the penny is an exterior image of Jennie Wade’s House.  Directly across the street was my next stop.

Old Gettysburg Village 01

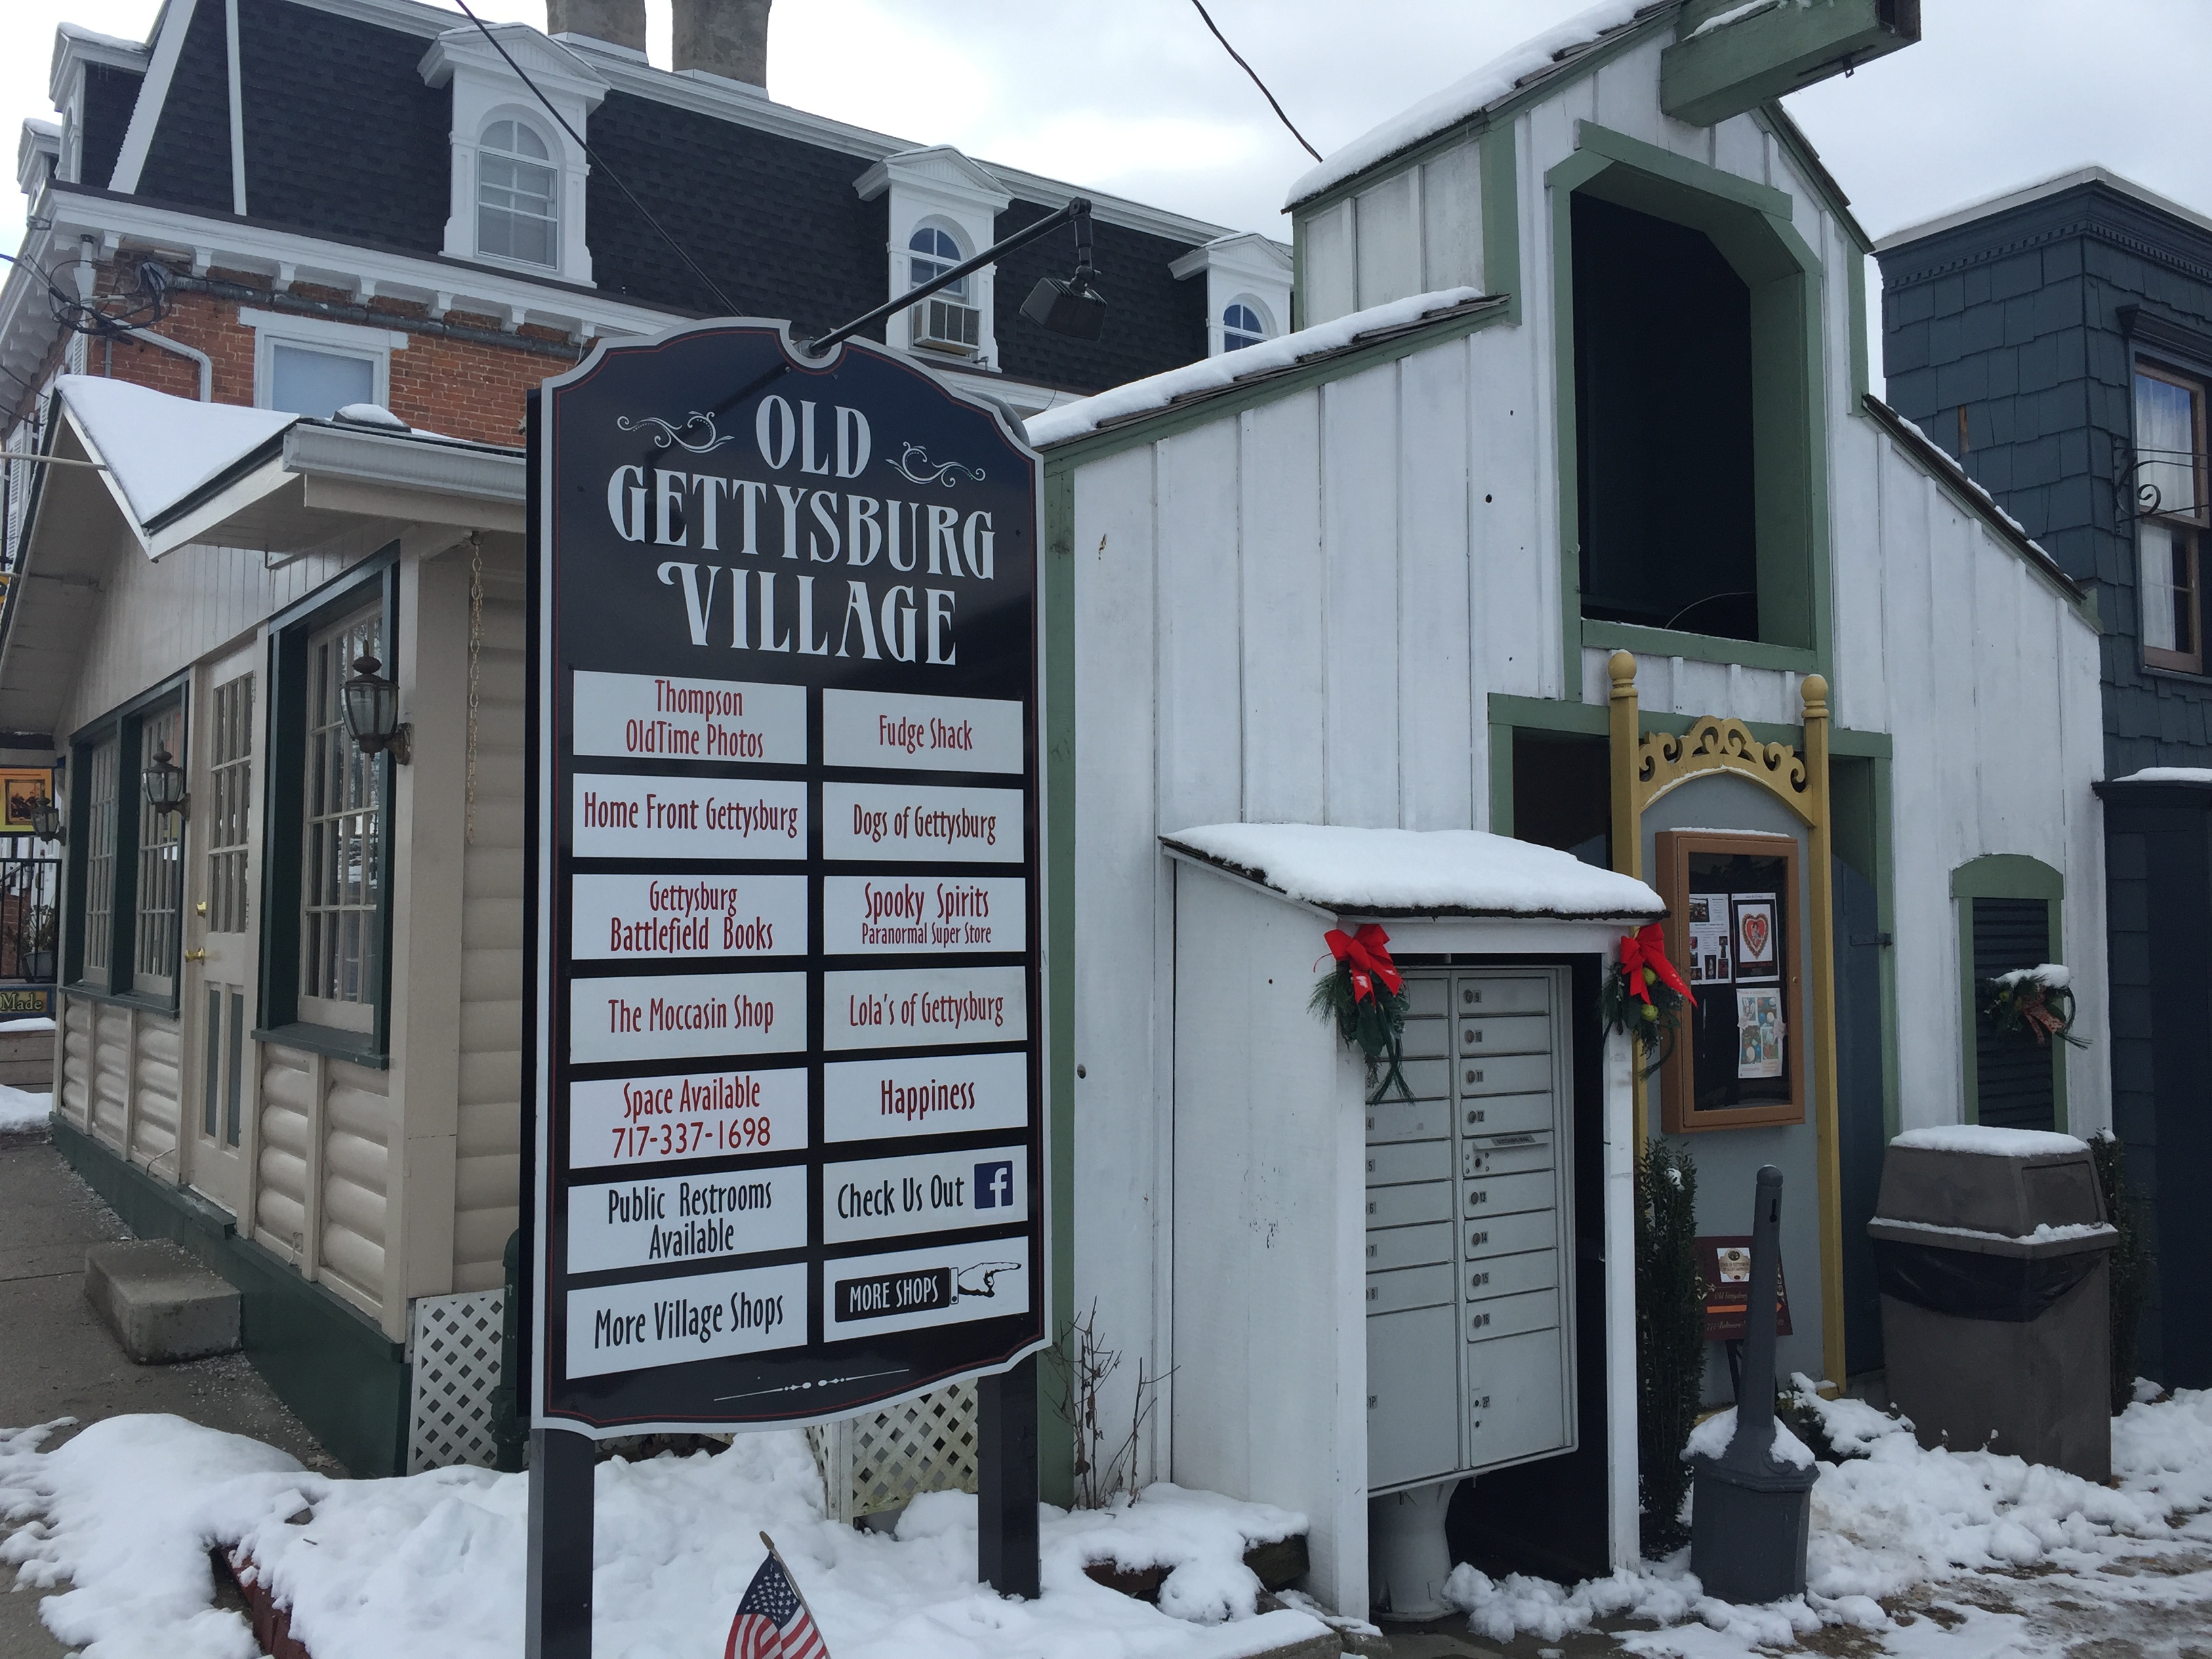
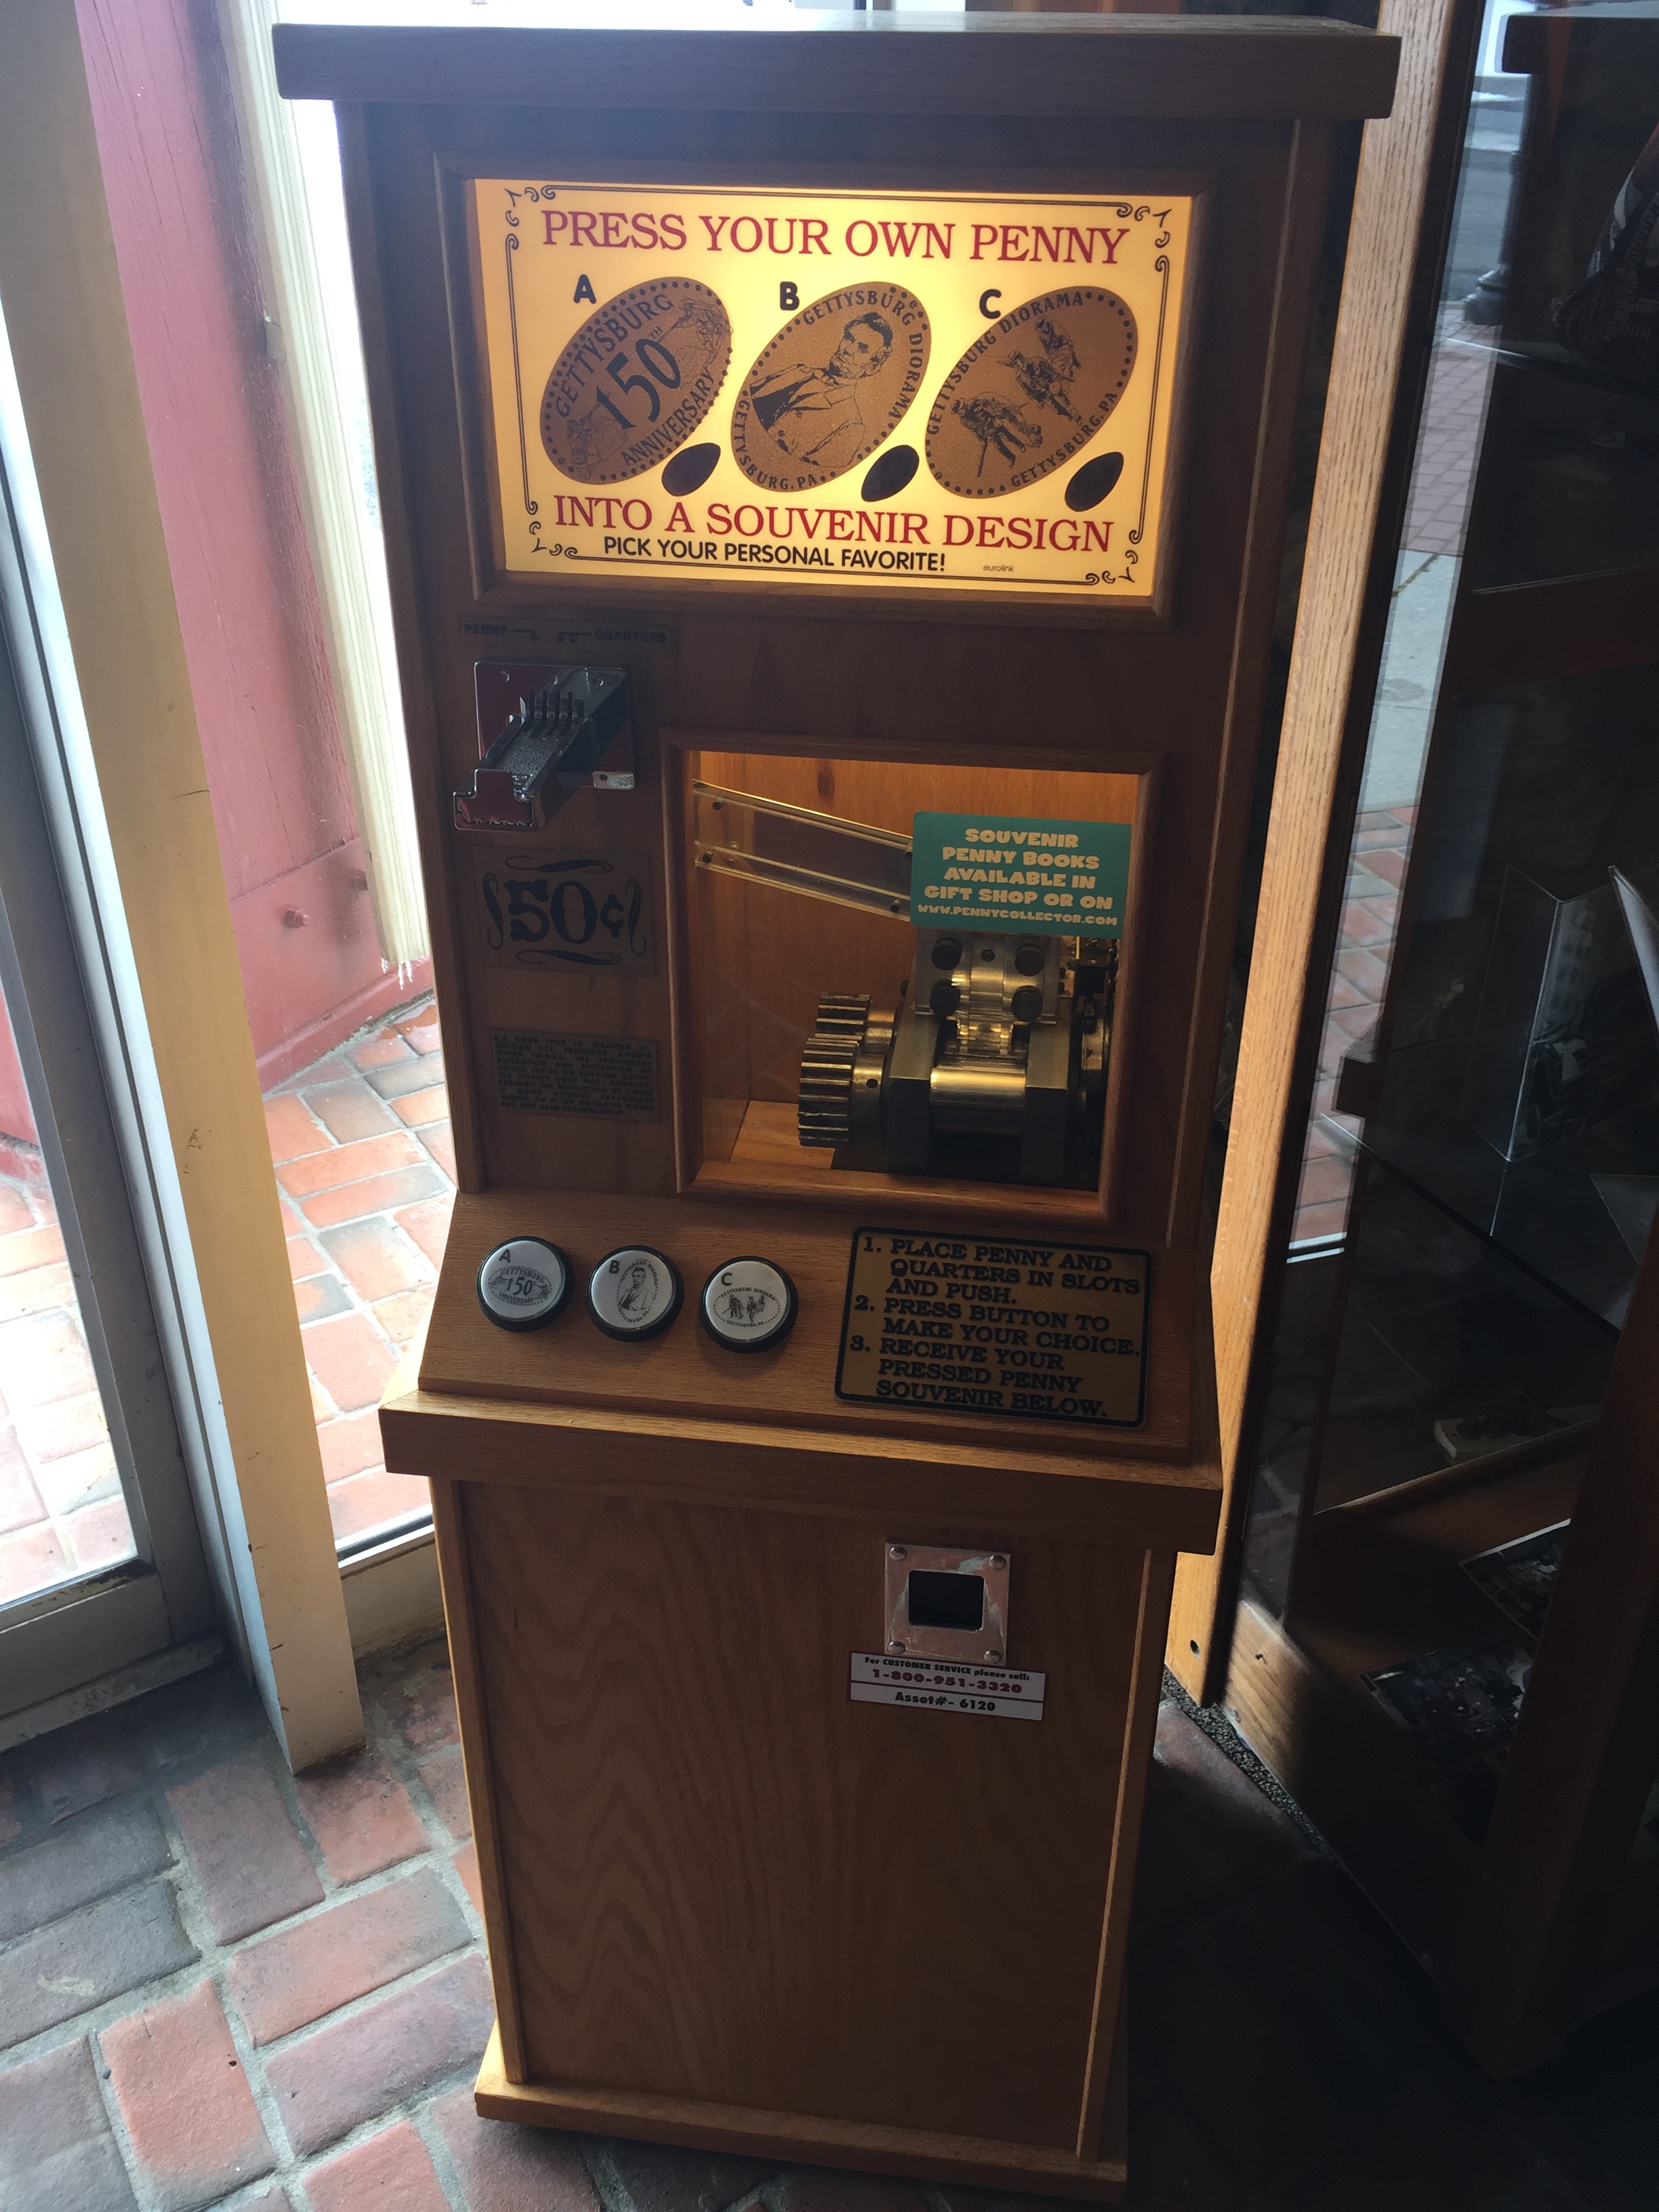
The Old Gettysburg Village is a collection of small stores that surround a central area that has a gazebo and nice little gardens (when there isn’t snow all over the place) for a quite place to relax.

PA - Old Gettysburg Village 01

Most of these stores were closed during my visit, but the penny machine was available outside for use.

Old Gettysburg Village

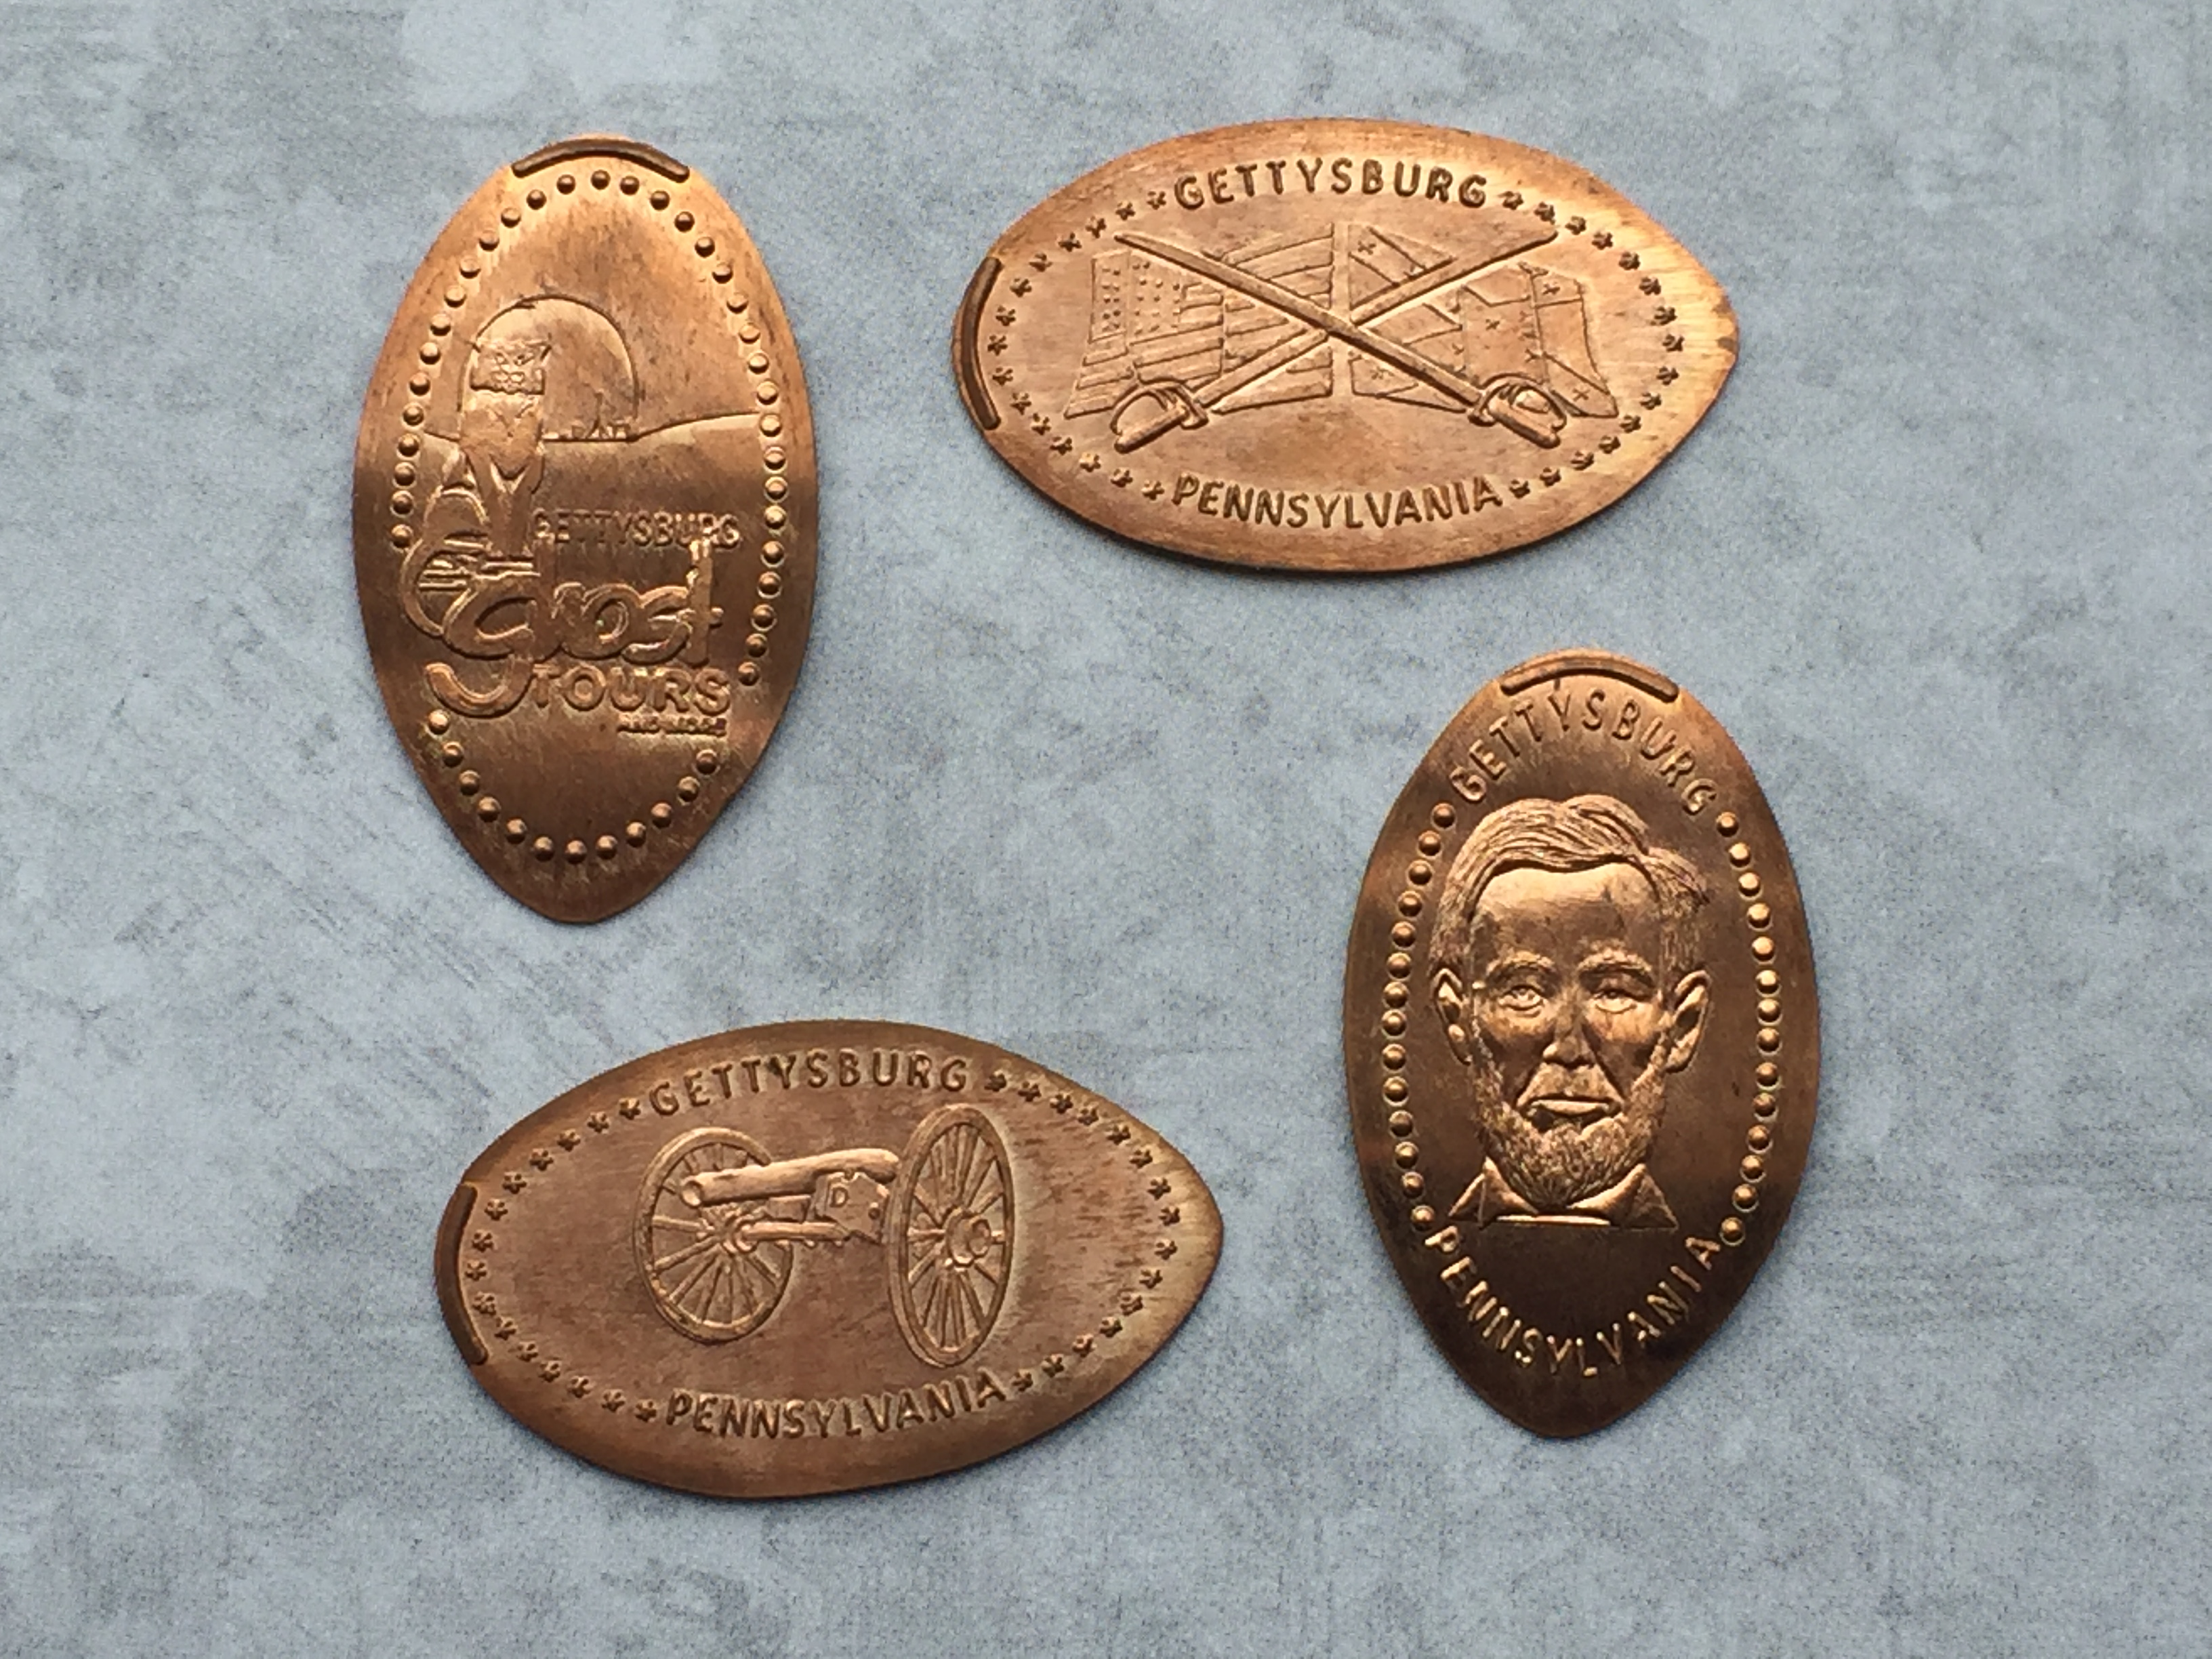
The four penny designs available at this machine were: A Civil War Soldier, a Cannon, United States & Confederate Flags, and a Military Drum.  With pennies in hand I packed them away with the others and headed about a block down the street to the Gettysburg Tour Center.

Gettysburg Tour Center 01

This place was also closed for the season as they offer bus tours around the battlefield.  I lucked out that there was someone inside and they allowed me in real quick to use their two machines.  Since the place was technically closed they didn’t have any of the overhead lights on and my pictures of the machines came out really dark so I’m not bothering to post them.  Guess I’ll just have to go back again sometime.

Gettysburg Tour Center 01a

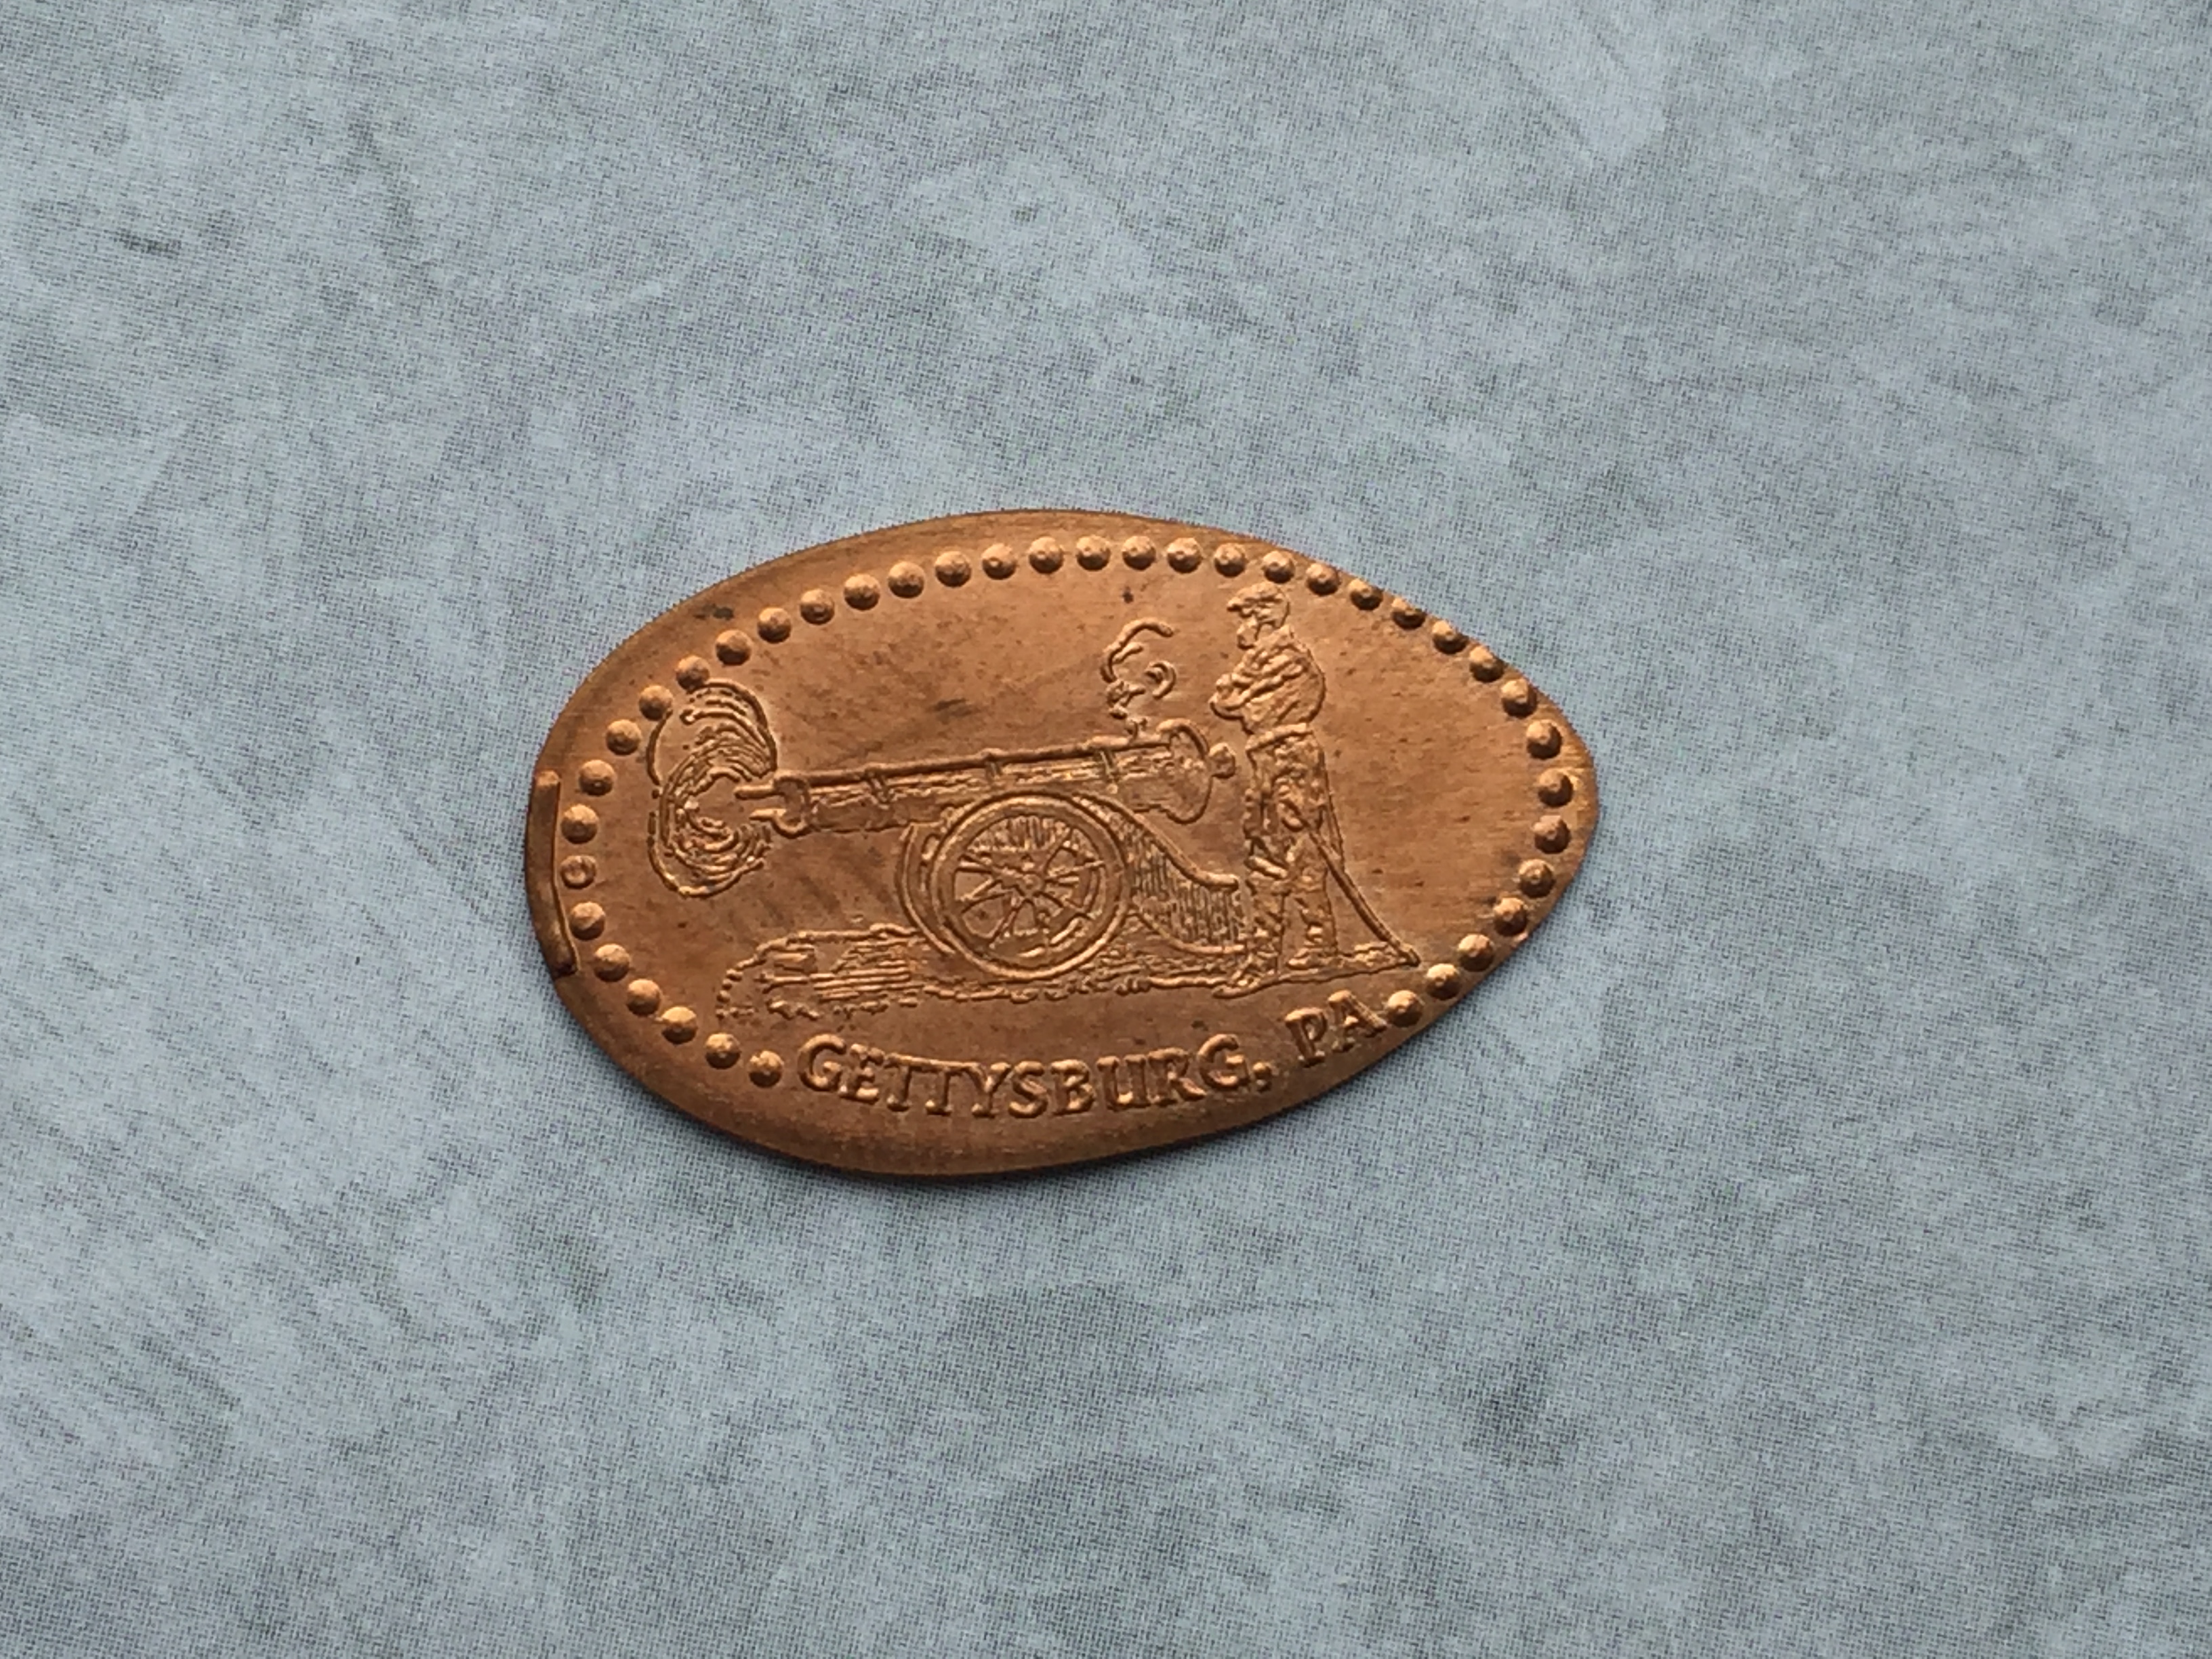
The first machine had one design which was of a Soldier firing a cannon with Gettysburg, PA across the bottom.

Gettysburg Tour Center 02

The second machine had three available designs that were images of General Lee, General Meade, and General Chamberlain.  Once I was done I quickly thanked the employee and let myself out.  The last stop on this particular street was again right across the street.

Hall of Presidents 01

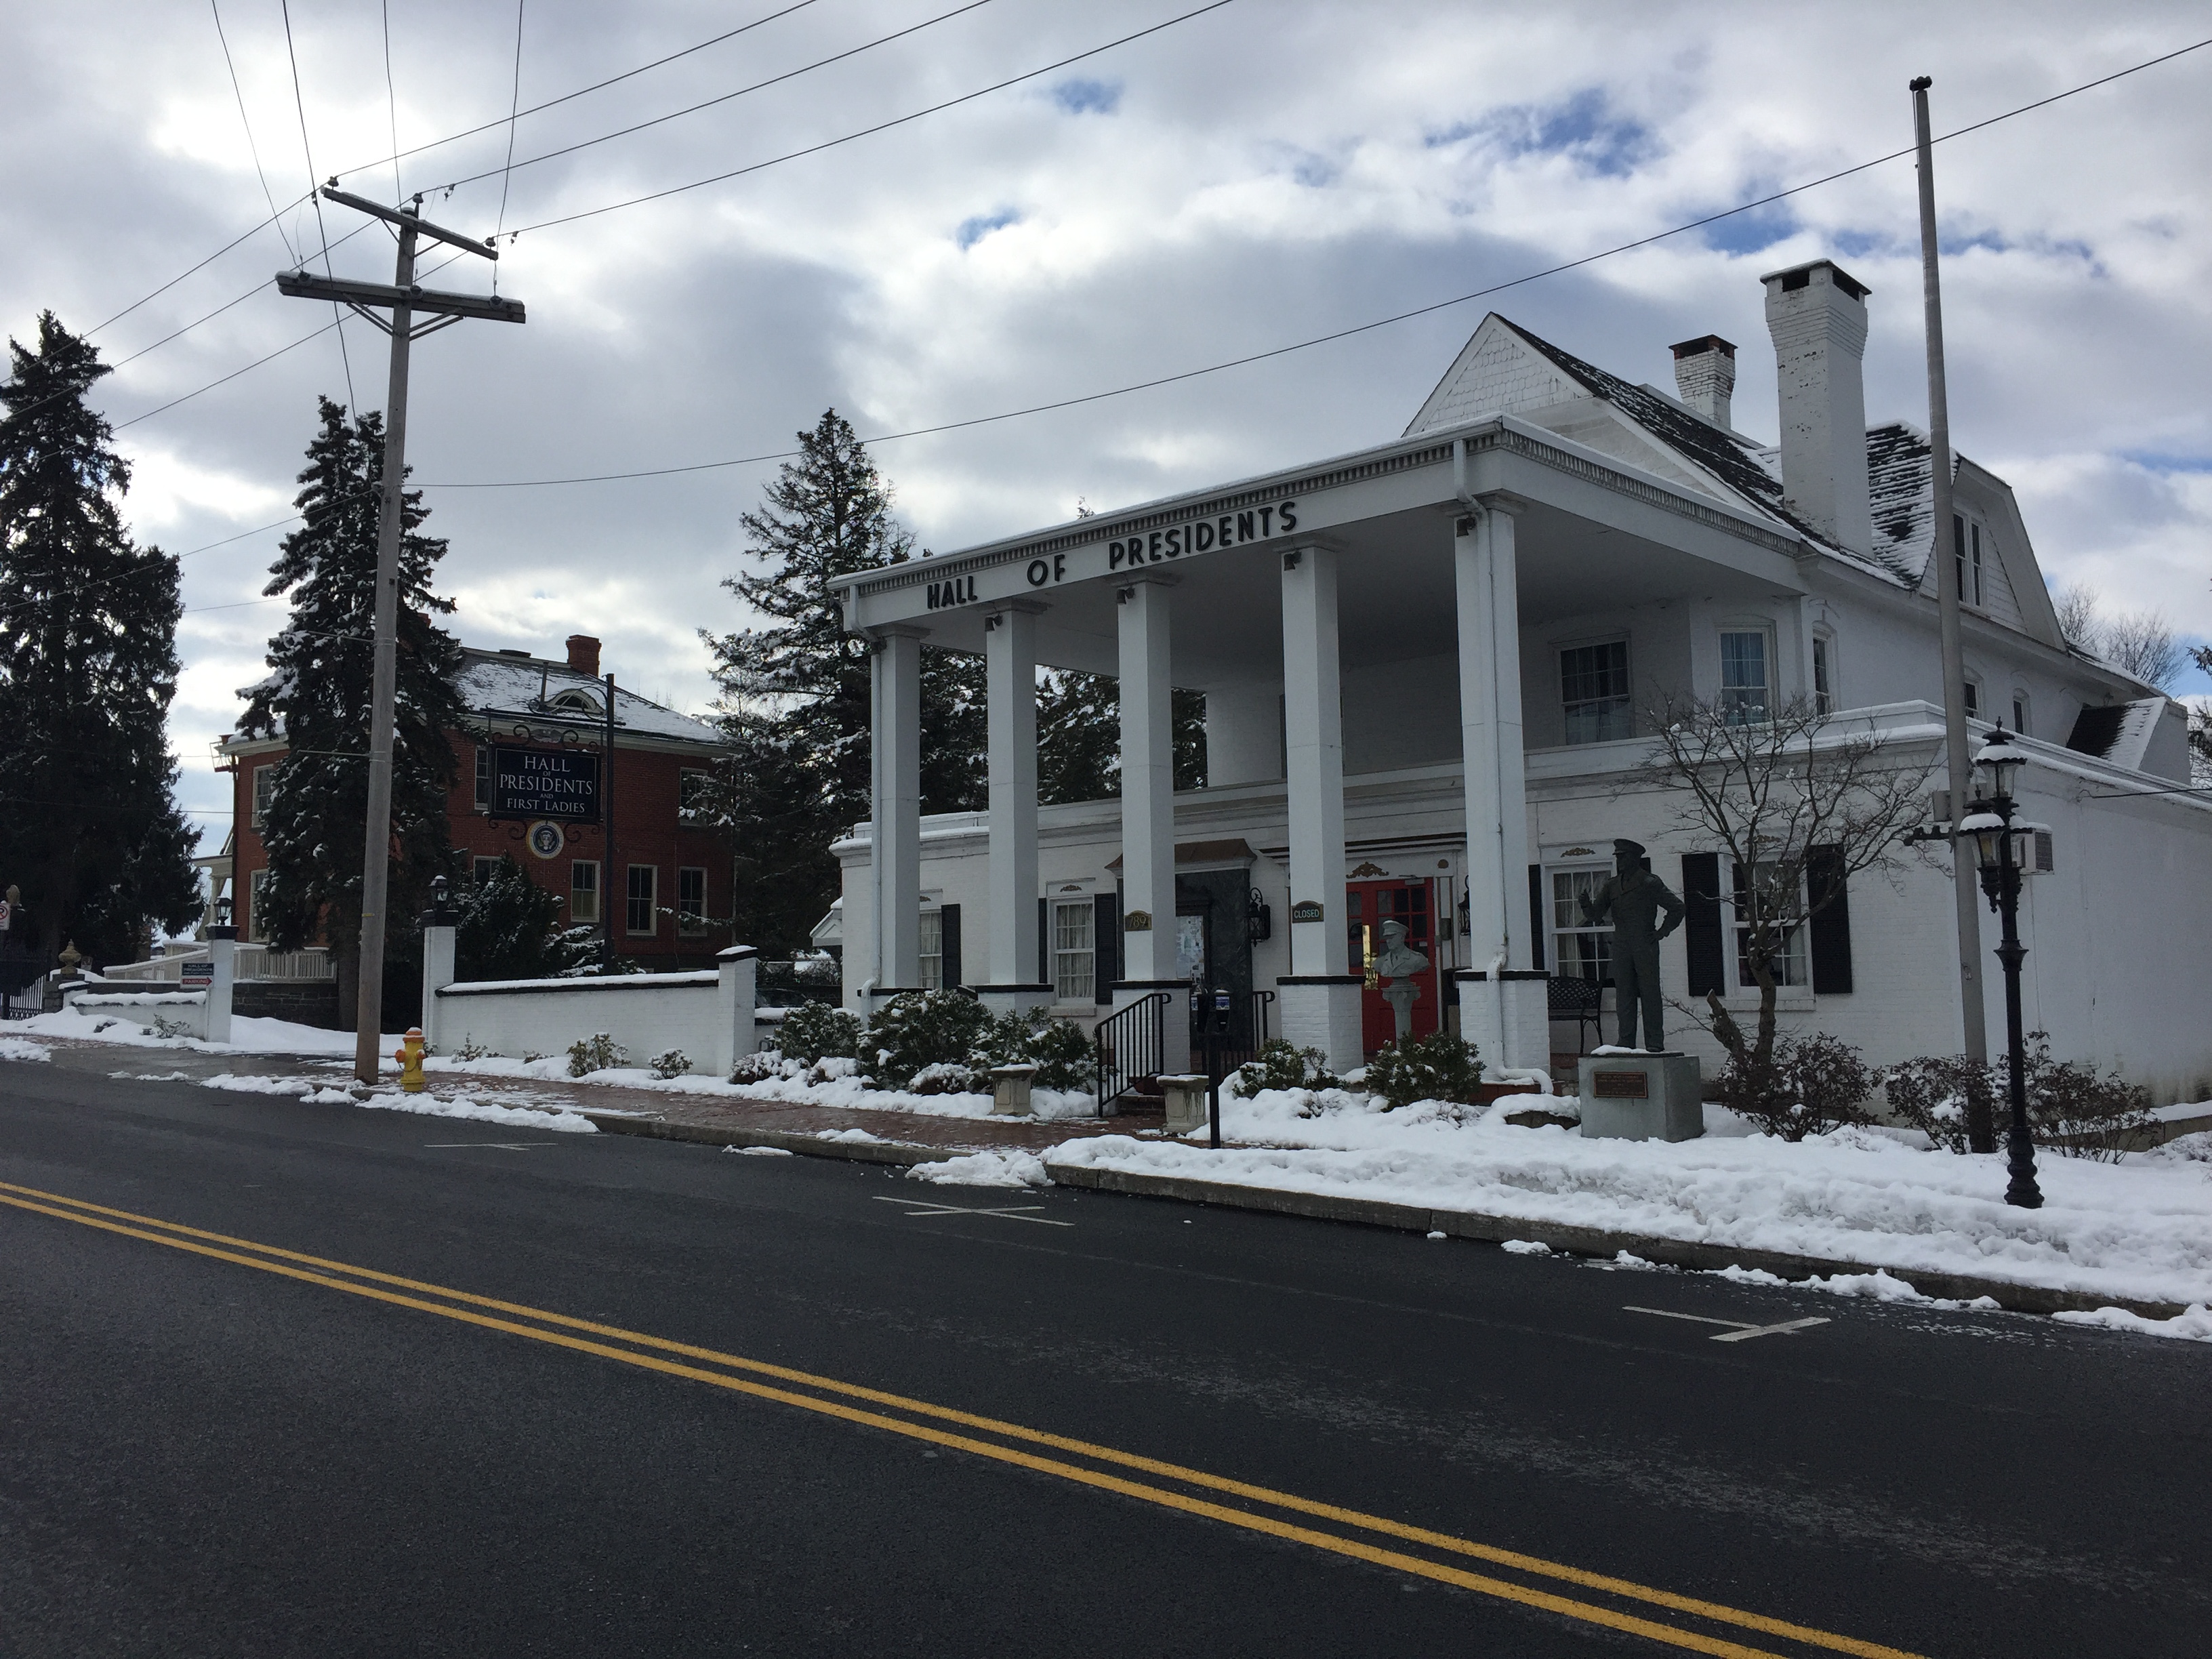
The impressive looking building was the Hall of Presidents museum.  Unfortunately like a lot of the places this time of season were not open.  I did send them a letter when I got home asking if someone could press the penny for me and it come back pretty quickly.

Hall of Presidents

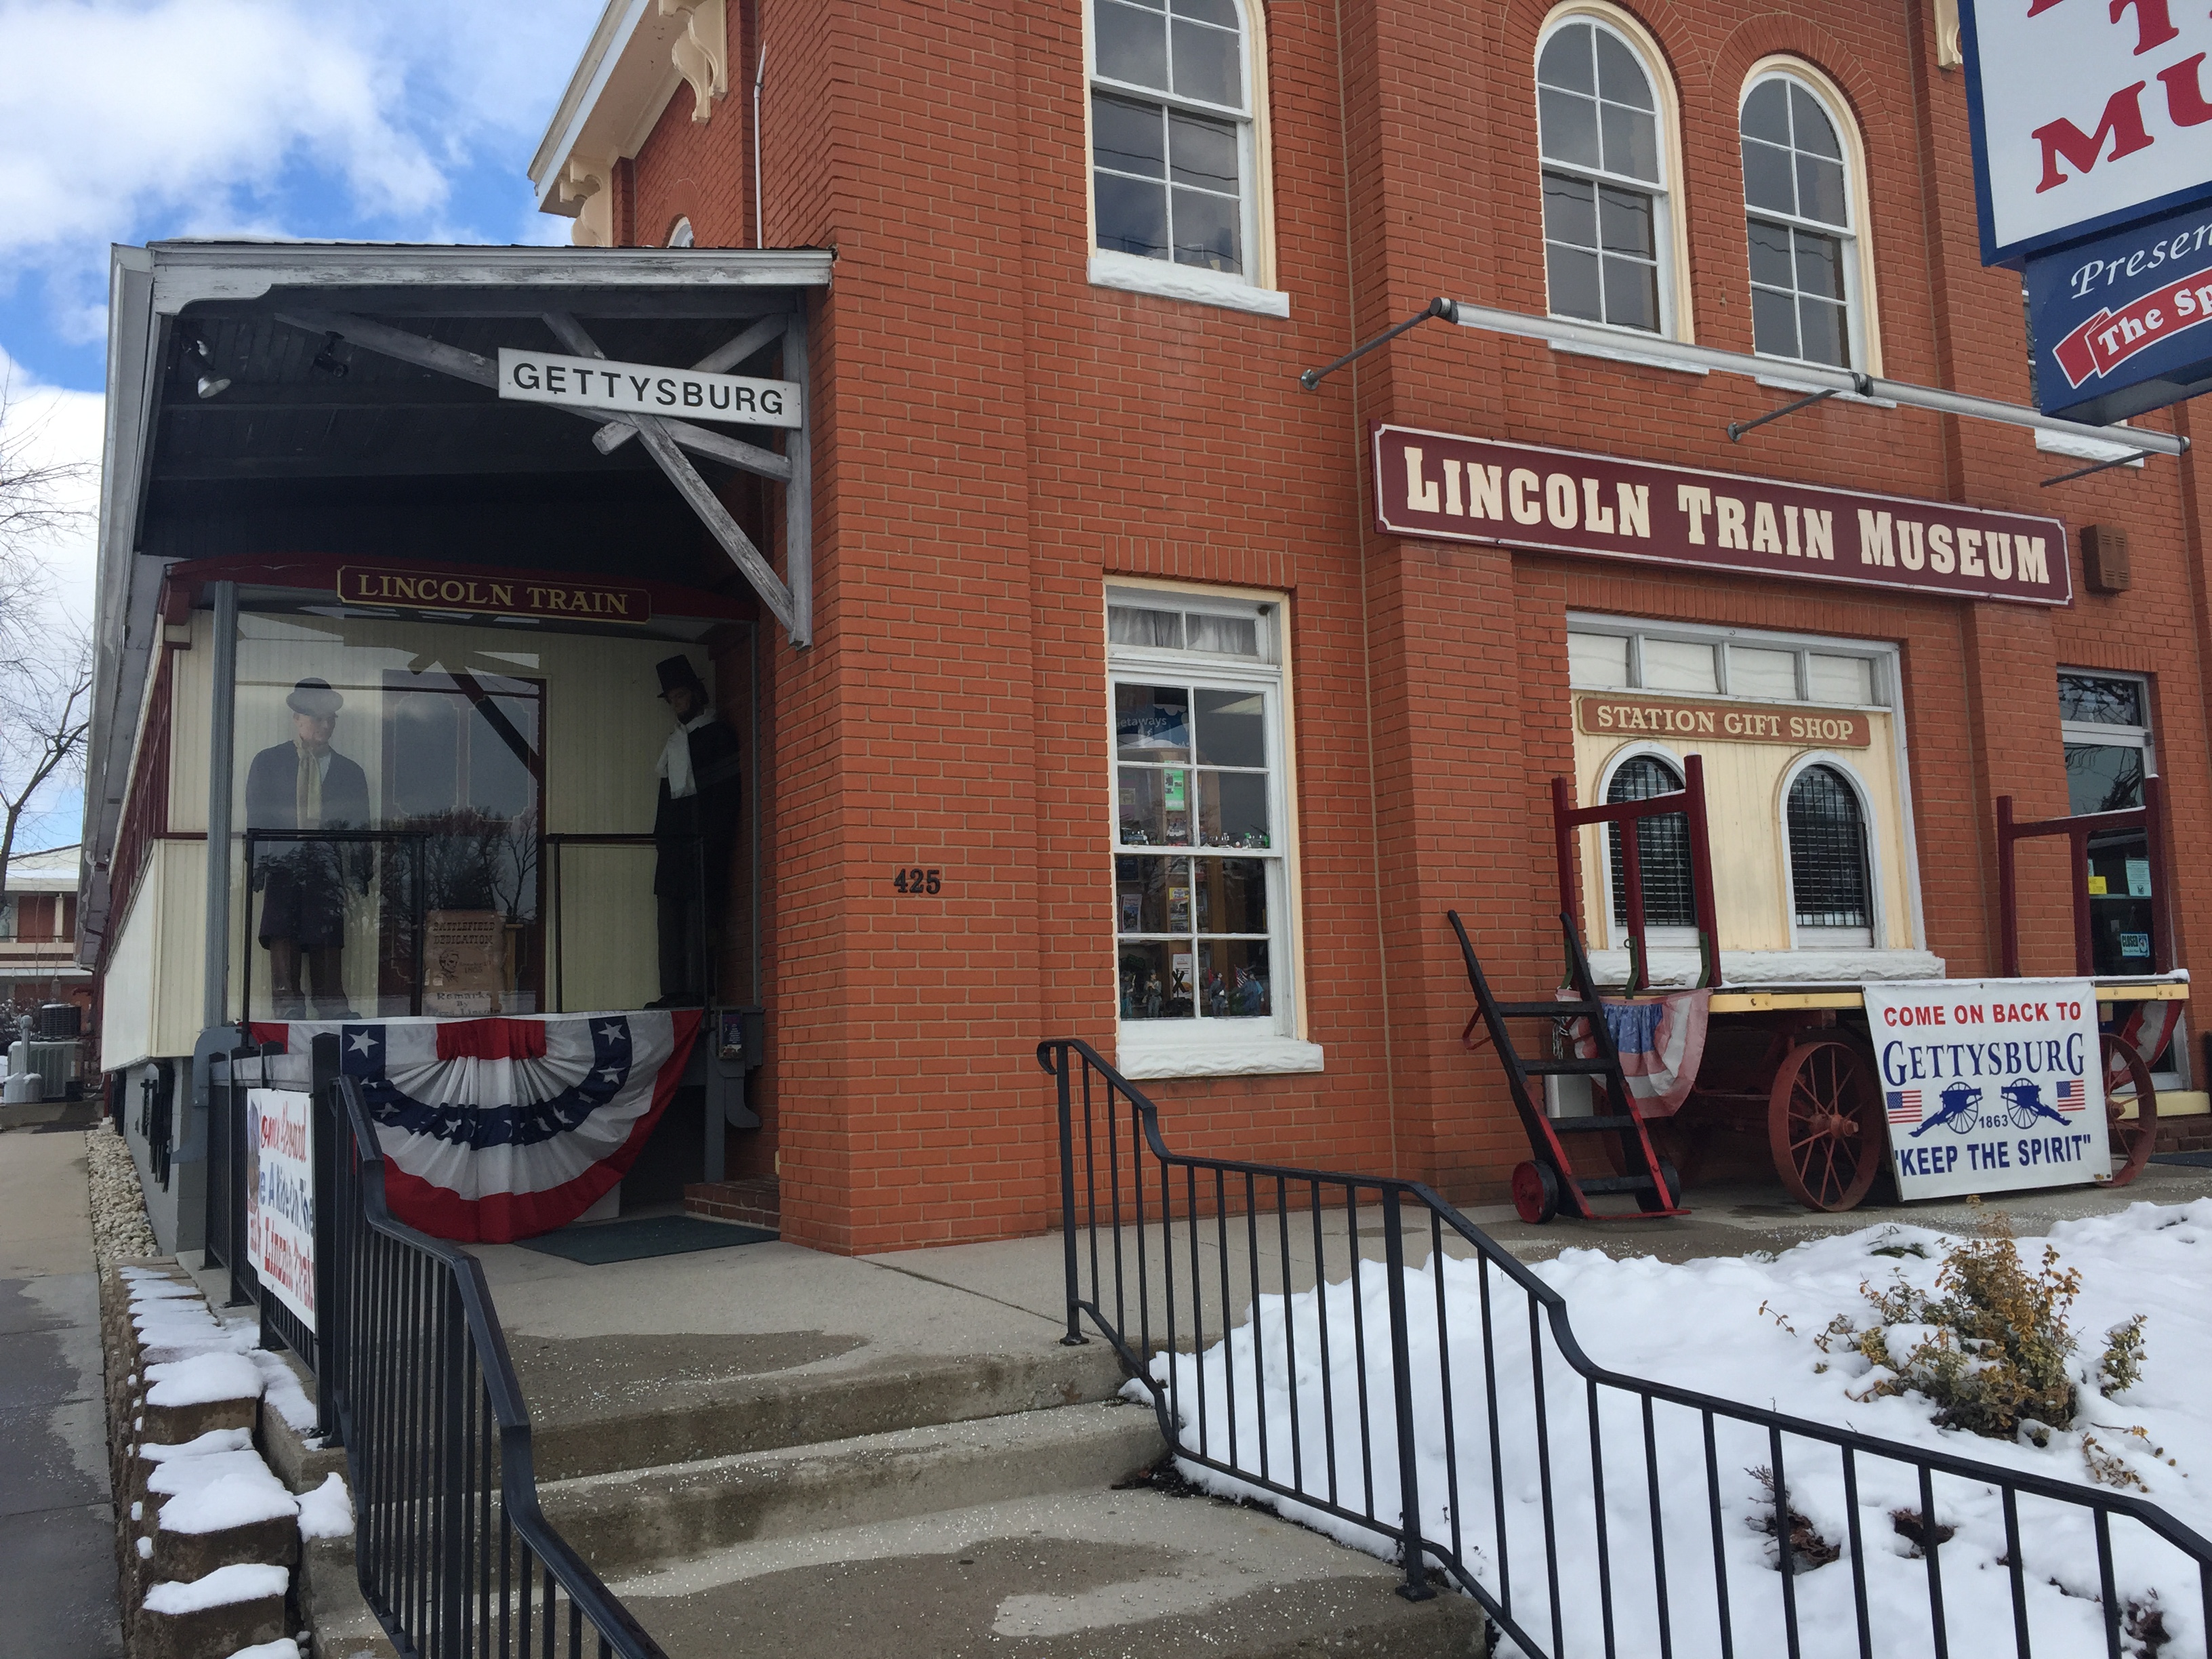
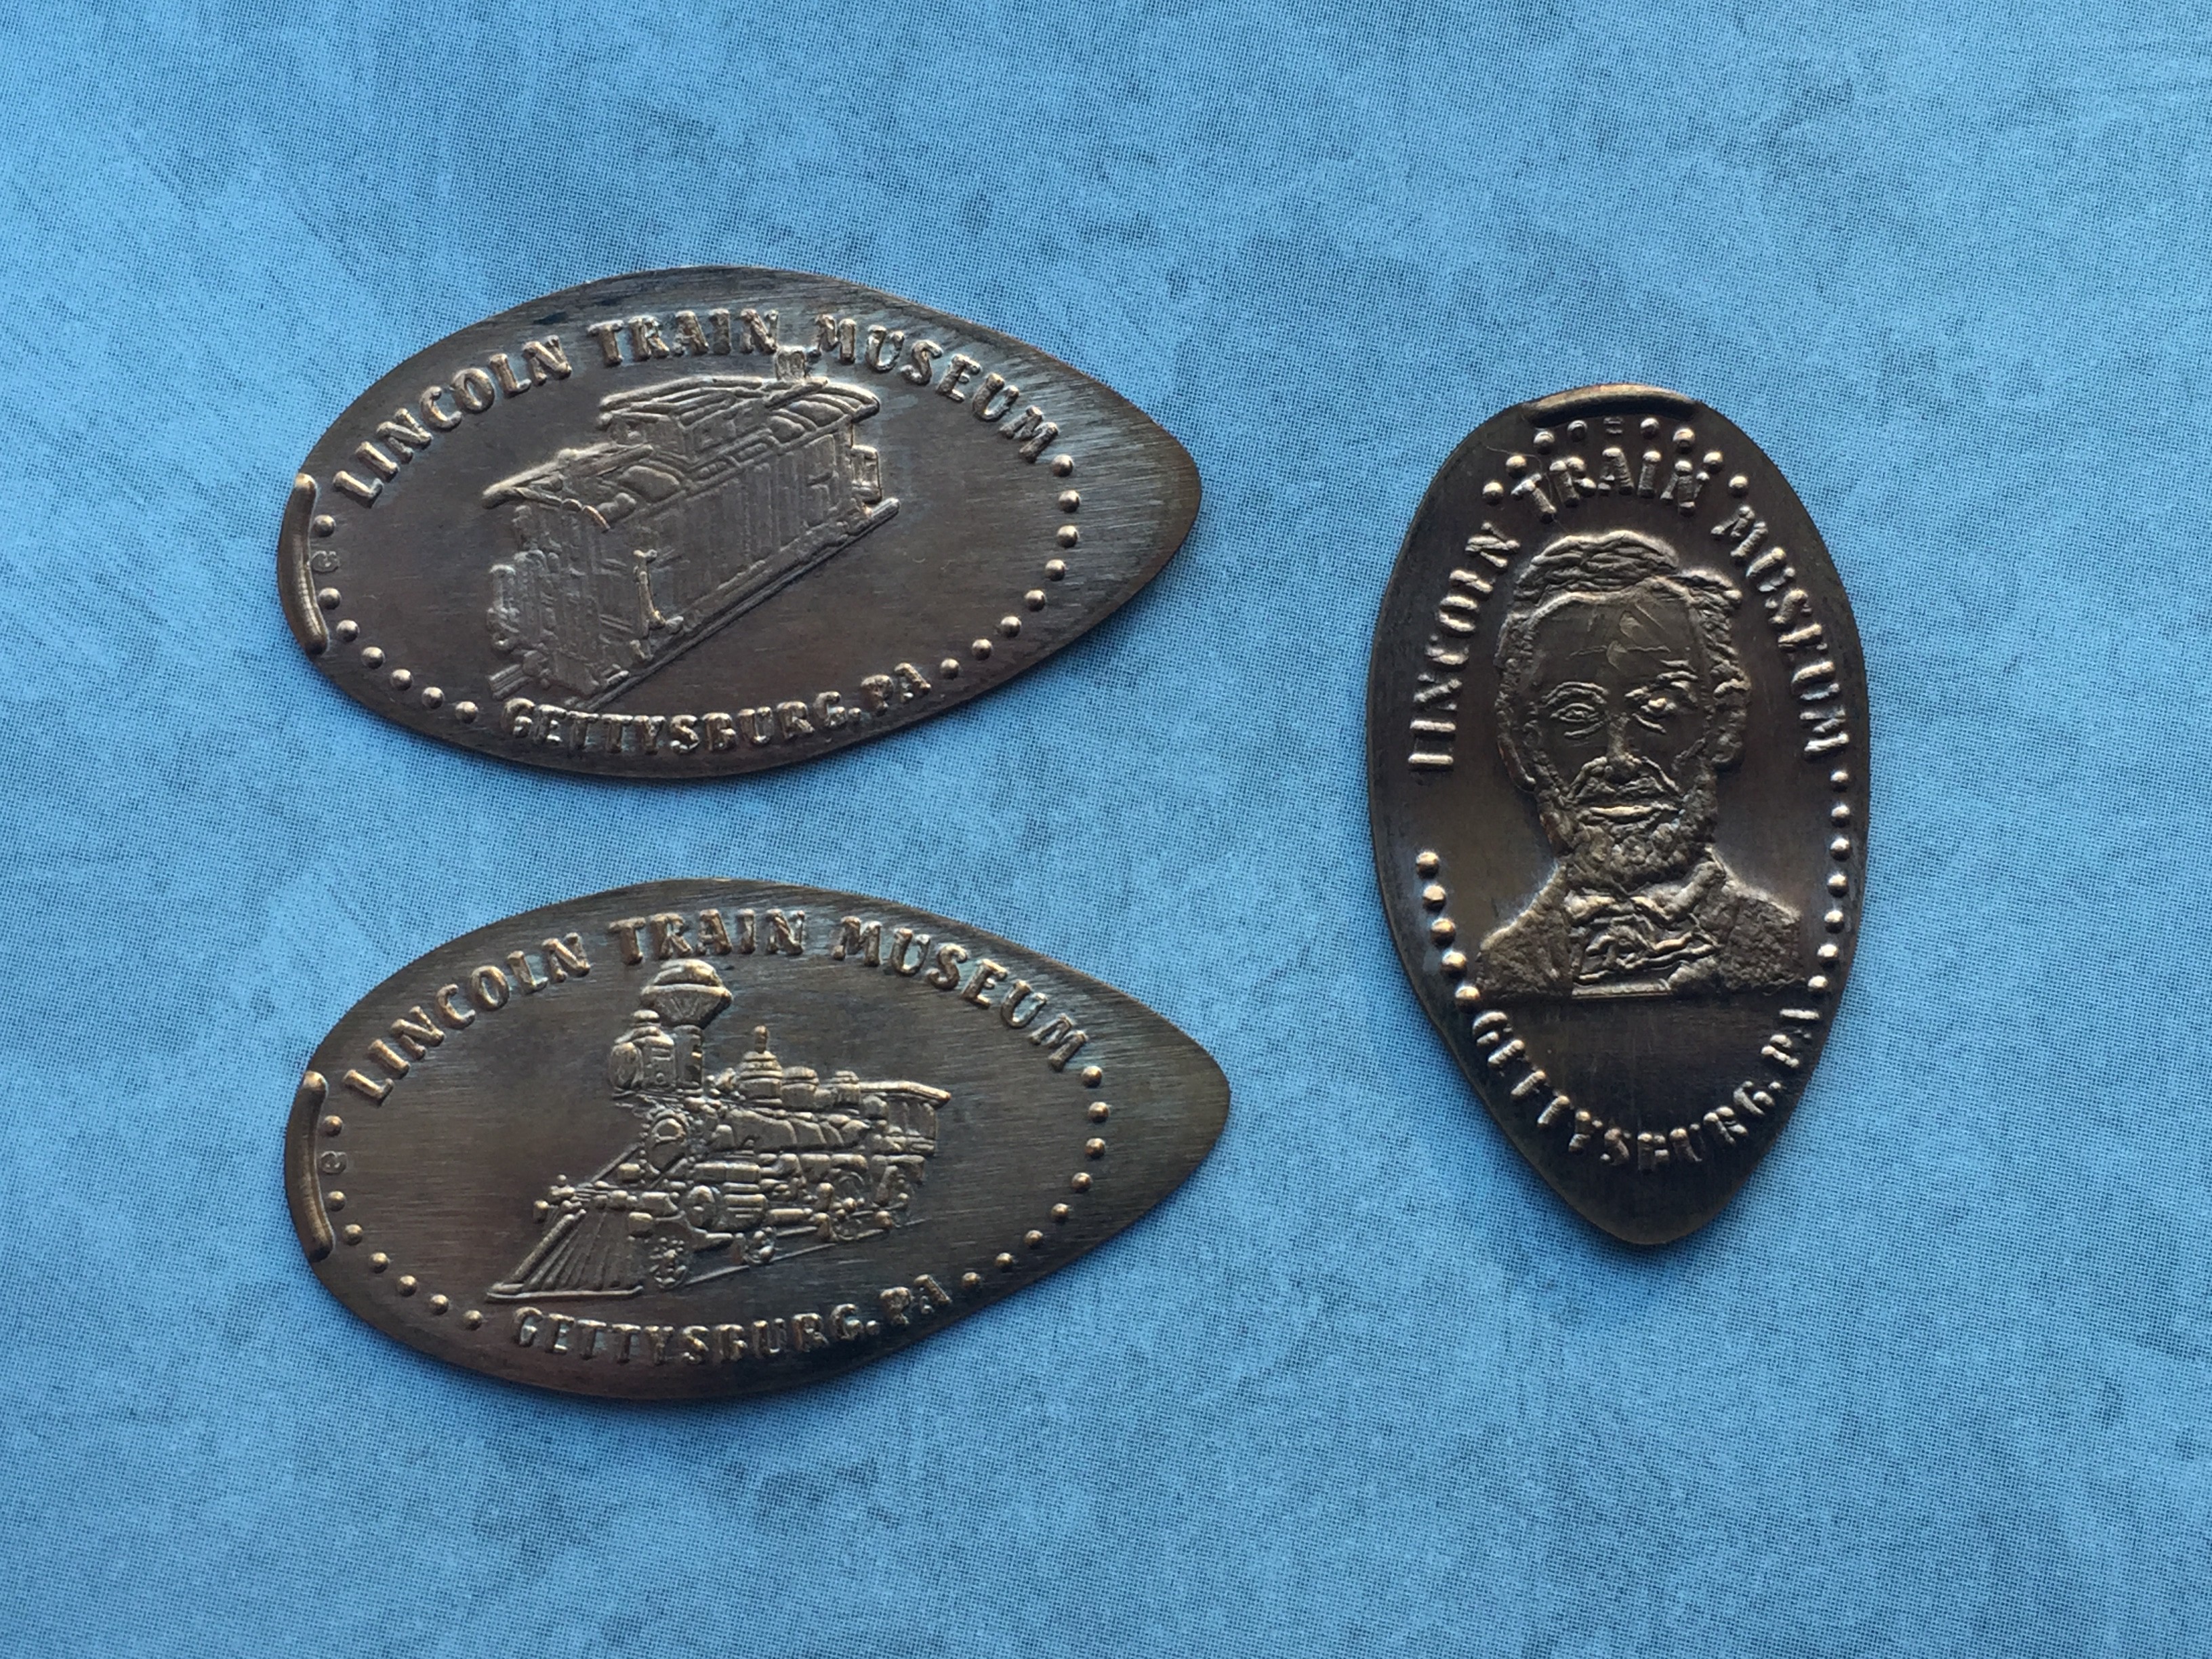
This penny has the beginning of President Lincolns famous “Fourscore and even years ago, our forefathers established, upon this continent, a new nation …”.  After finding out this museum was closed I started my way back.  Luckily as I mentioned in the previous post these machines were all located along two streets that met like a “Y”.  Back by the Old Gettysburg Village I was able to cut through over to the other street and only a couple blocks away was the Lincoln Train Museum where my car was parked.  But this was not the end of my trip, there were still a couple of machines left to find.

Gettysburg Military Park 03

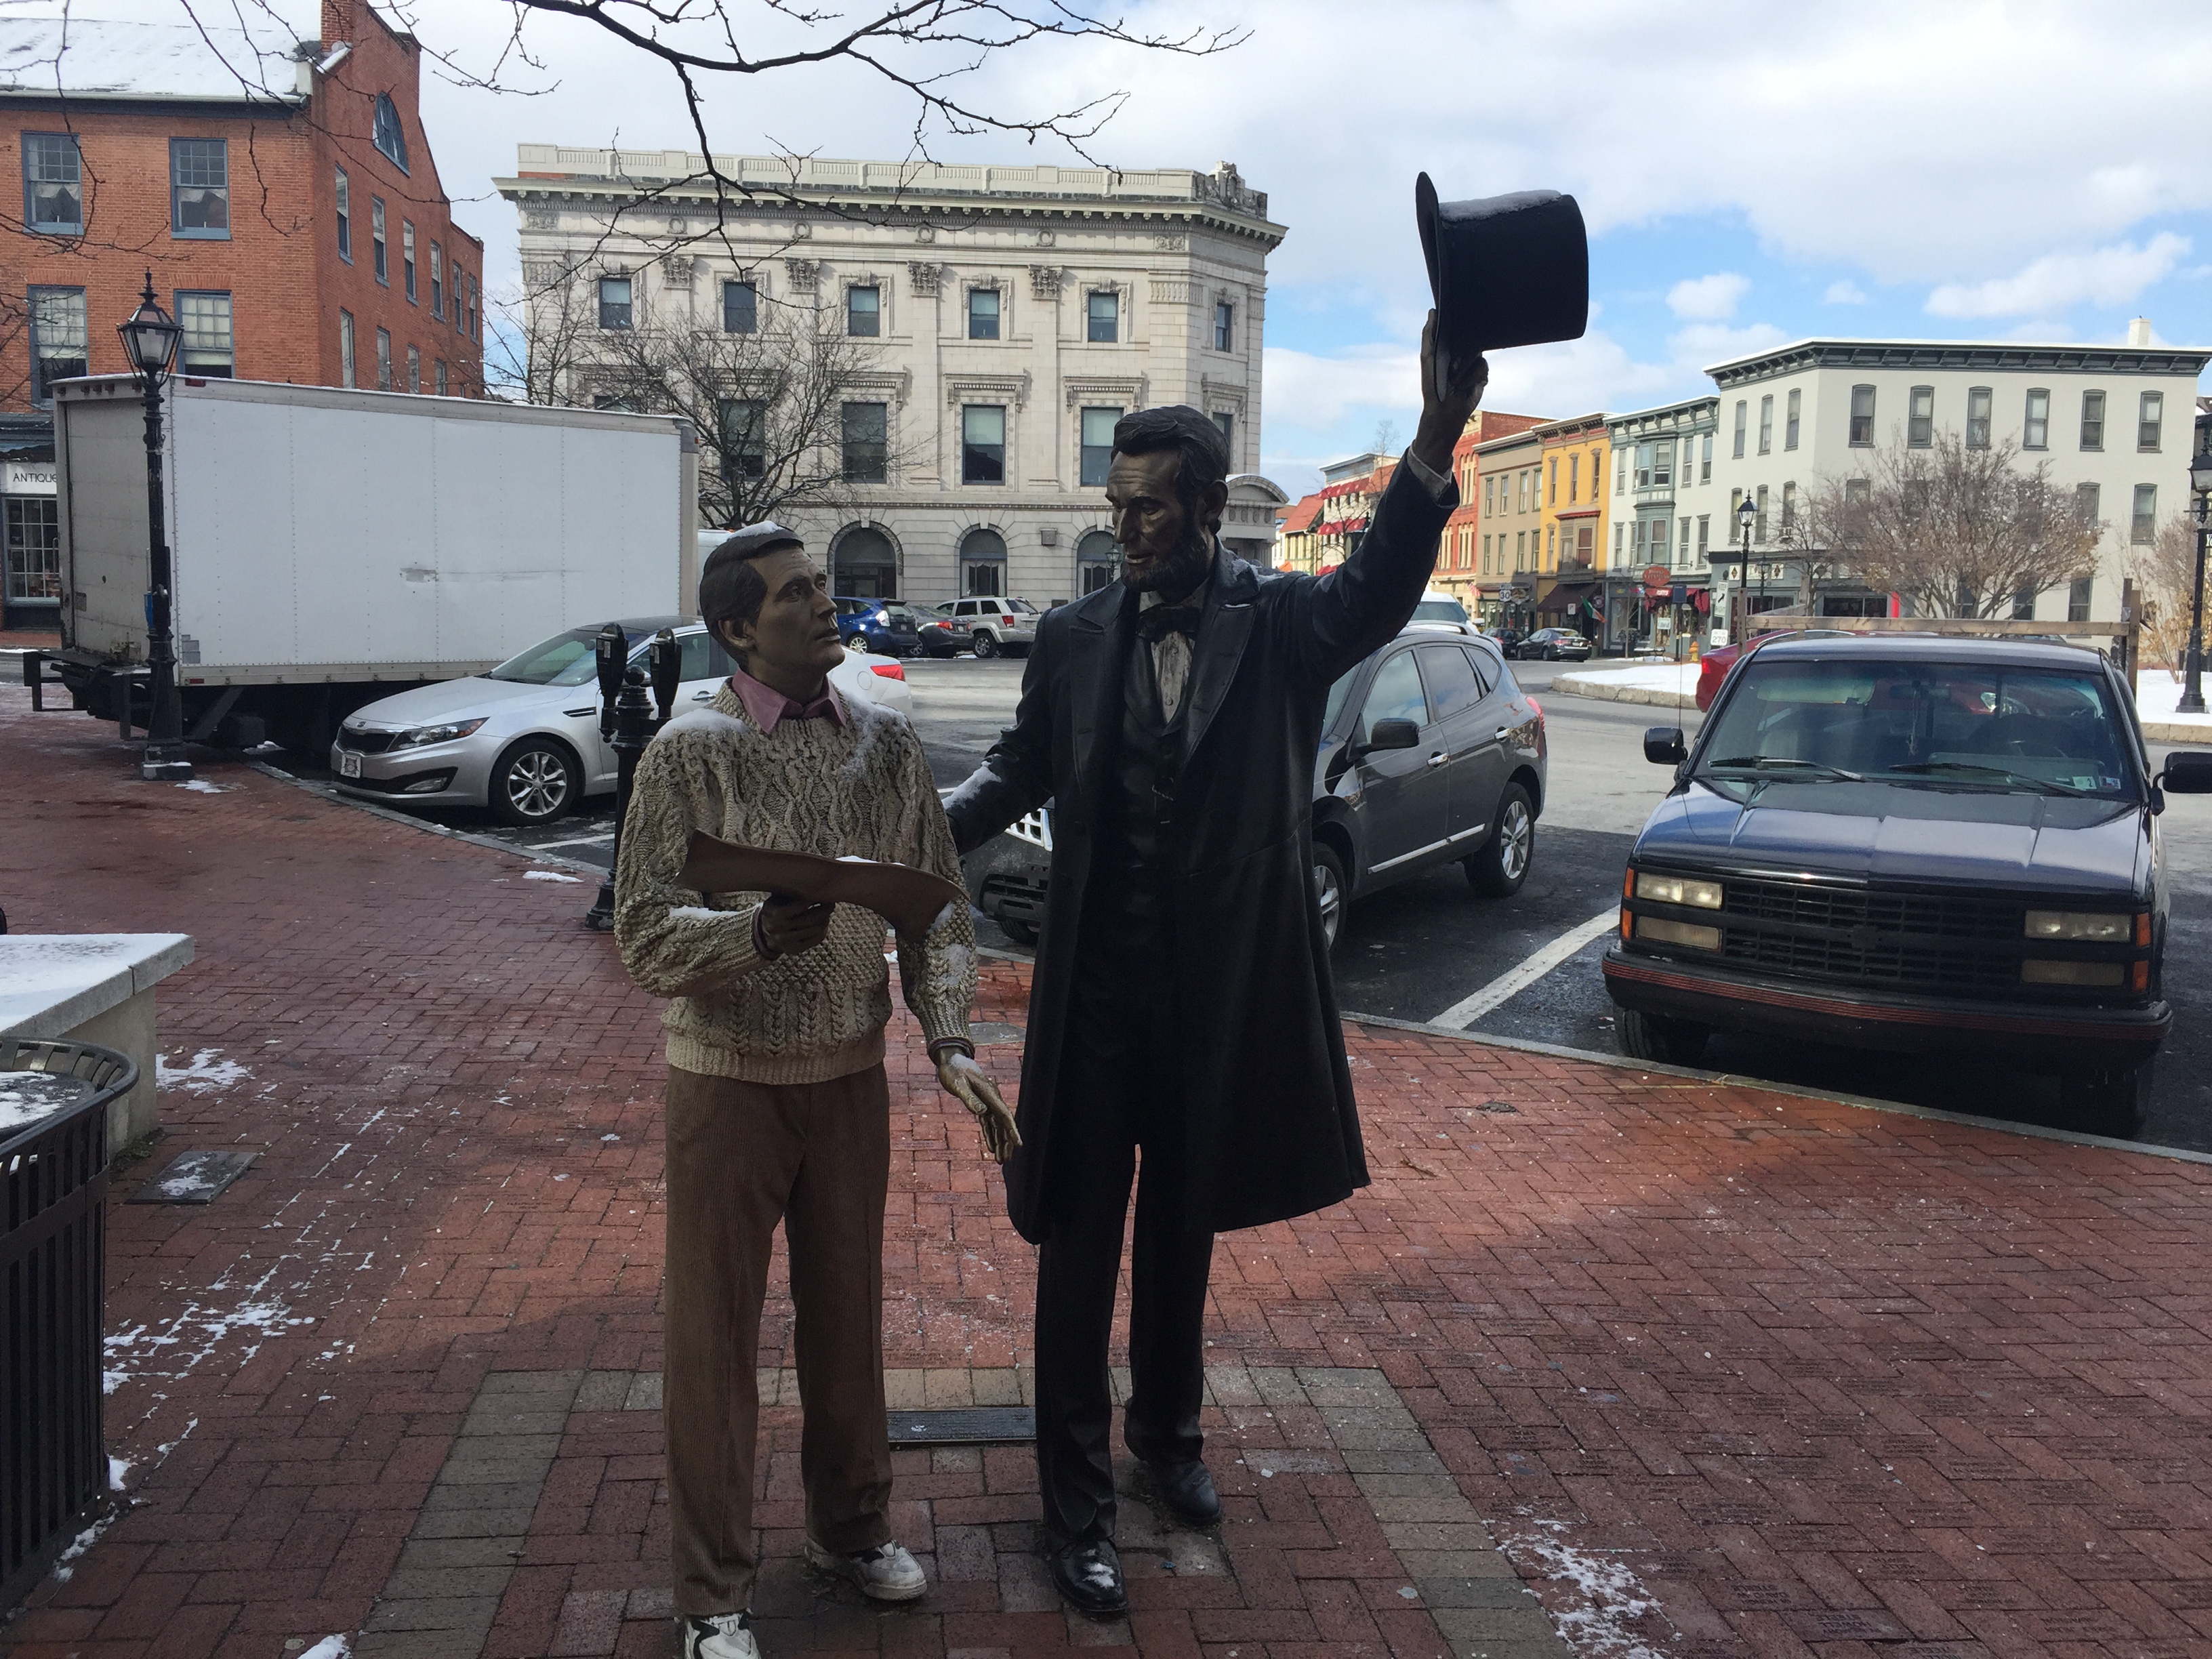
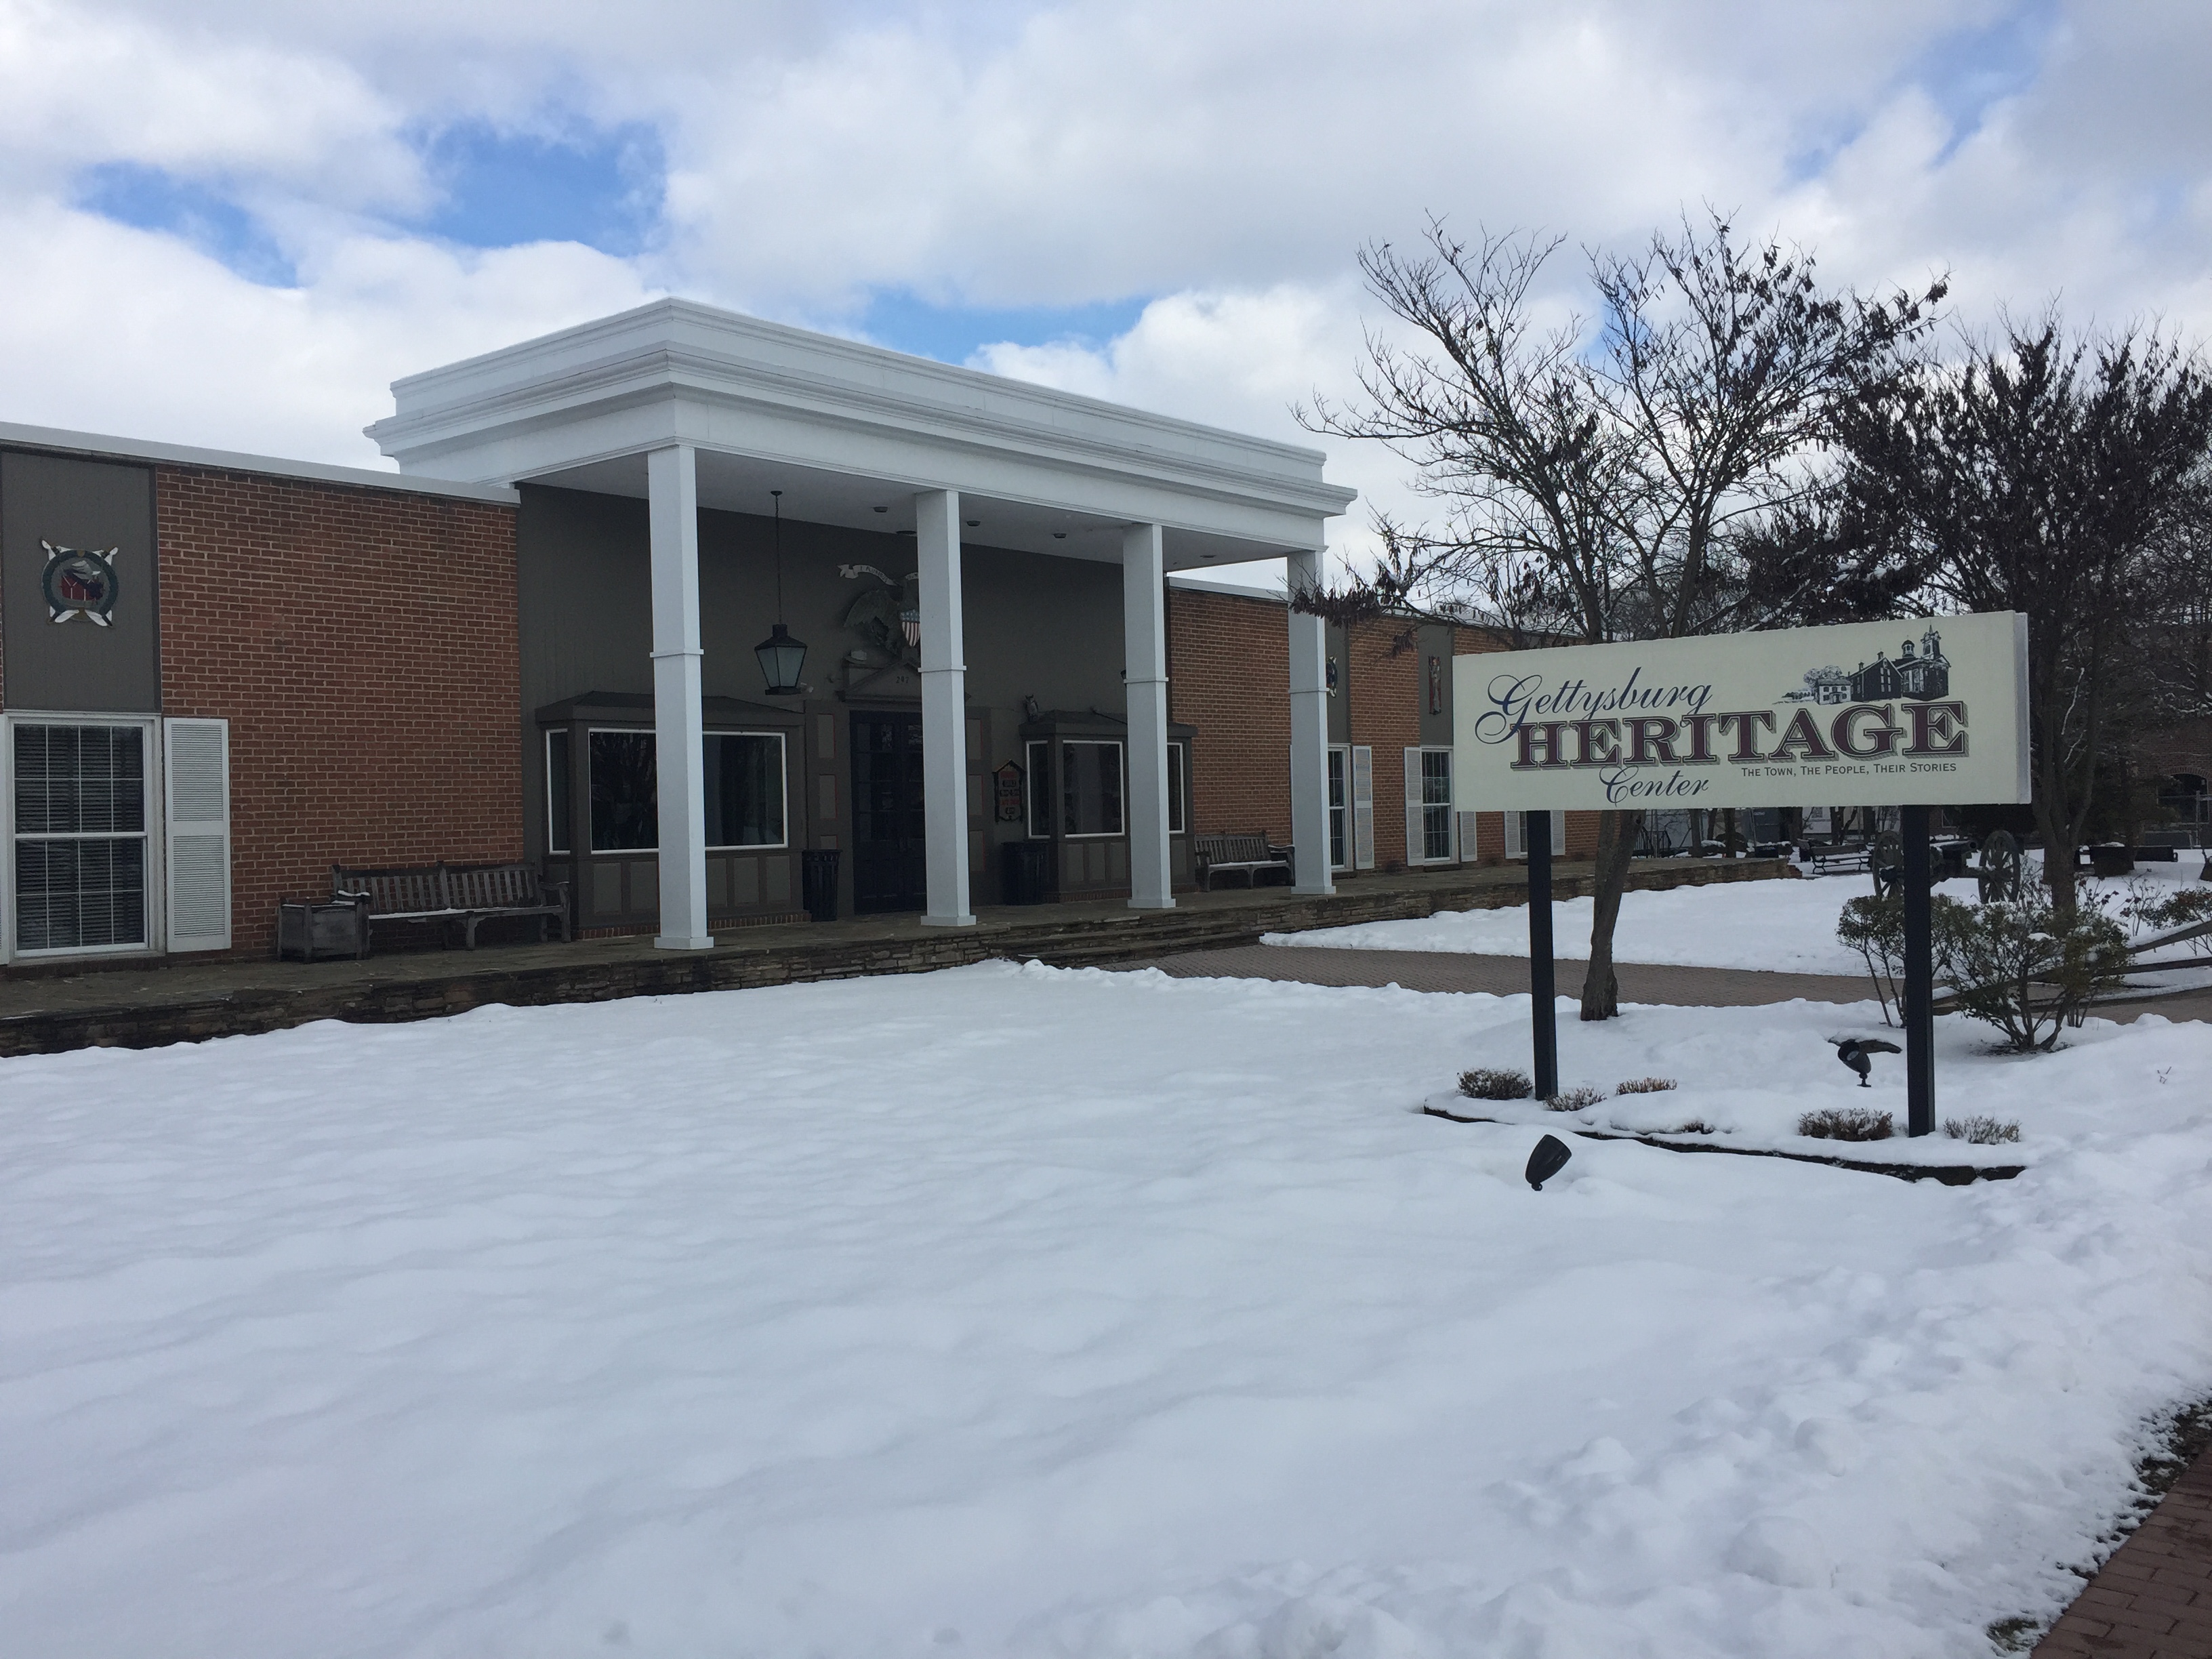
Just a few minute drive south I drove into the Gettysburg National Military Park Museum & Visitor Center.  This is a huge park with paths you can walk along and enjoy some fresh air.  Unfortunately when I was their it was cold so I just headed towards the museum but came across a familiar face.

Gettysburg Military Park 04

President Lincoln is an overwhelming presence here in Gettysburg.  With my selfie-stick nowhere to be found I wasn’t able to take a proper picture with the former President.

Gettysburg Military Park 06

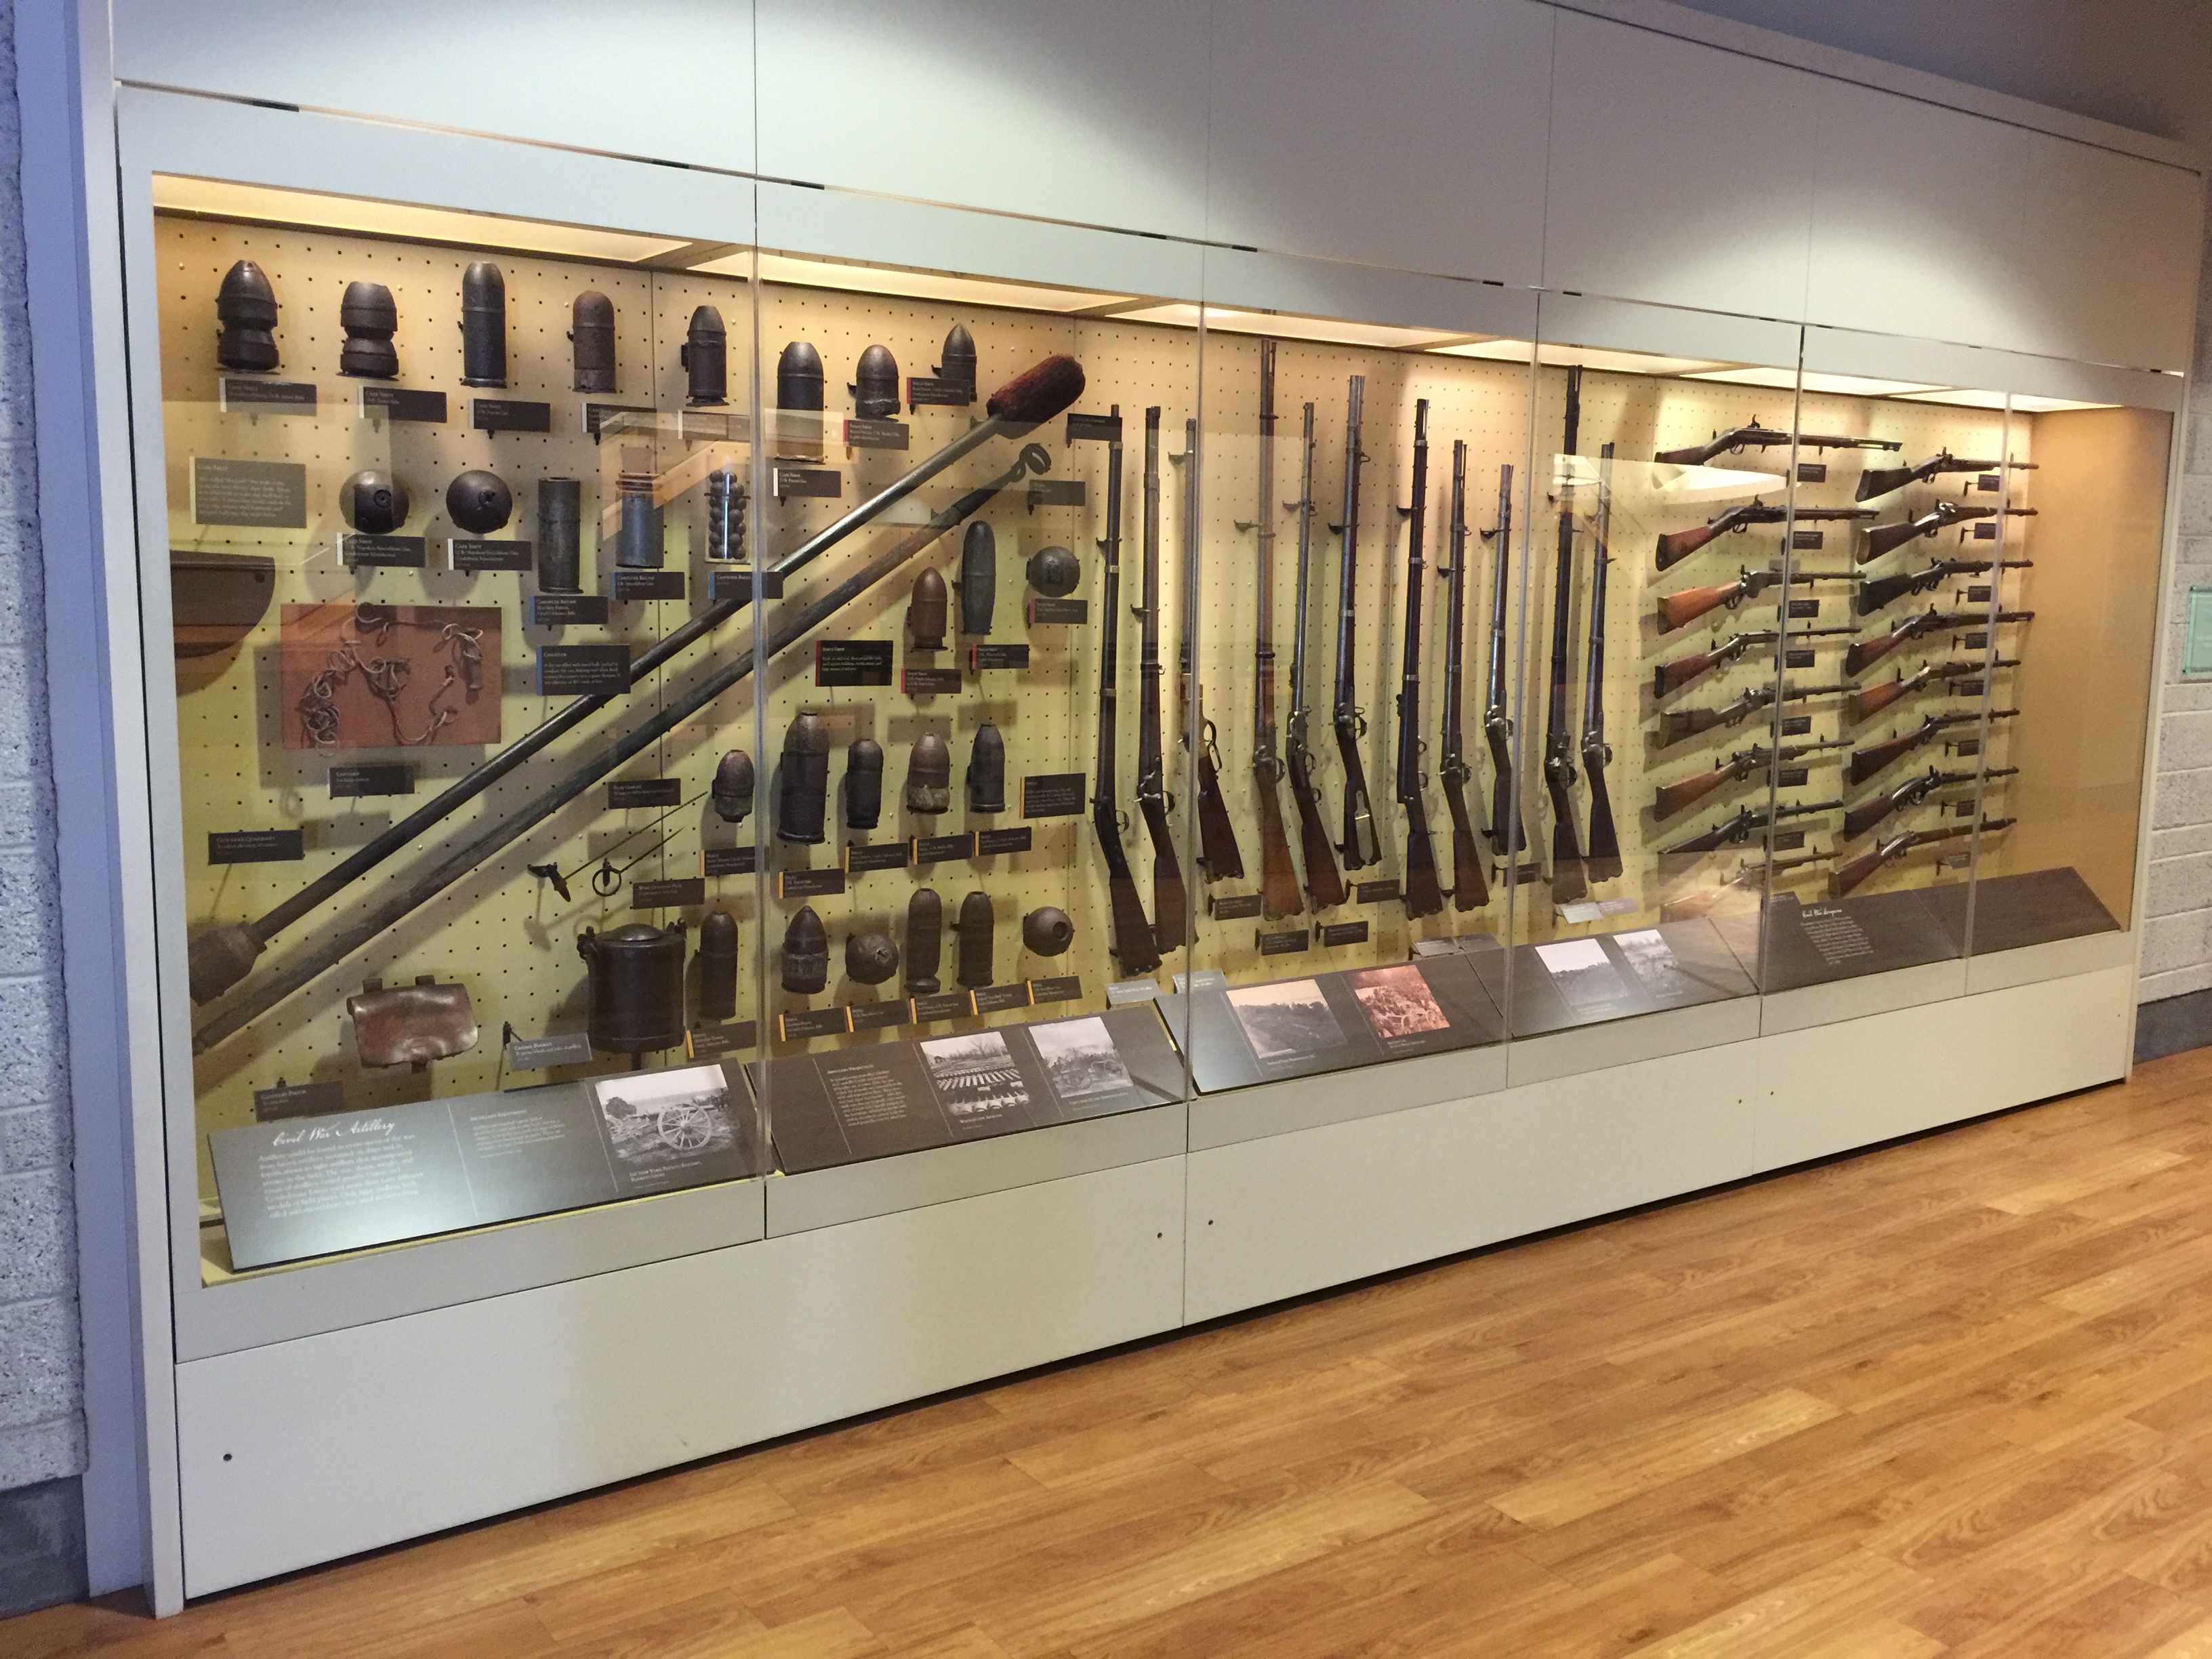
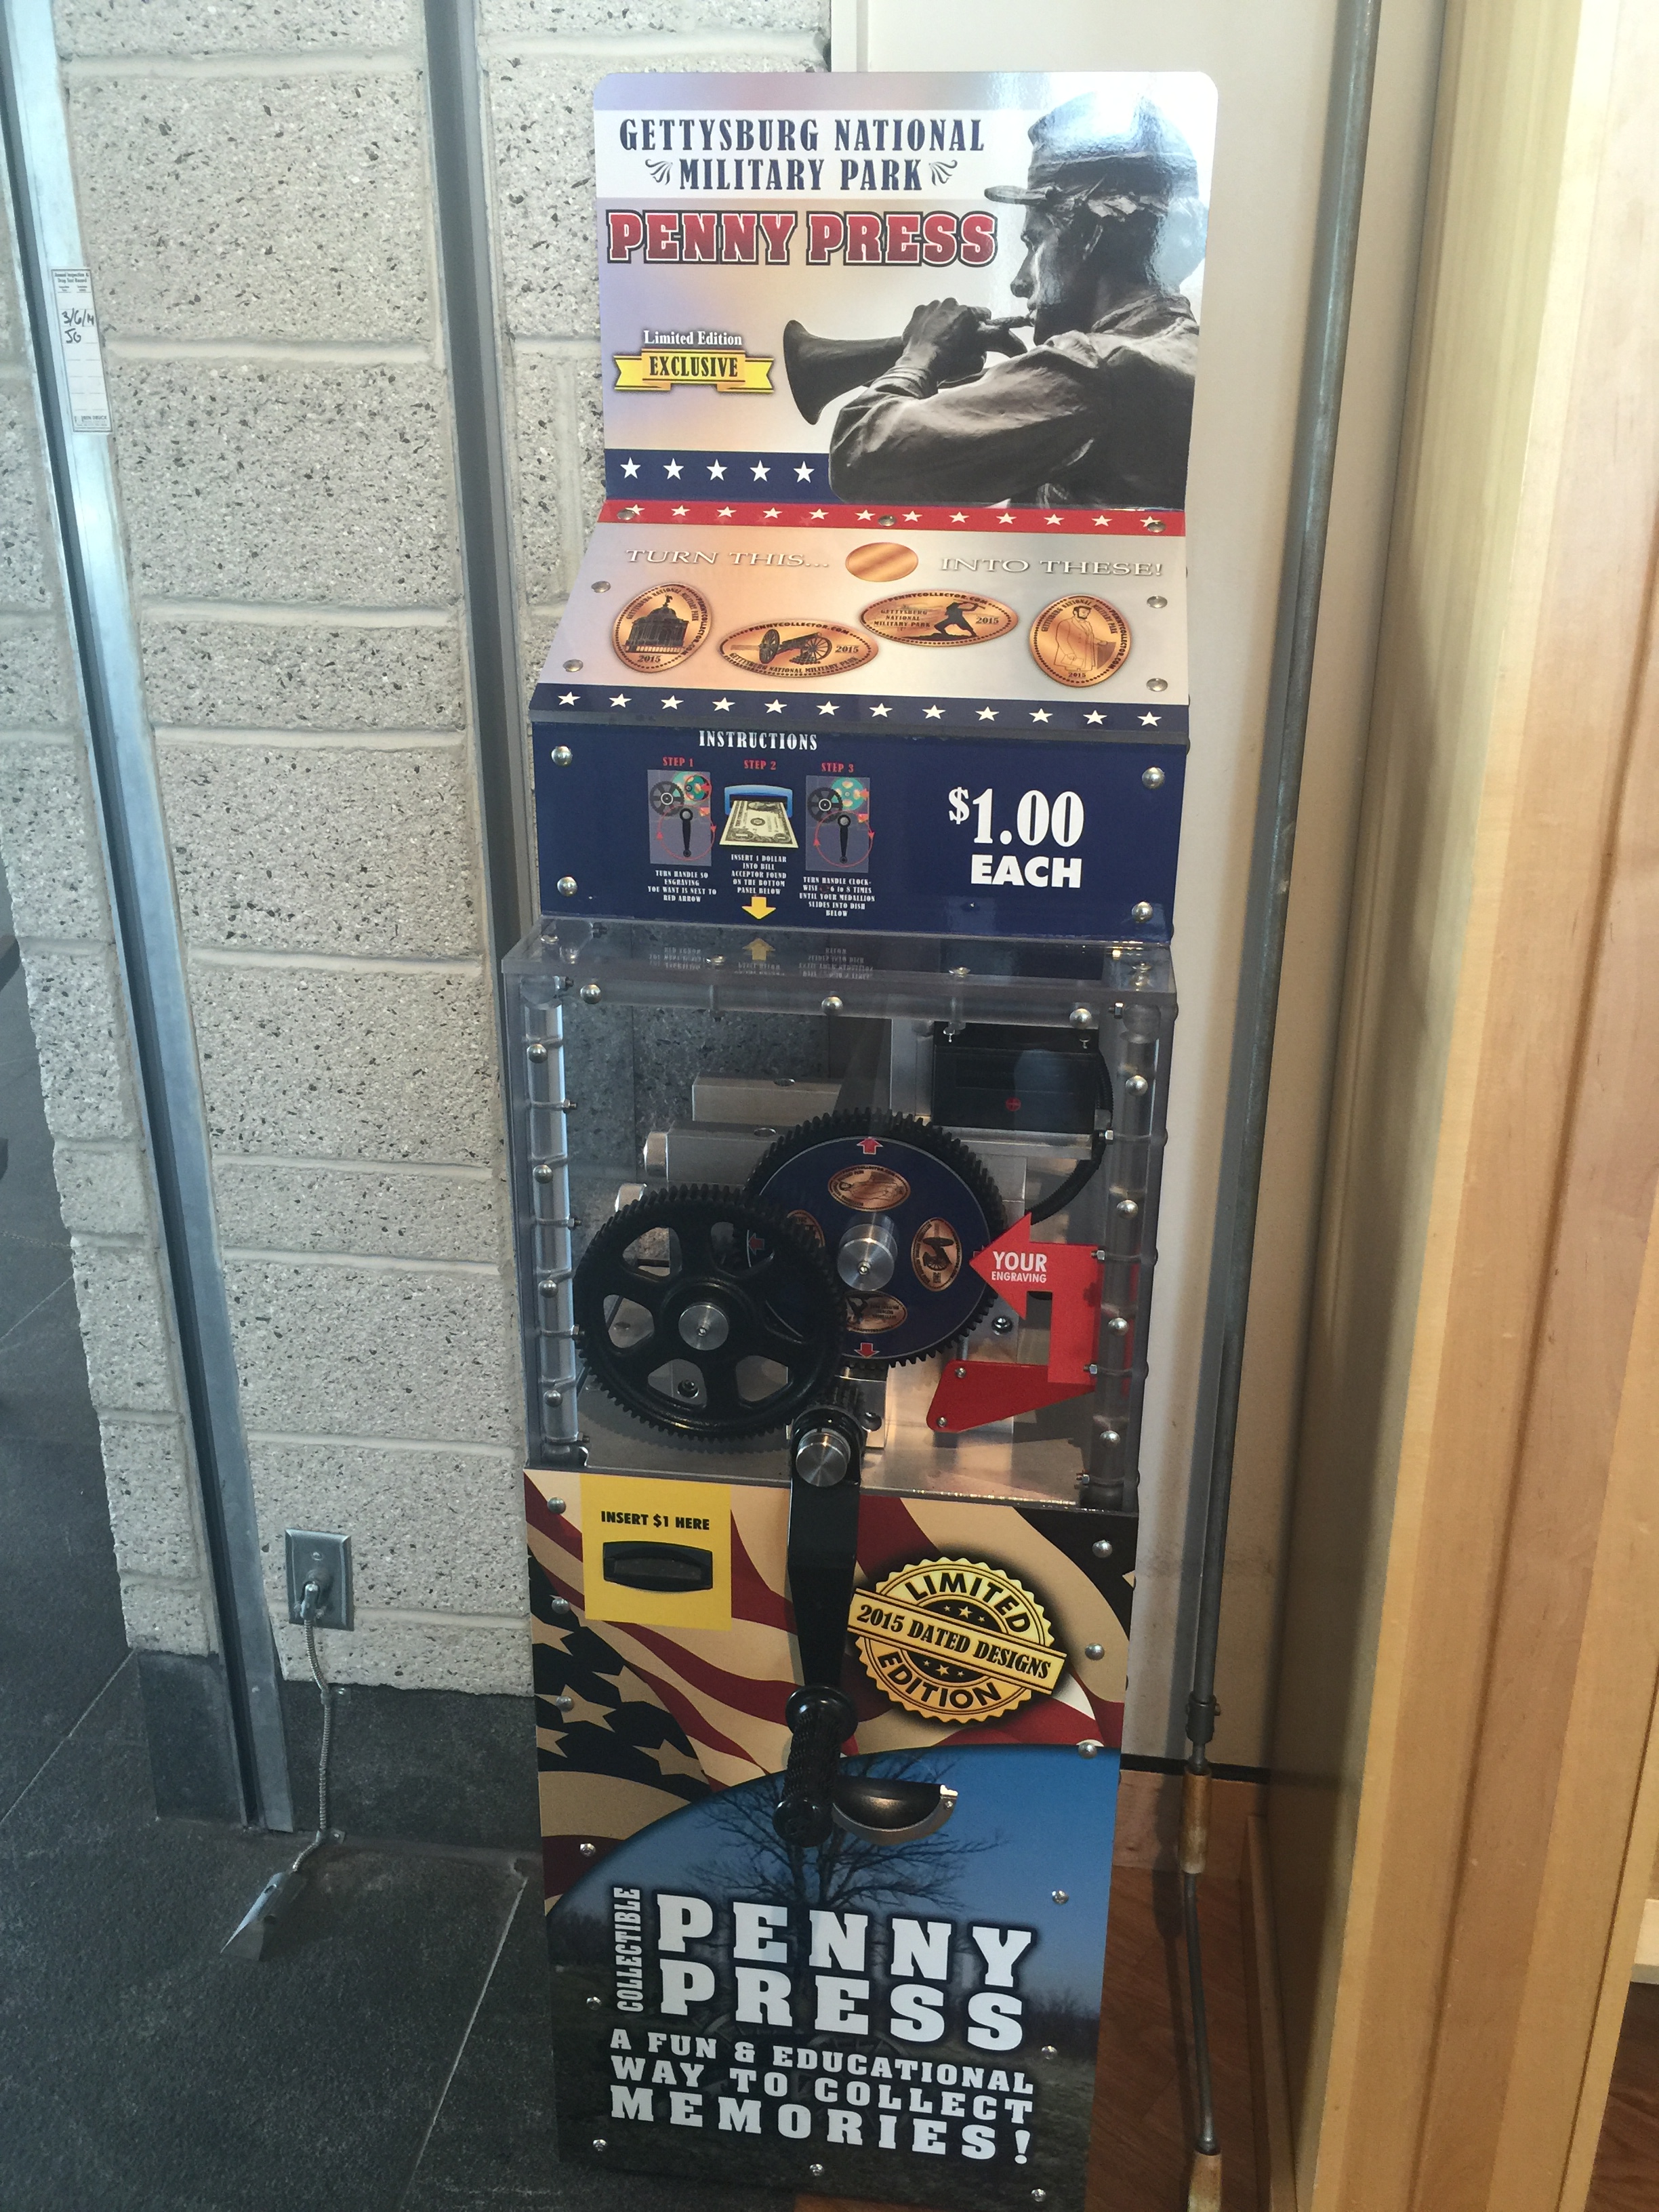
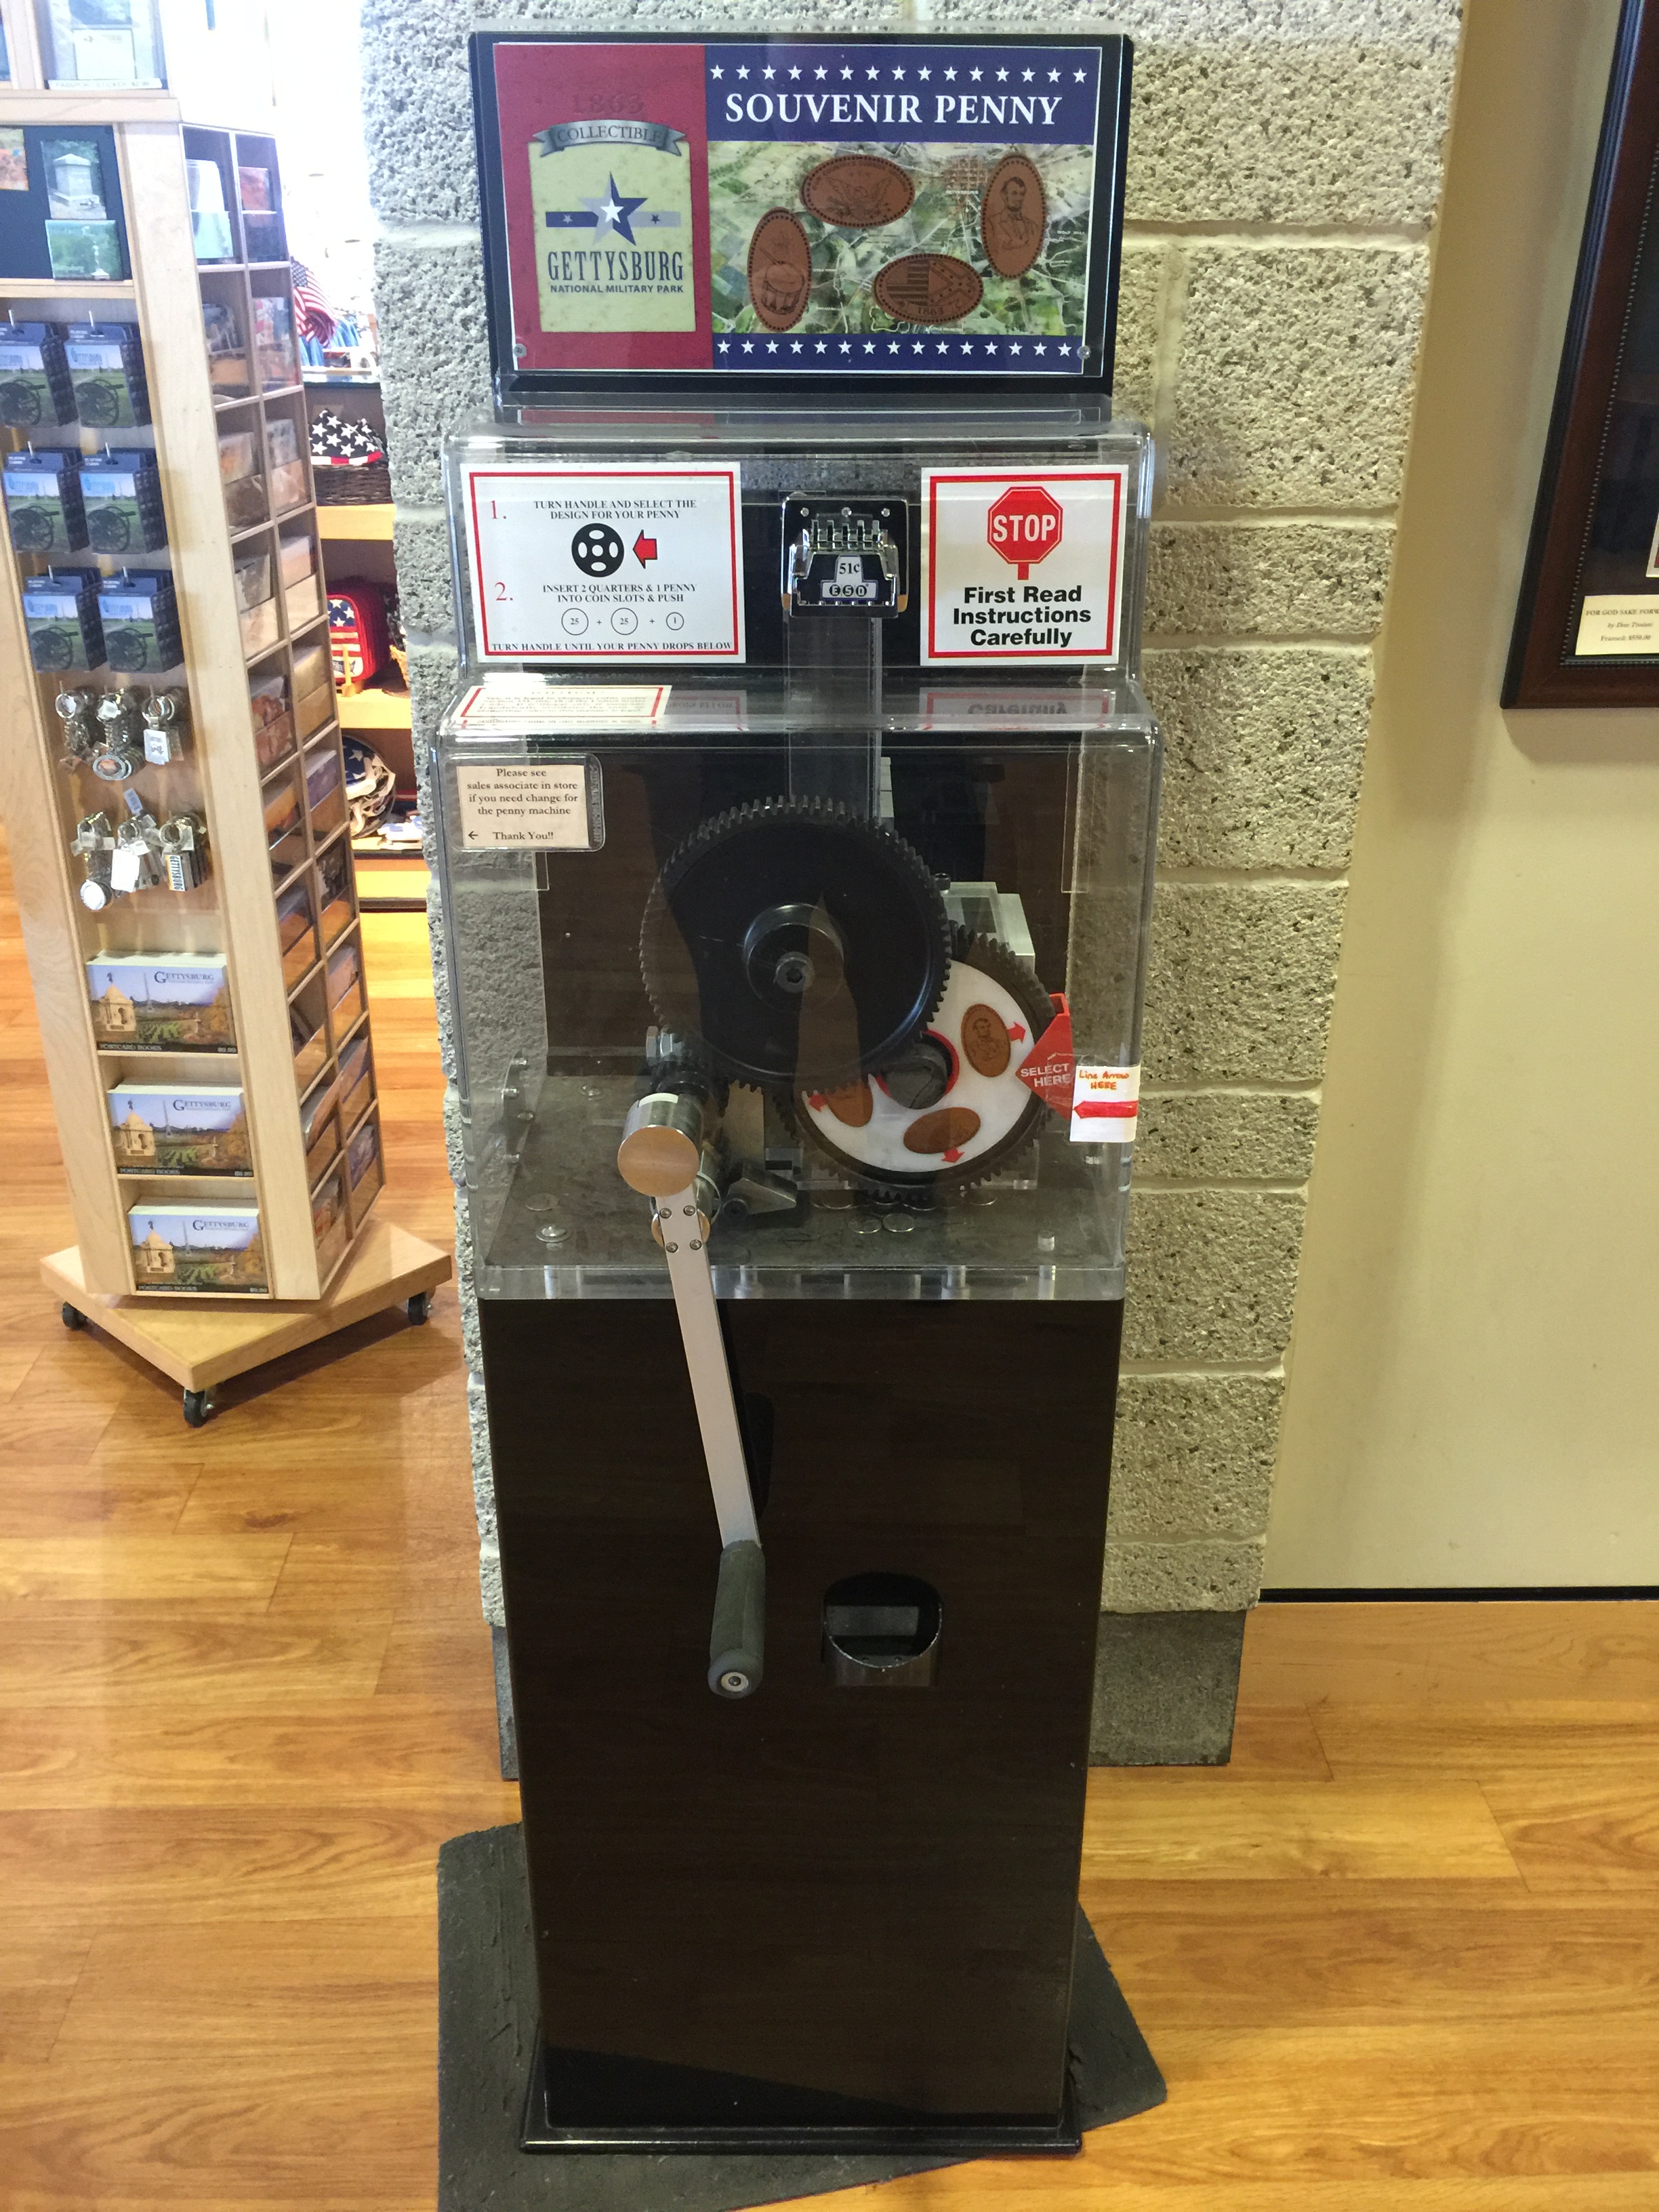
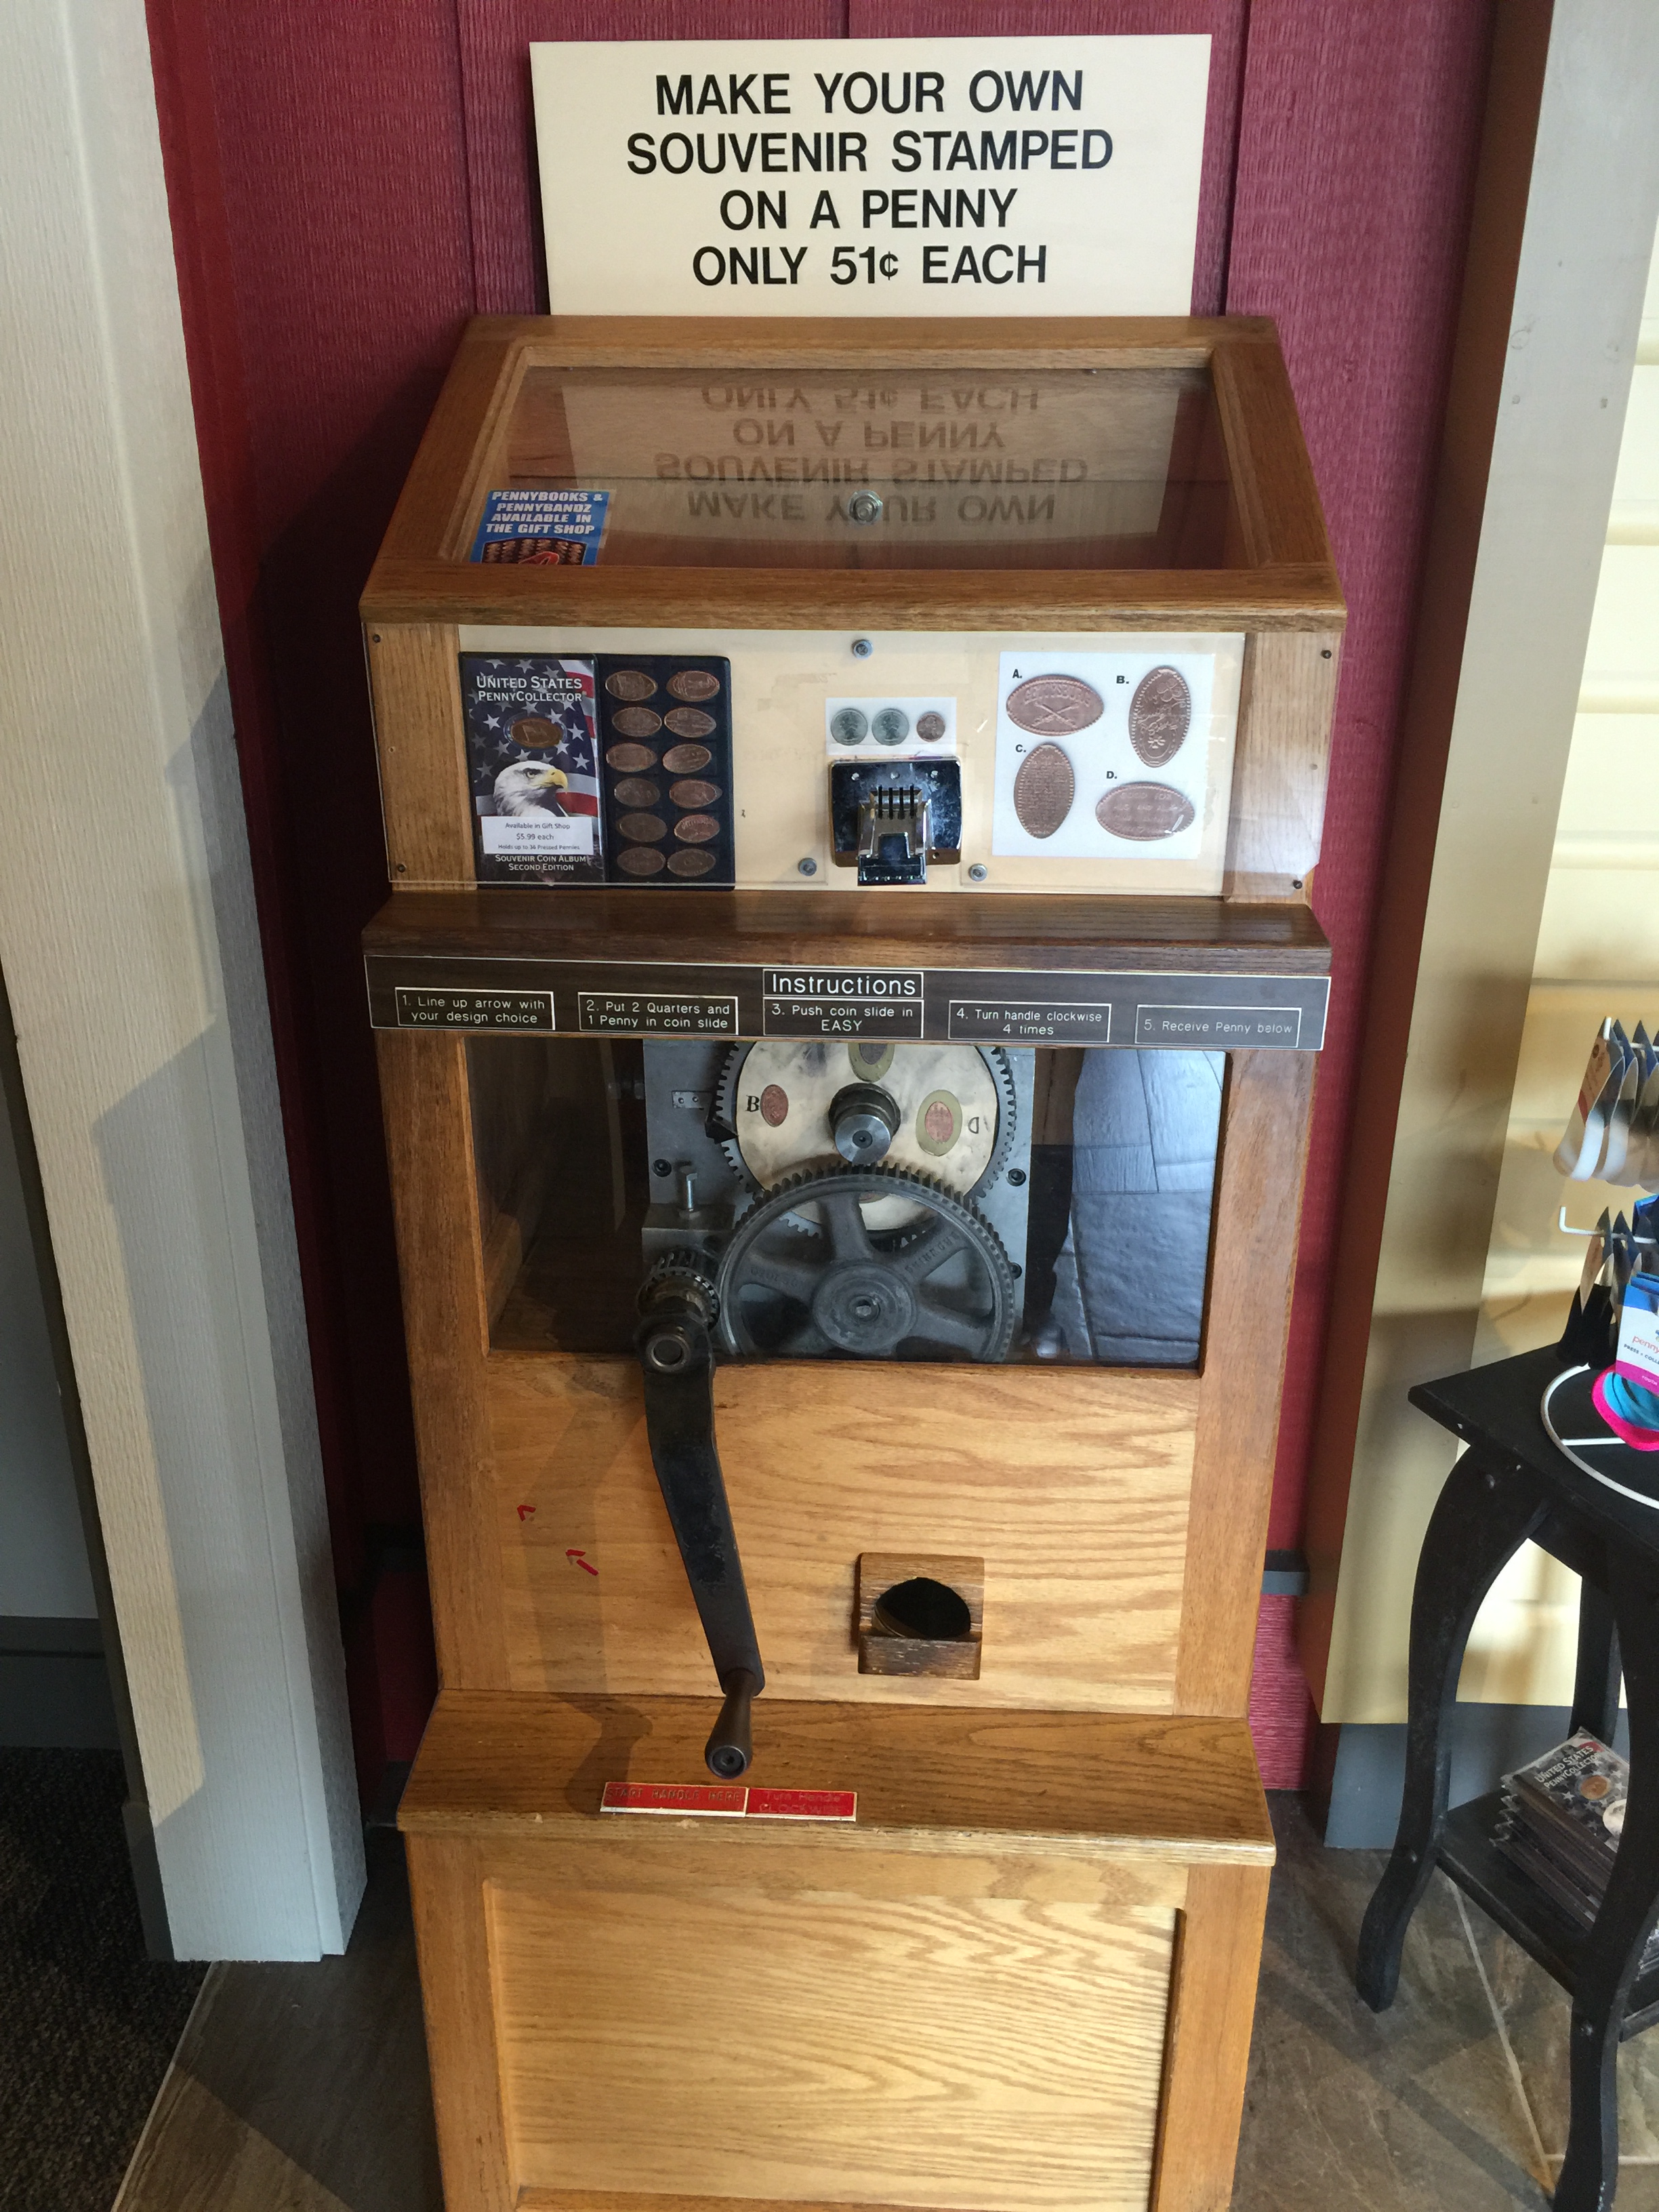
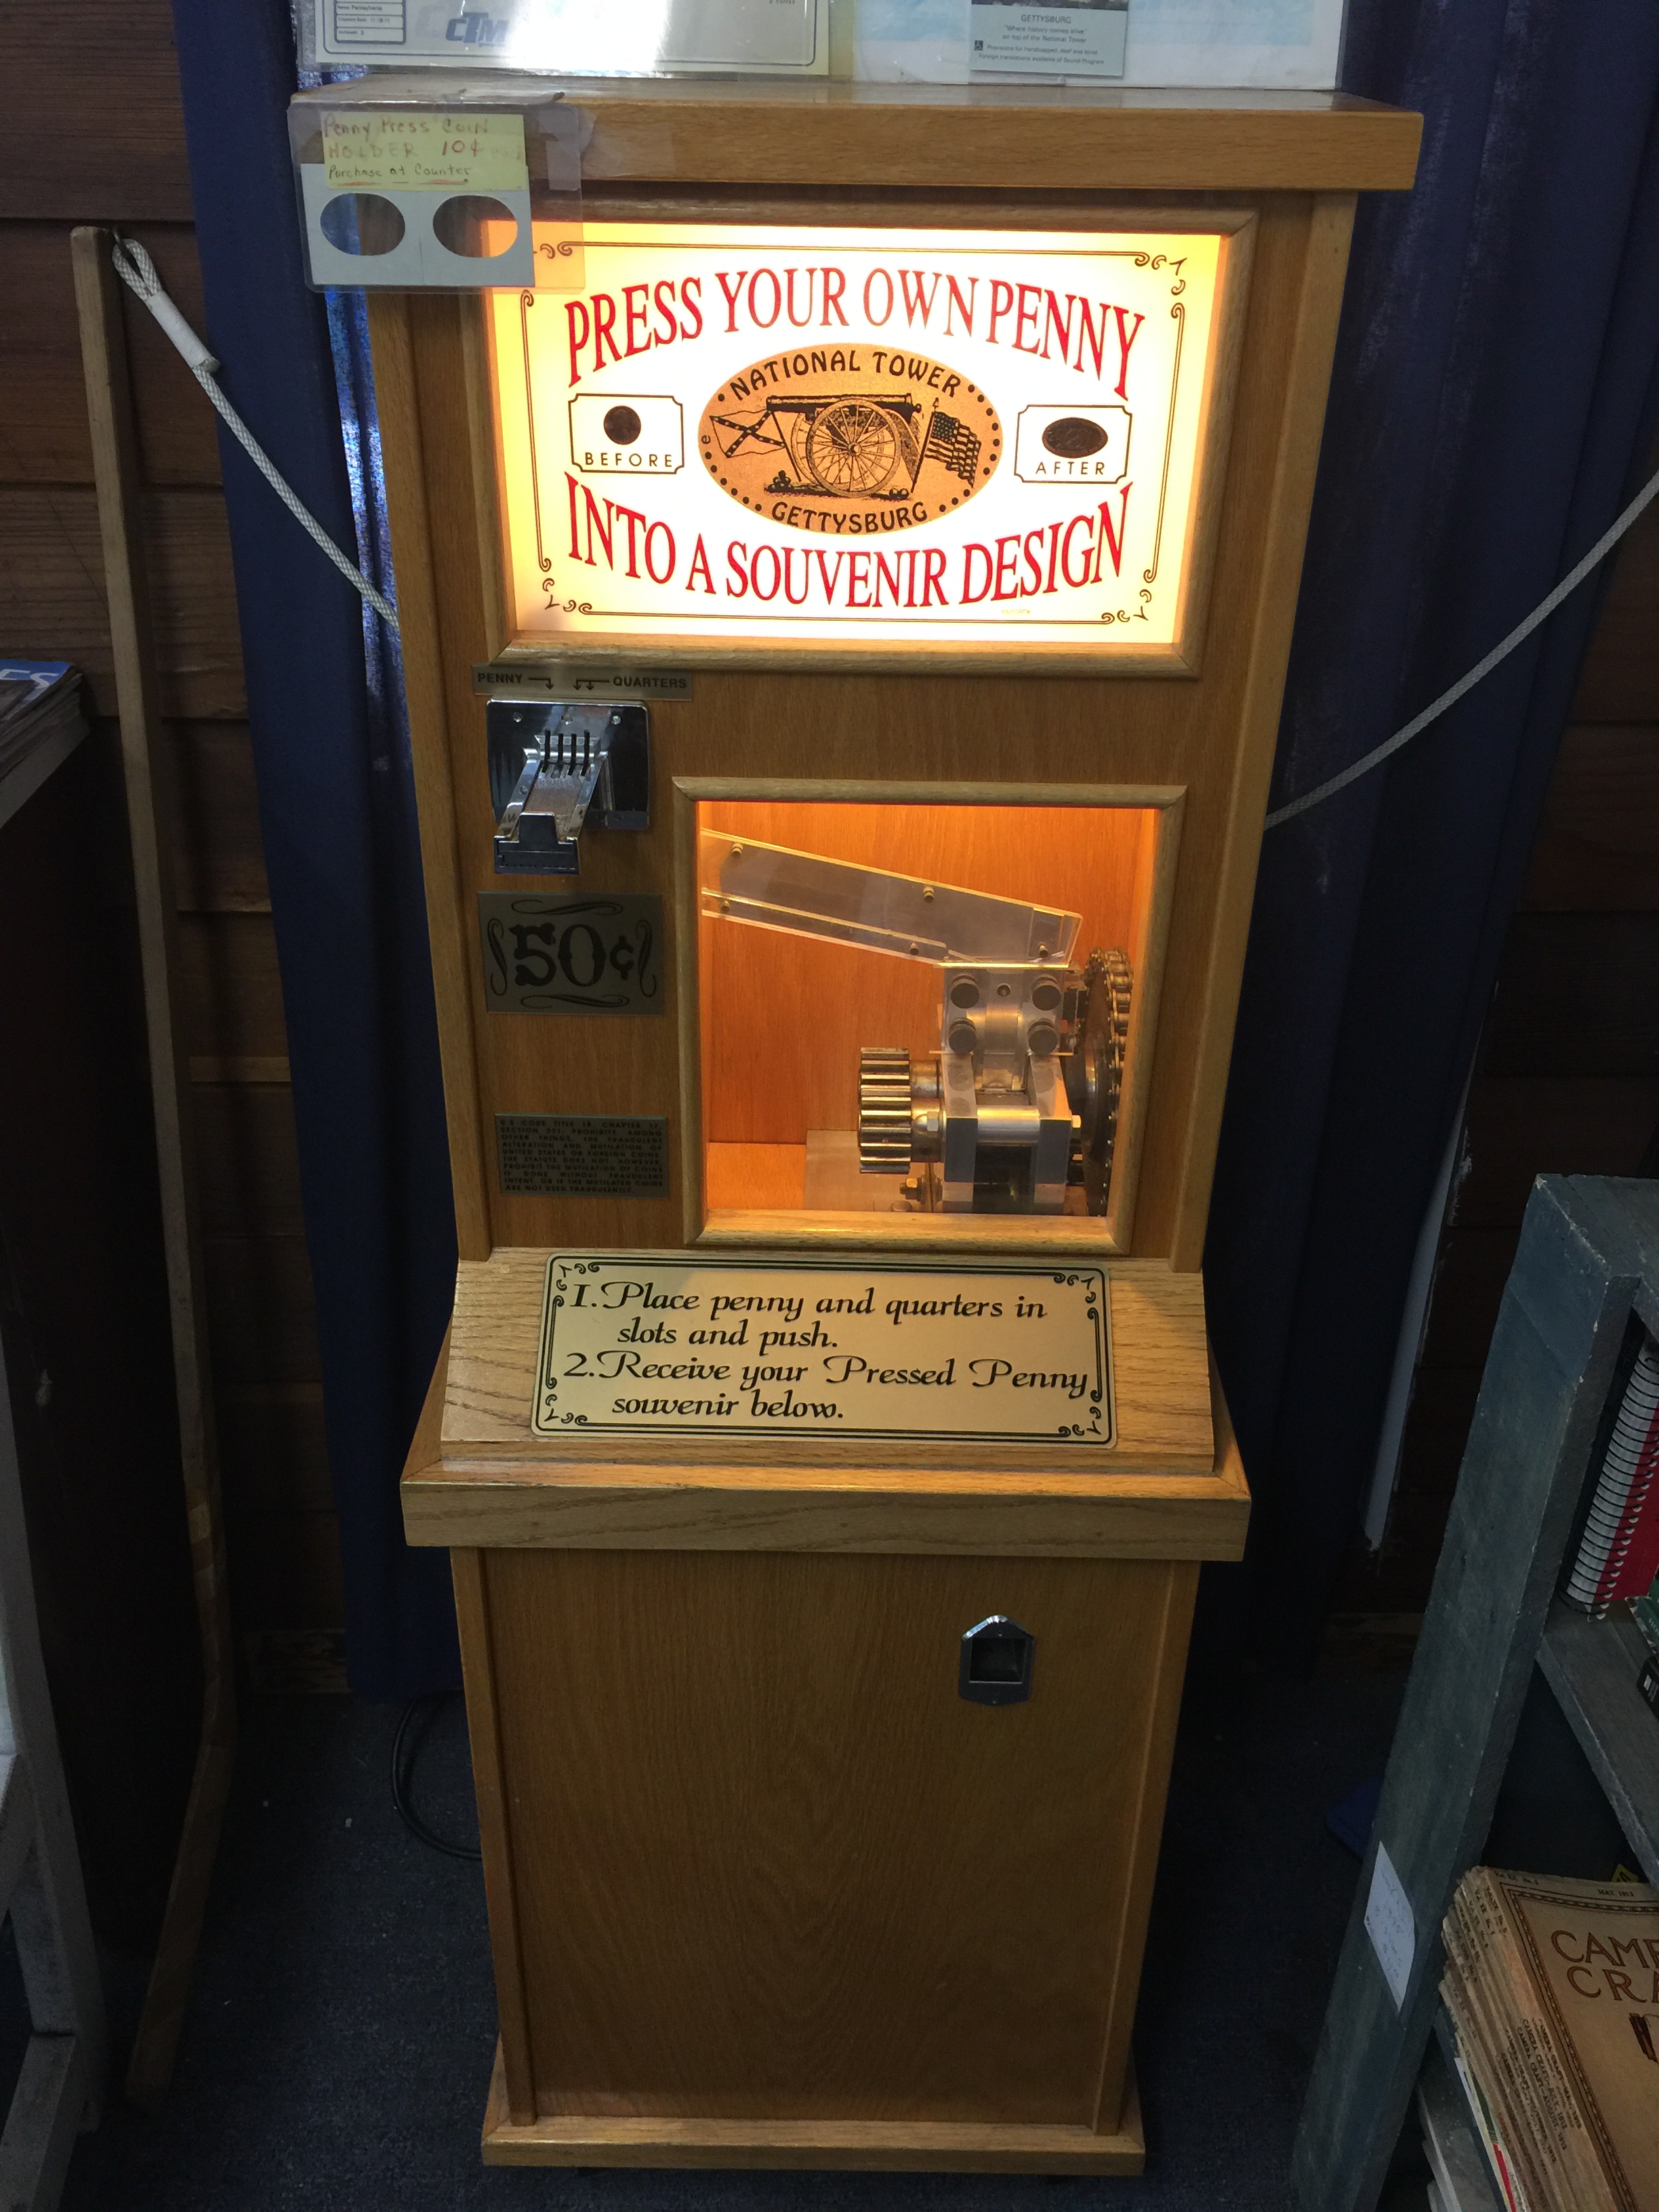
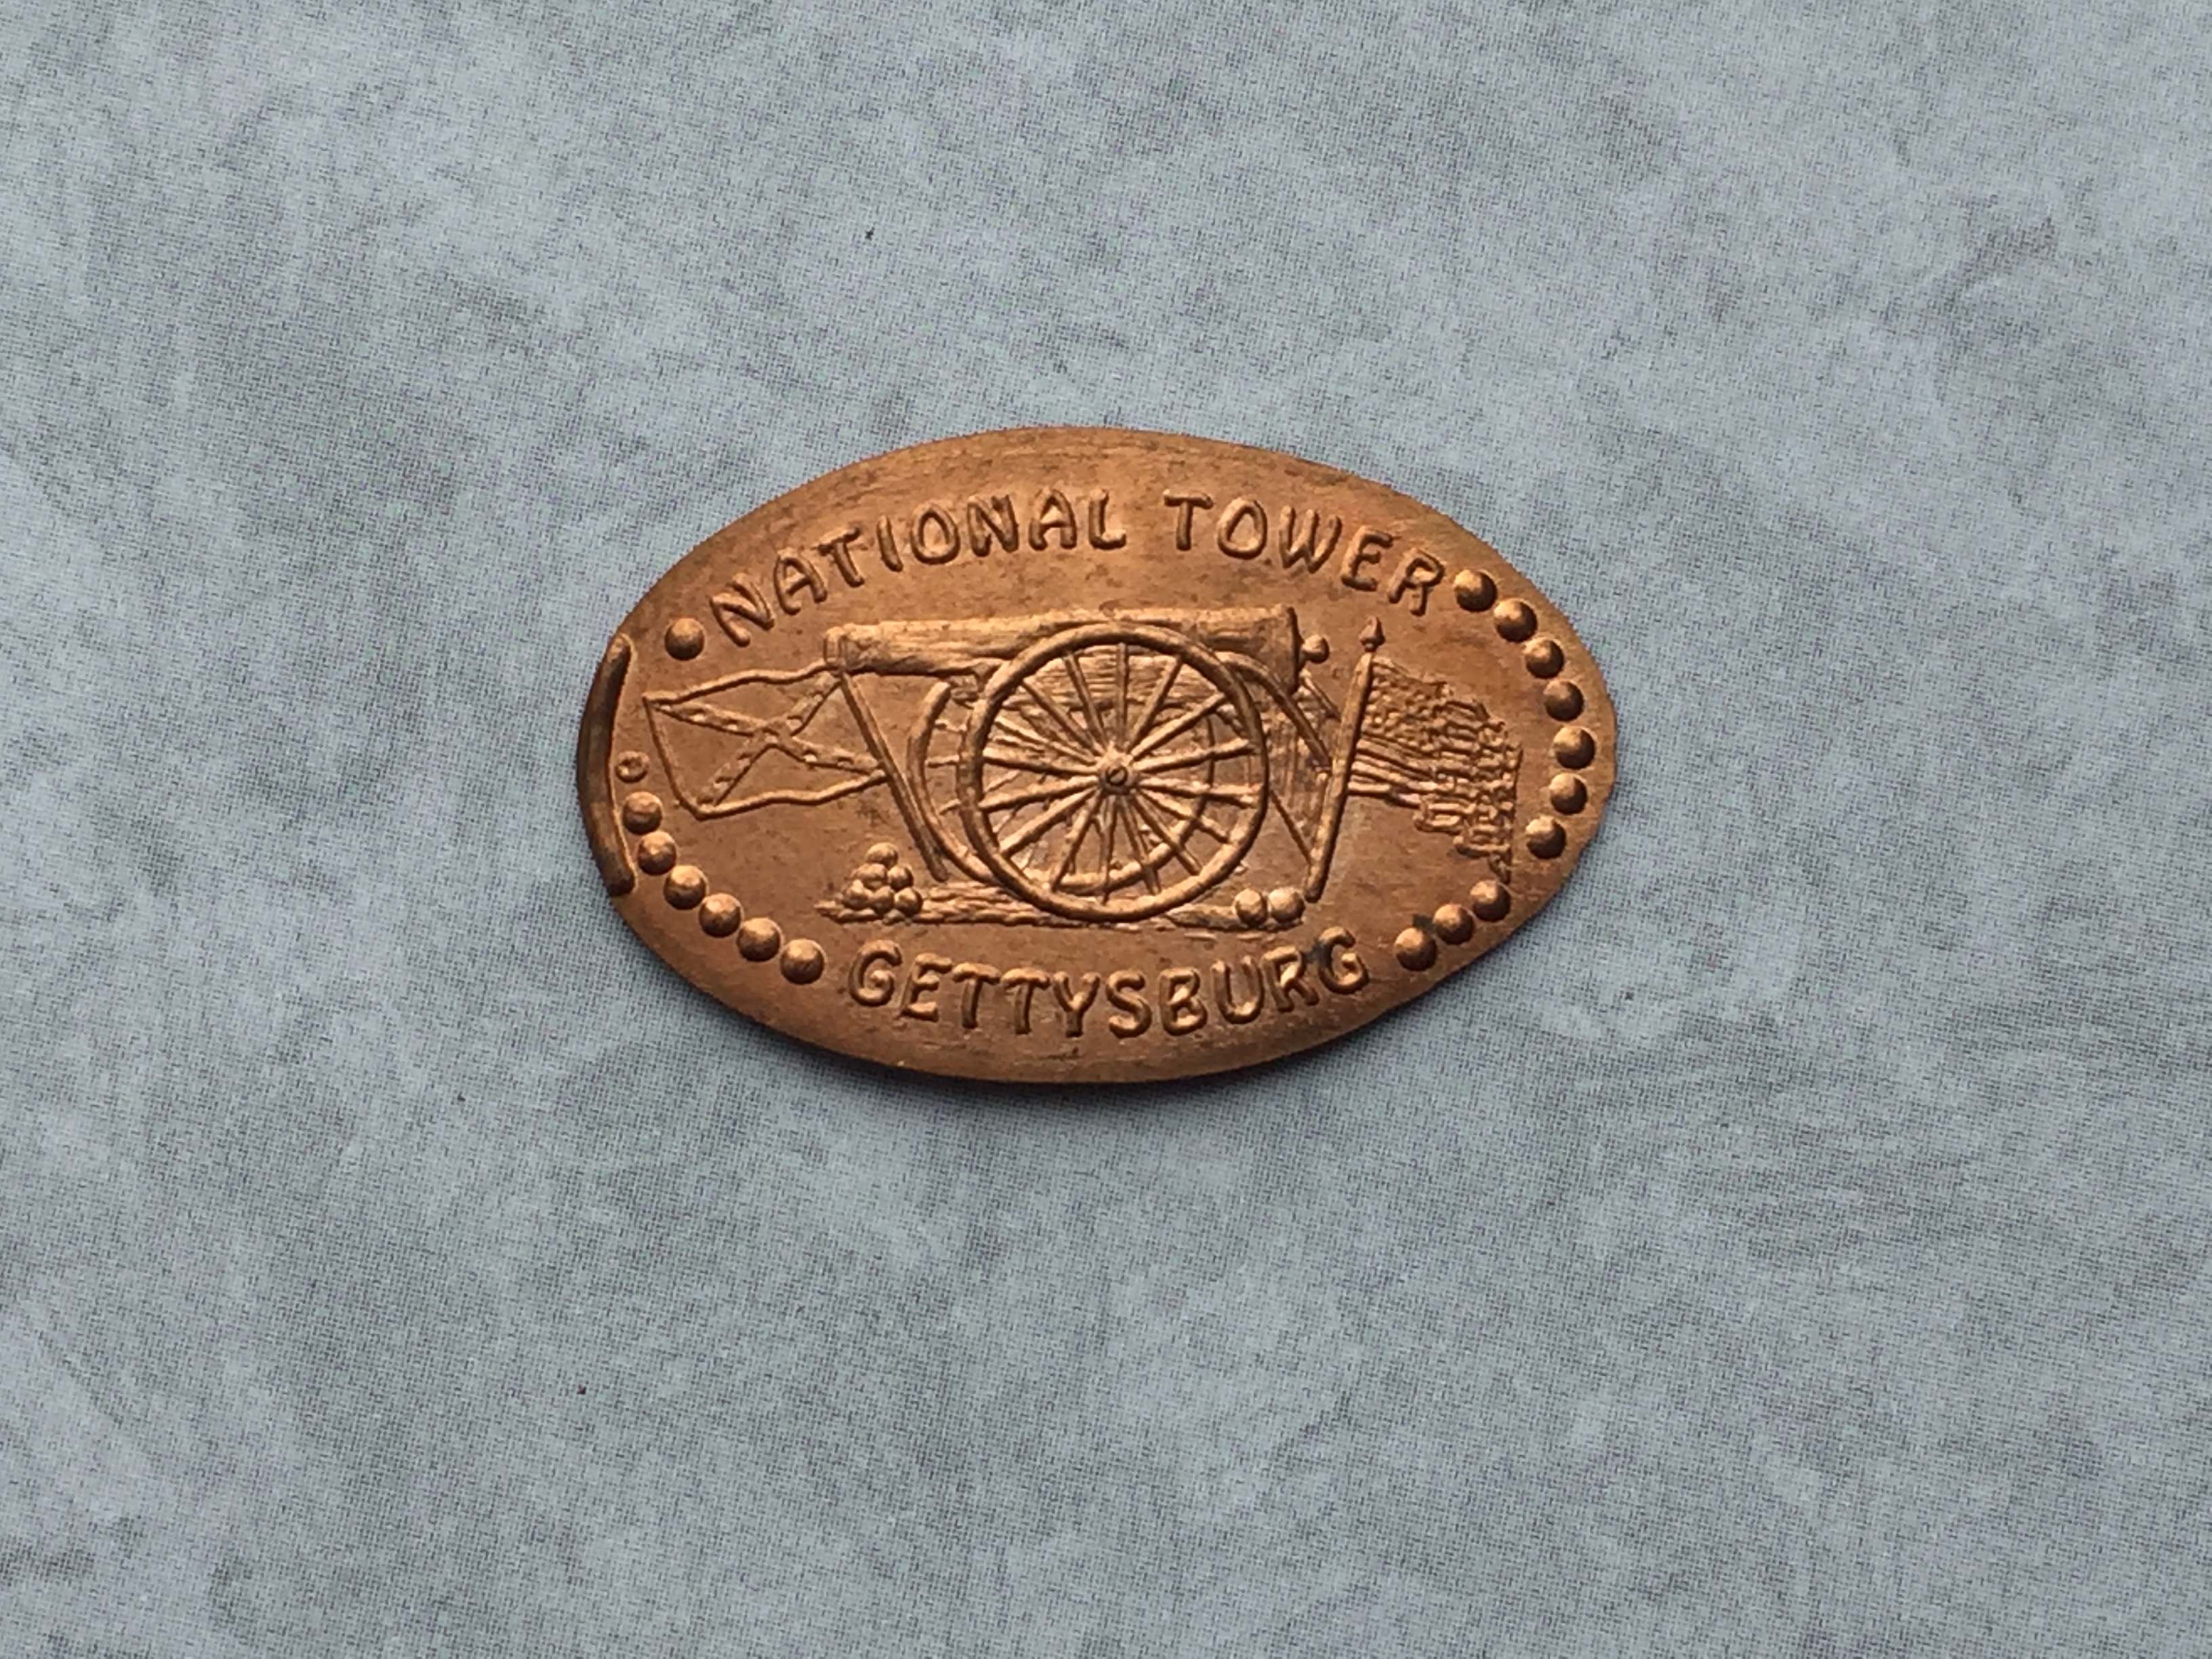
Inside the museum there are all types of artifacts pertaining to the Gettysburg battle.  There is an admission to visit the entire museum, but there are some small areas you can look at for no fee.  Just outside the theatre is their gift shop which has quite a selection of items for purchase.  Just near the one exit tot he gift shop I found penny machine.

PA - Gettysburg Military Park 01

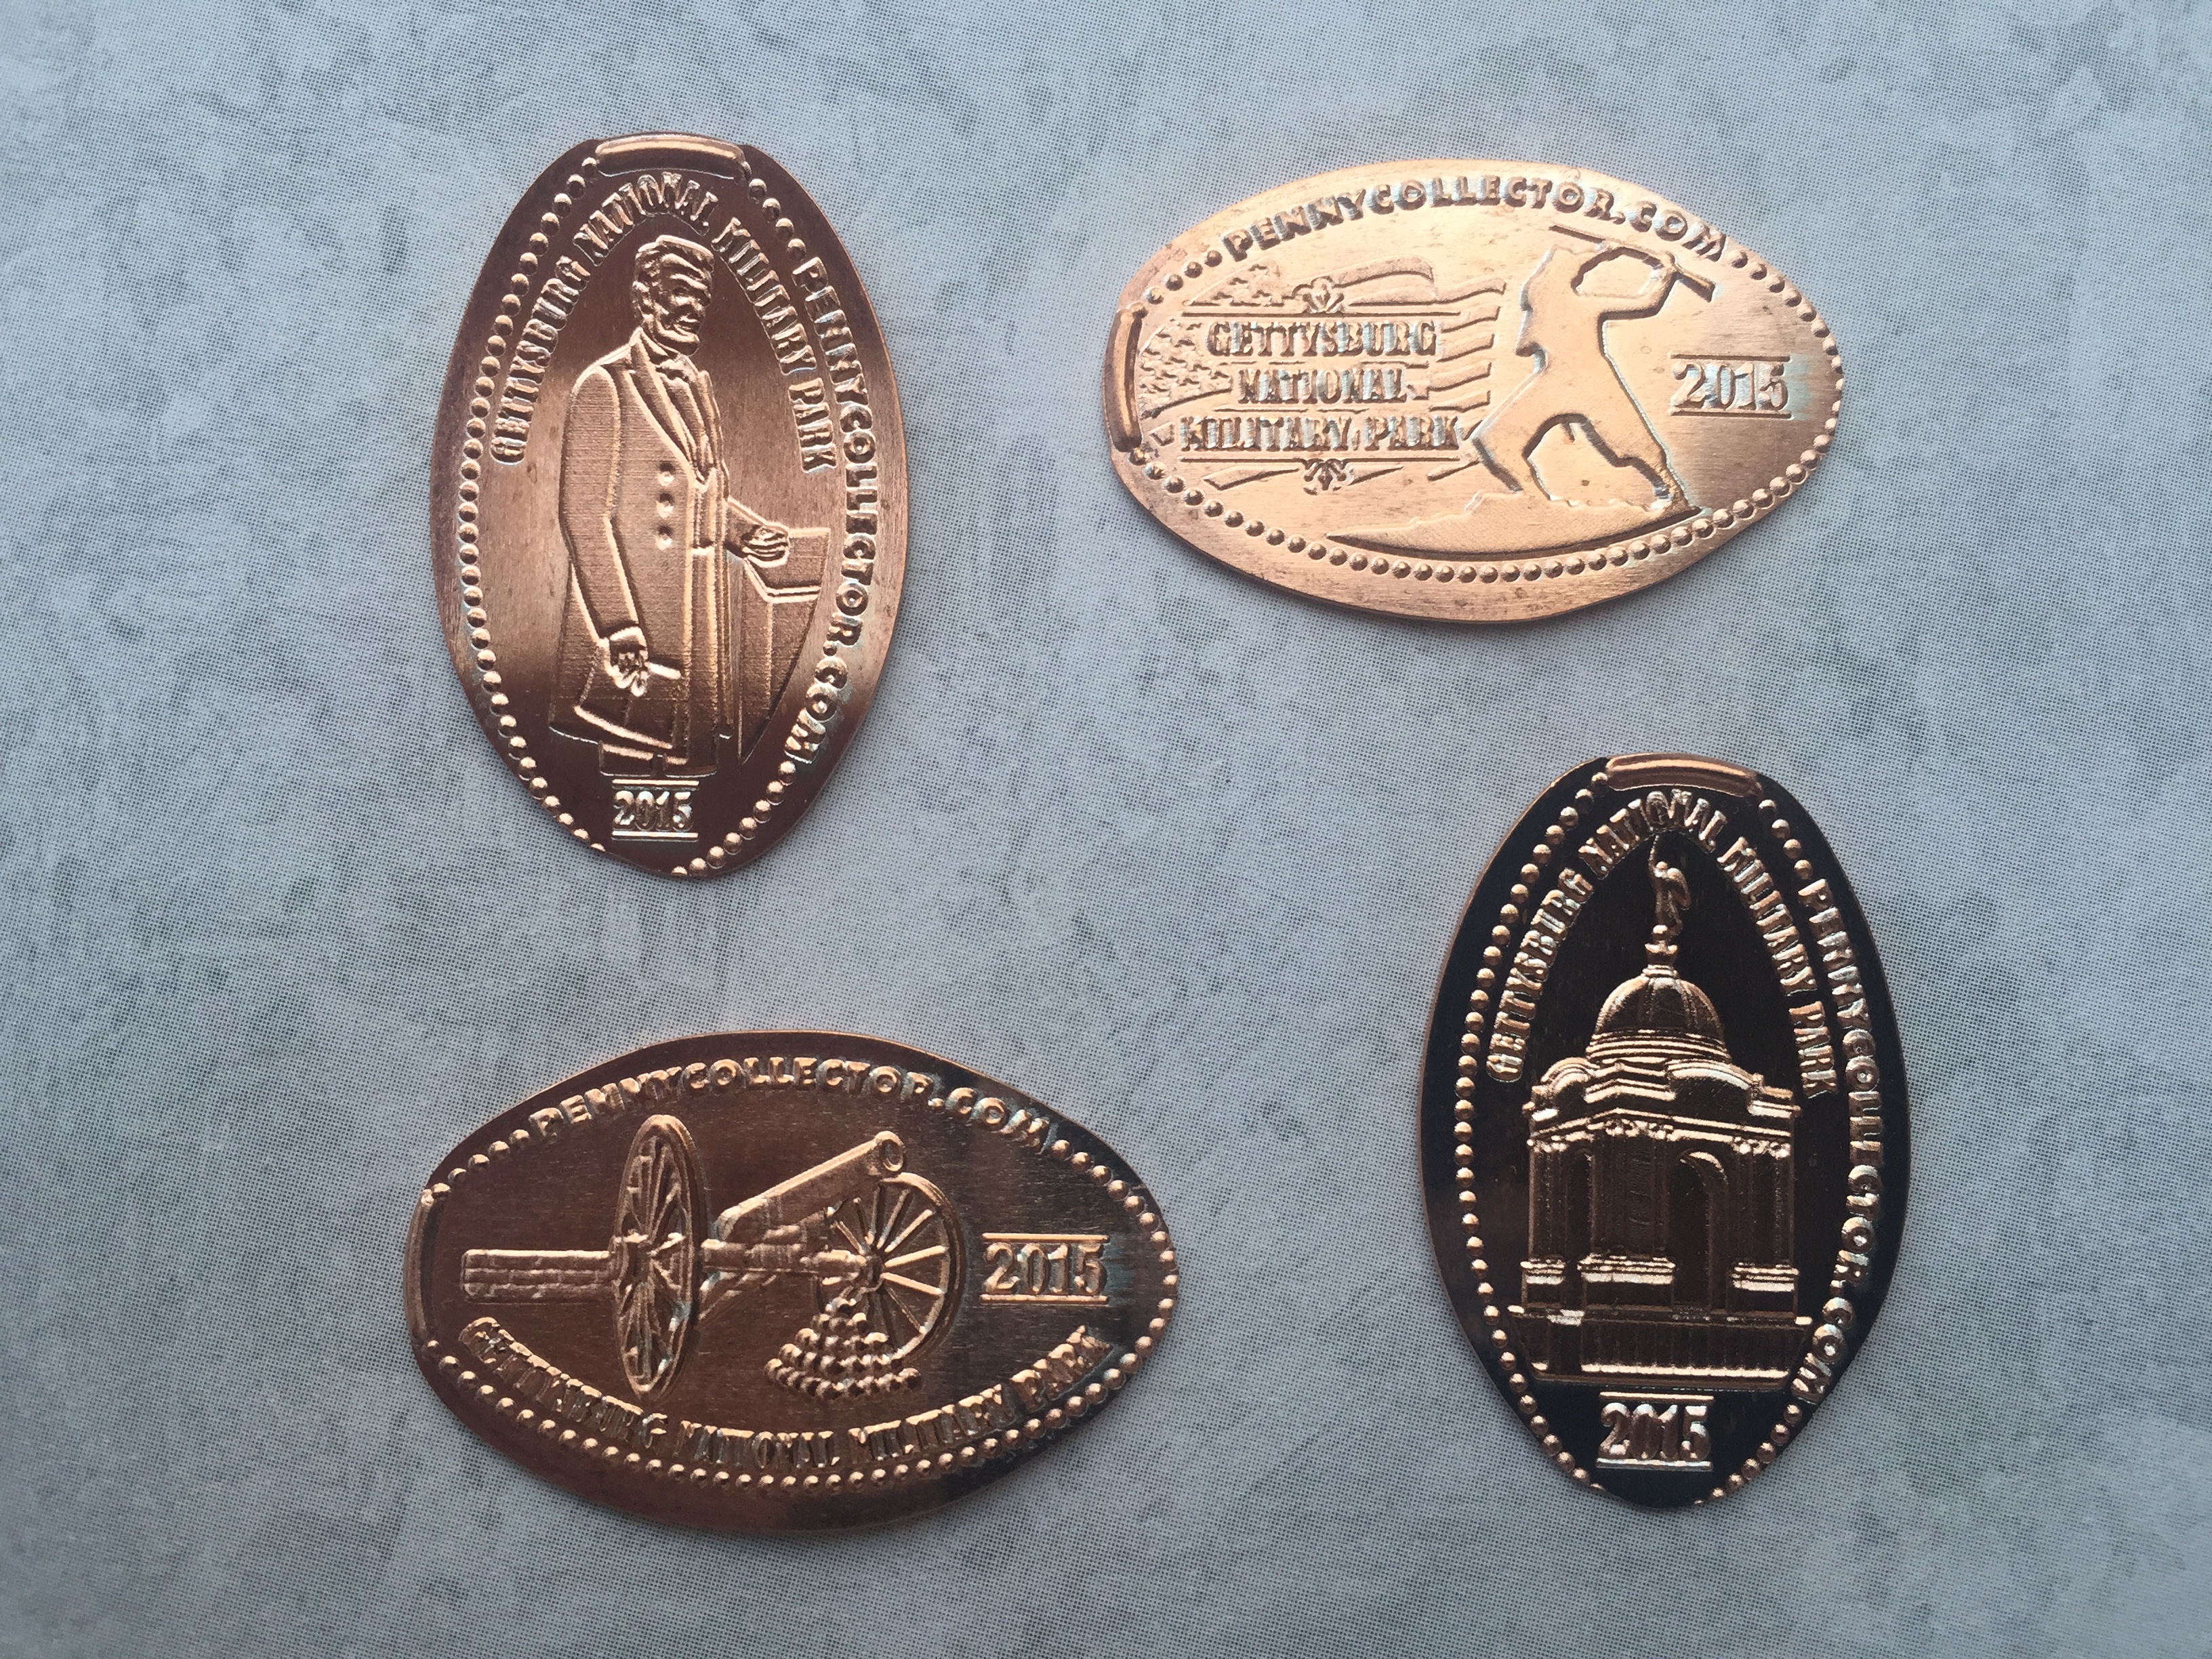
This seemed to be a fairly new machine, but all the images had 2015 listed on them.  It only takes dollar bills and spits out the design on a coin blank.  I will say they came out really shiny.

PA - Gettysburg Military Park Pennies 01

The images on the coins are President Lincoln, a Cannon, Part of the Museum Tower, and the Military Park’s logo.  After I was done the gift shop was calling my name again so I went back in to wonder around.  Towards the opposite end there was an exit towards where the restrooms.  I figured I may as well make a pit stop before hitting the road but just before I left I saw another penny machine.

PA - Gettysburg Military Park 02

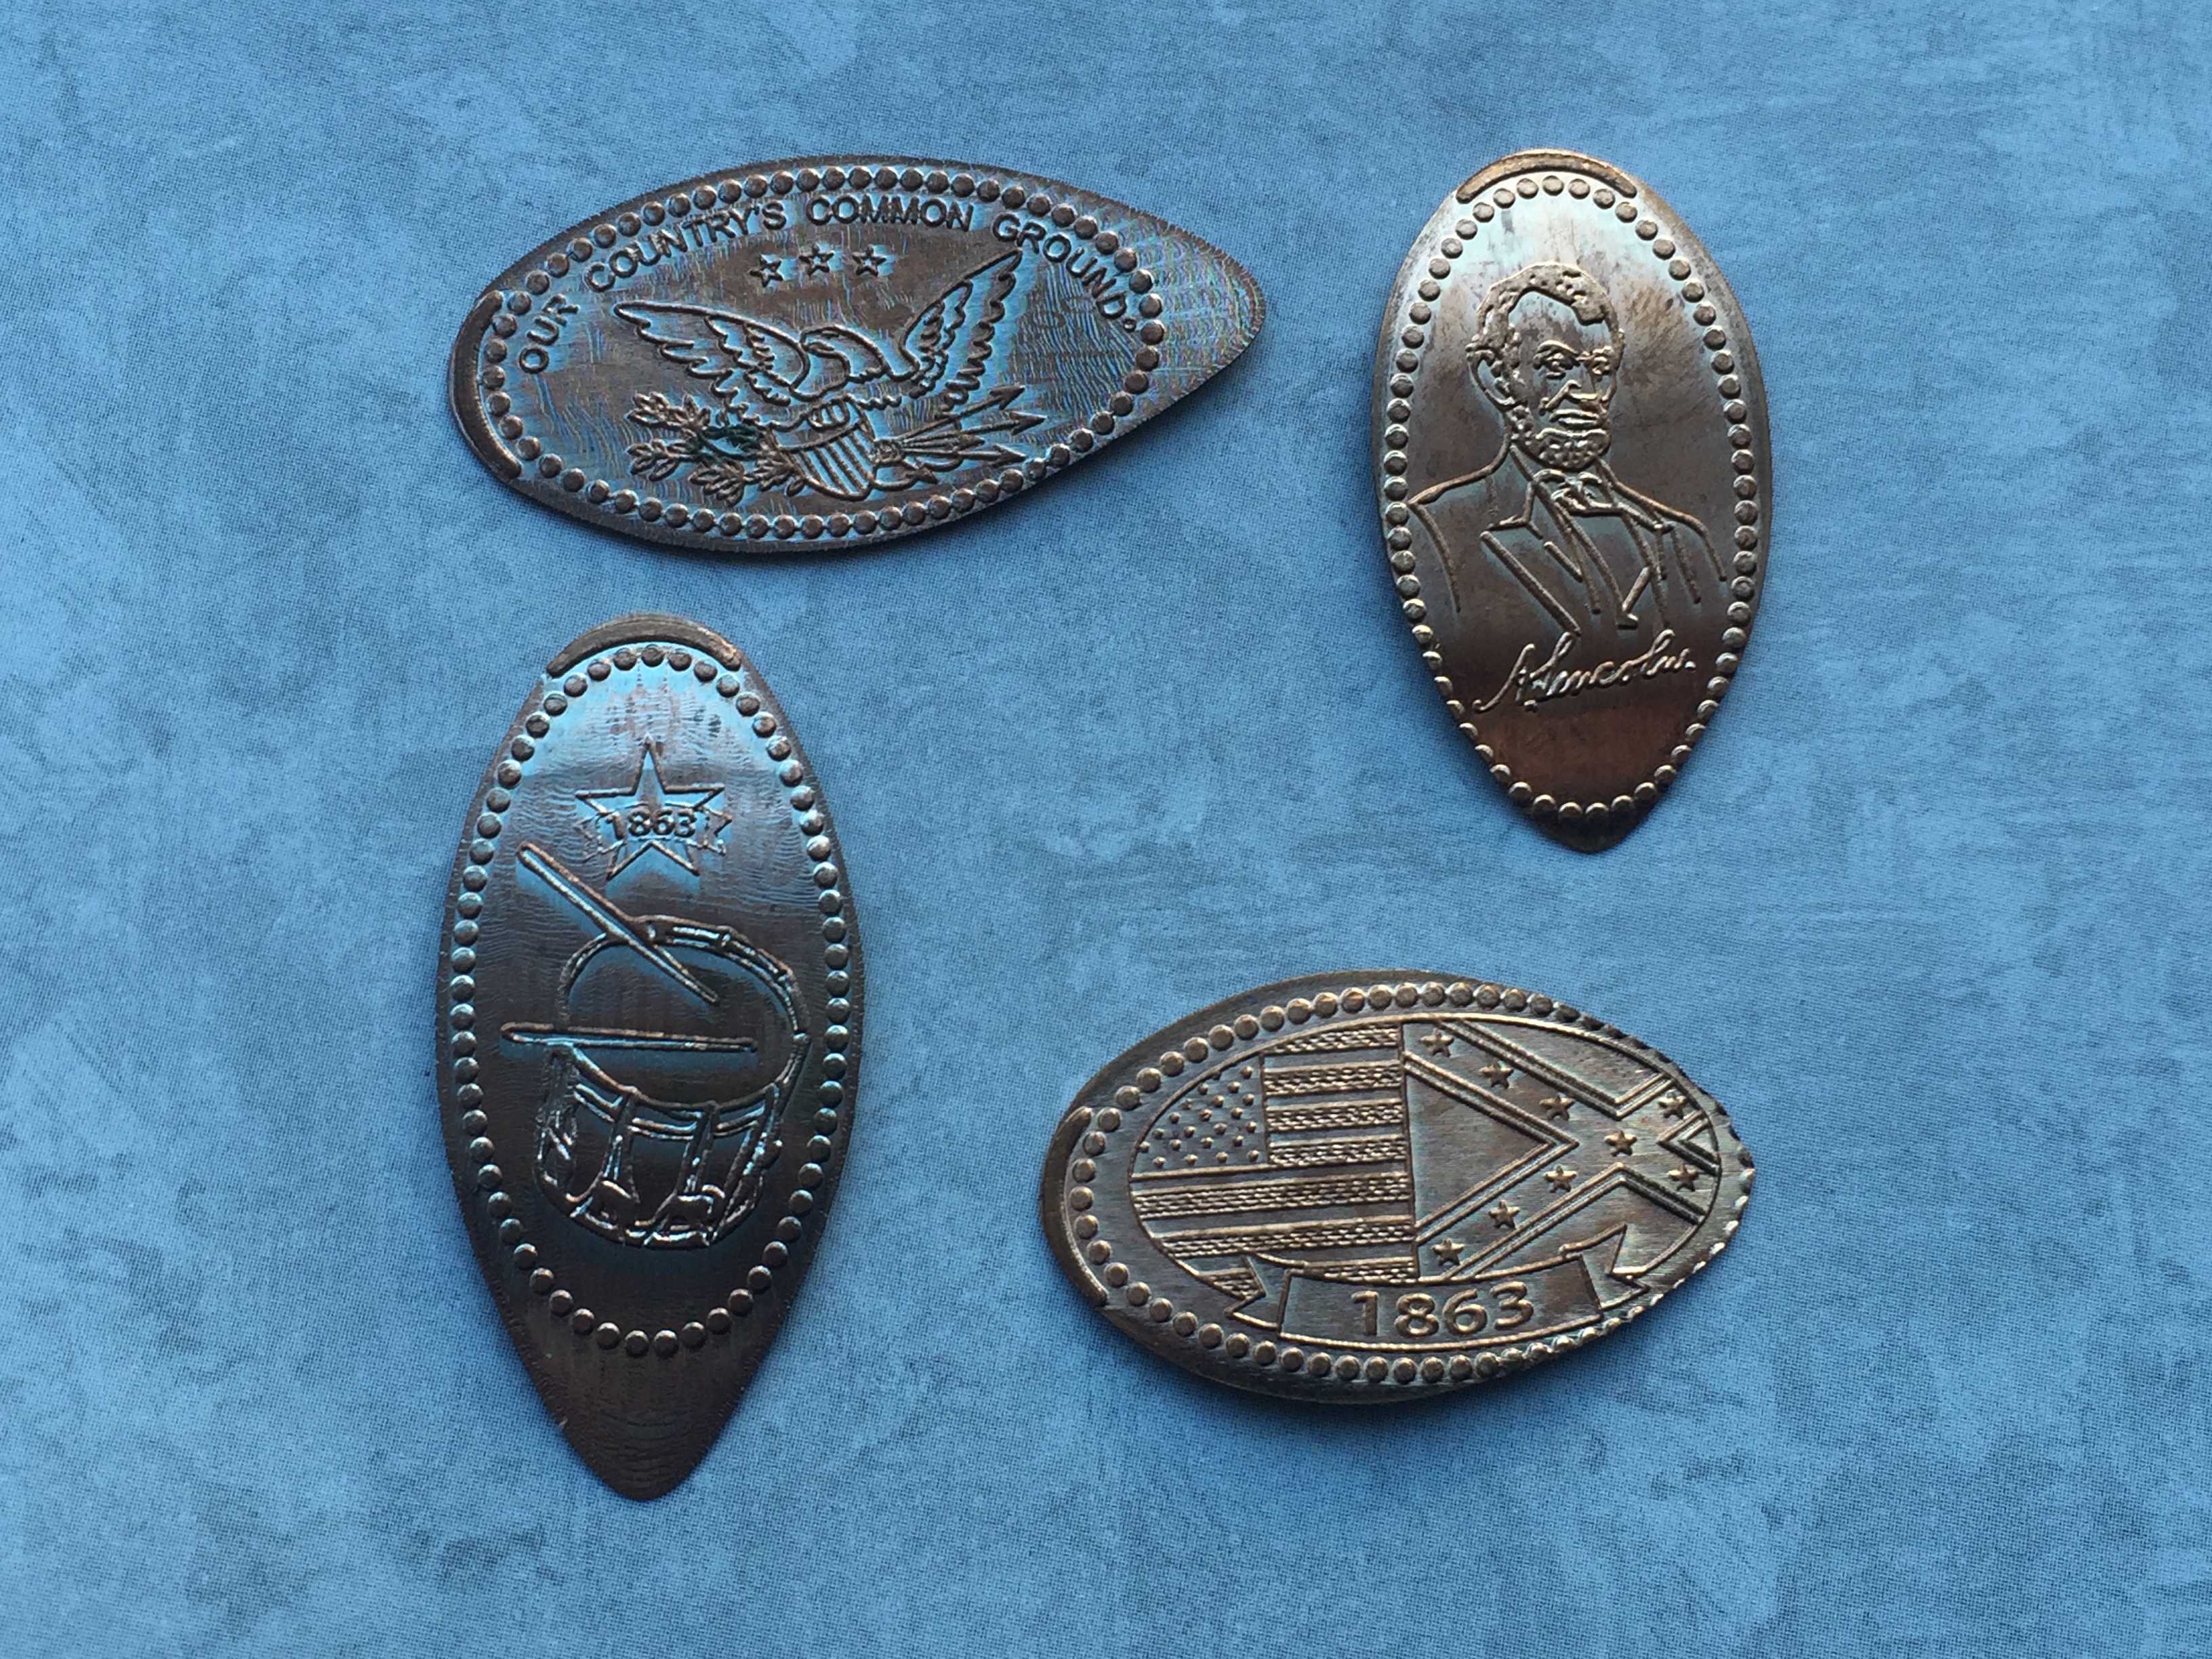
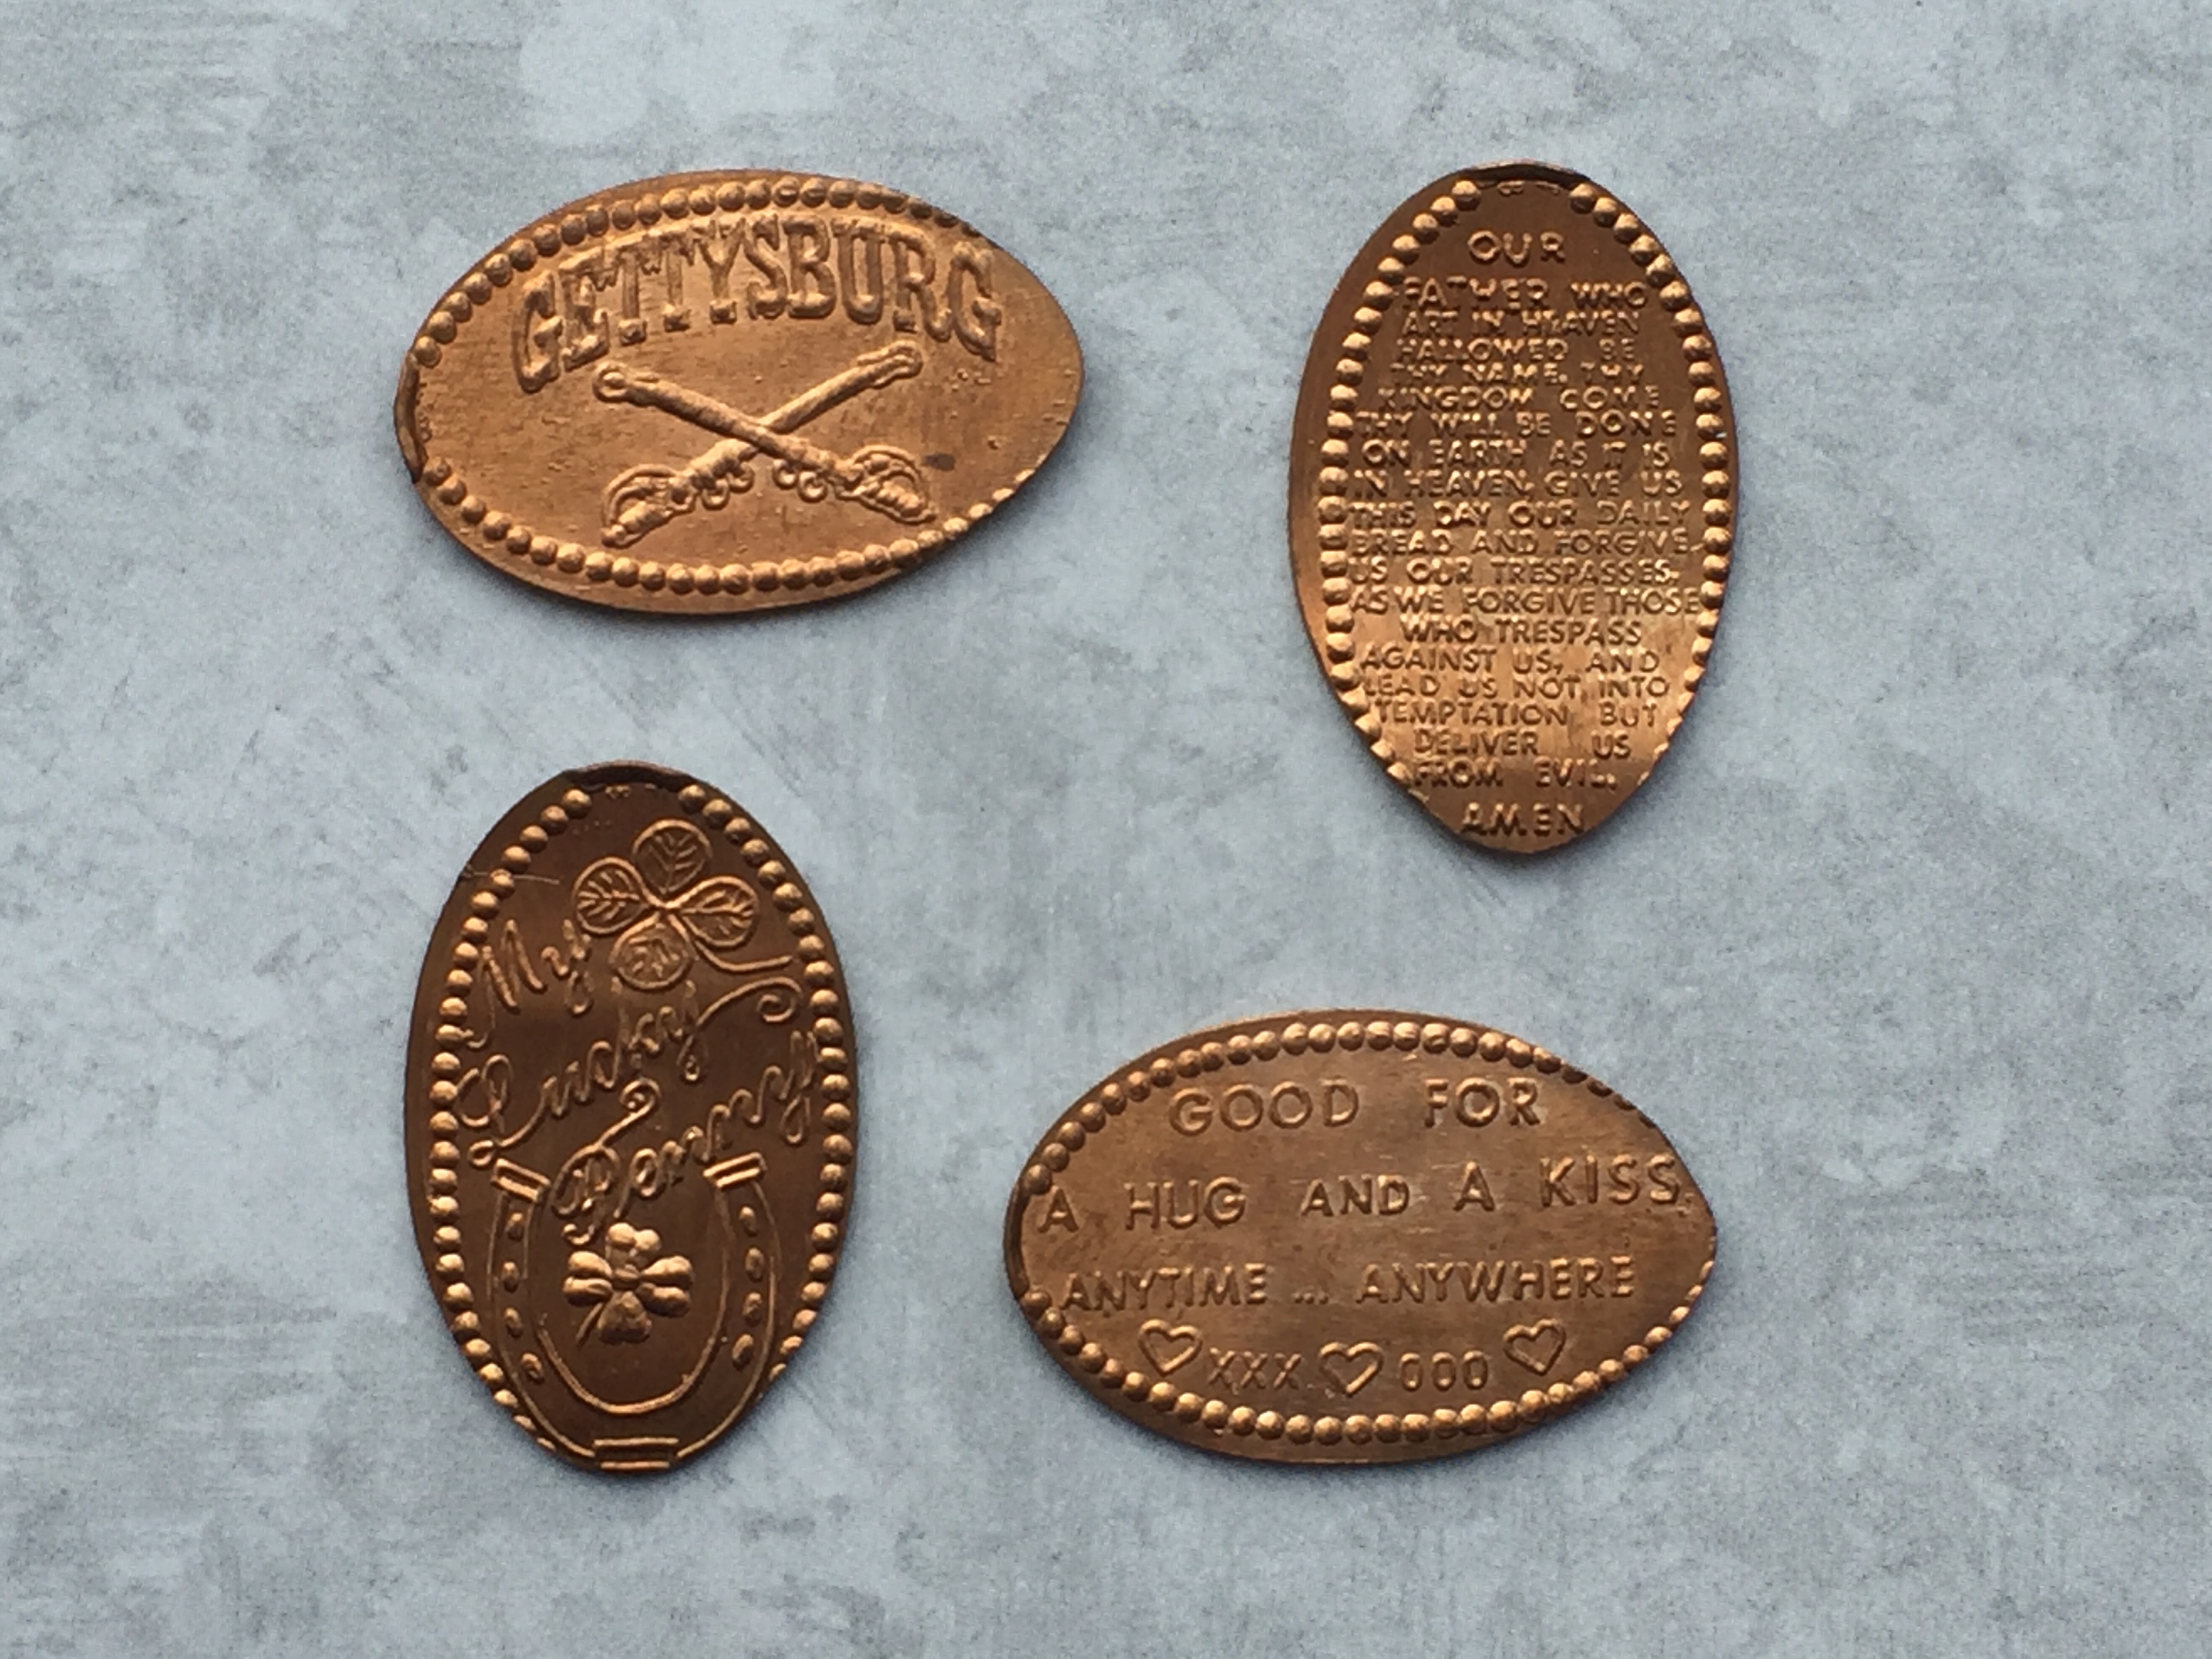
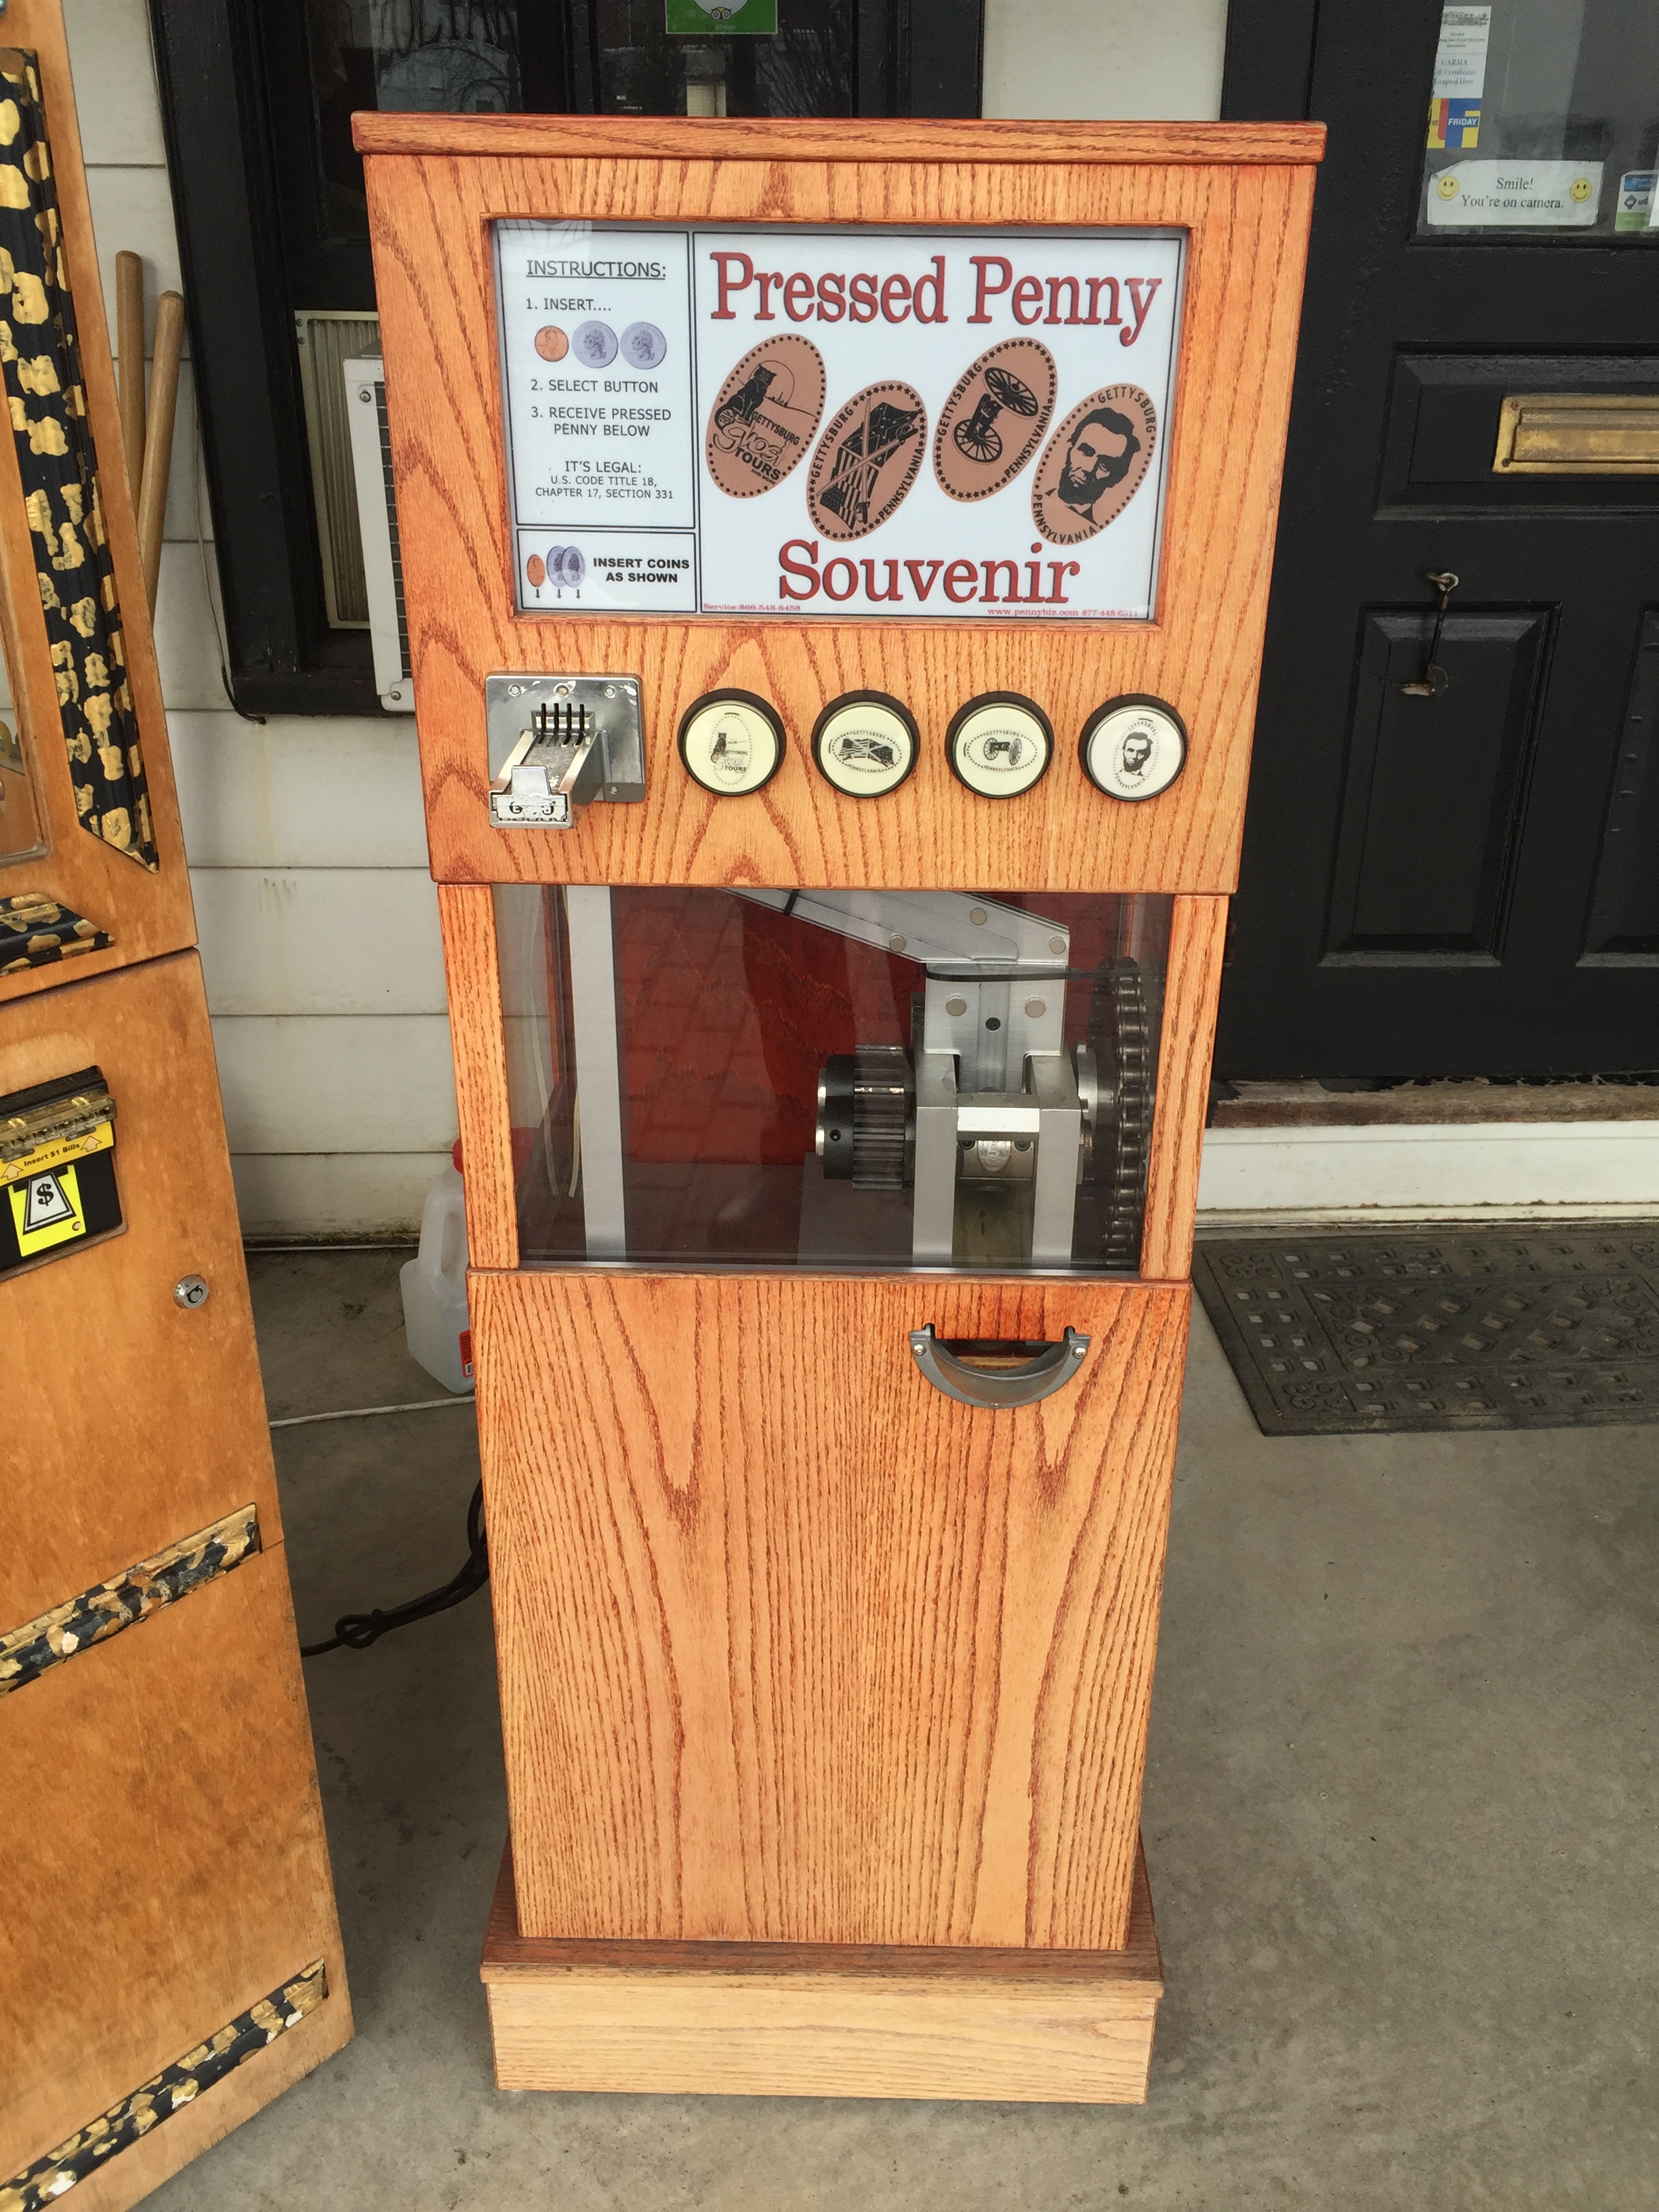
When I had done my pre-trip planning only the one machine had been listed as active here which is why this one caught me off guard.  Thankfully I had my emergency backup kit in my car with some extra coins (I wrote out this kit here, always be prepared).  I ran out to my car, got the change and came back to press a set before leaving.

PA - Gettysburg Military Park Pennies 02

Two of the pennies rolled a little long, and the other two a little short, but the images still came out pretty nicely.  The designs included Our Country’s Common Ground, Abraham Lincoln, a Military Drum, and the United States and Confederate Flags 1863.  Back in my car I had only one more stop to make and thankfully it was in the direction back home.

Drummer Boy Camping Resort 03

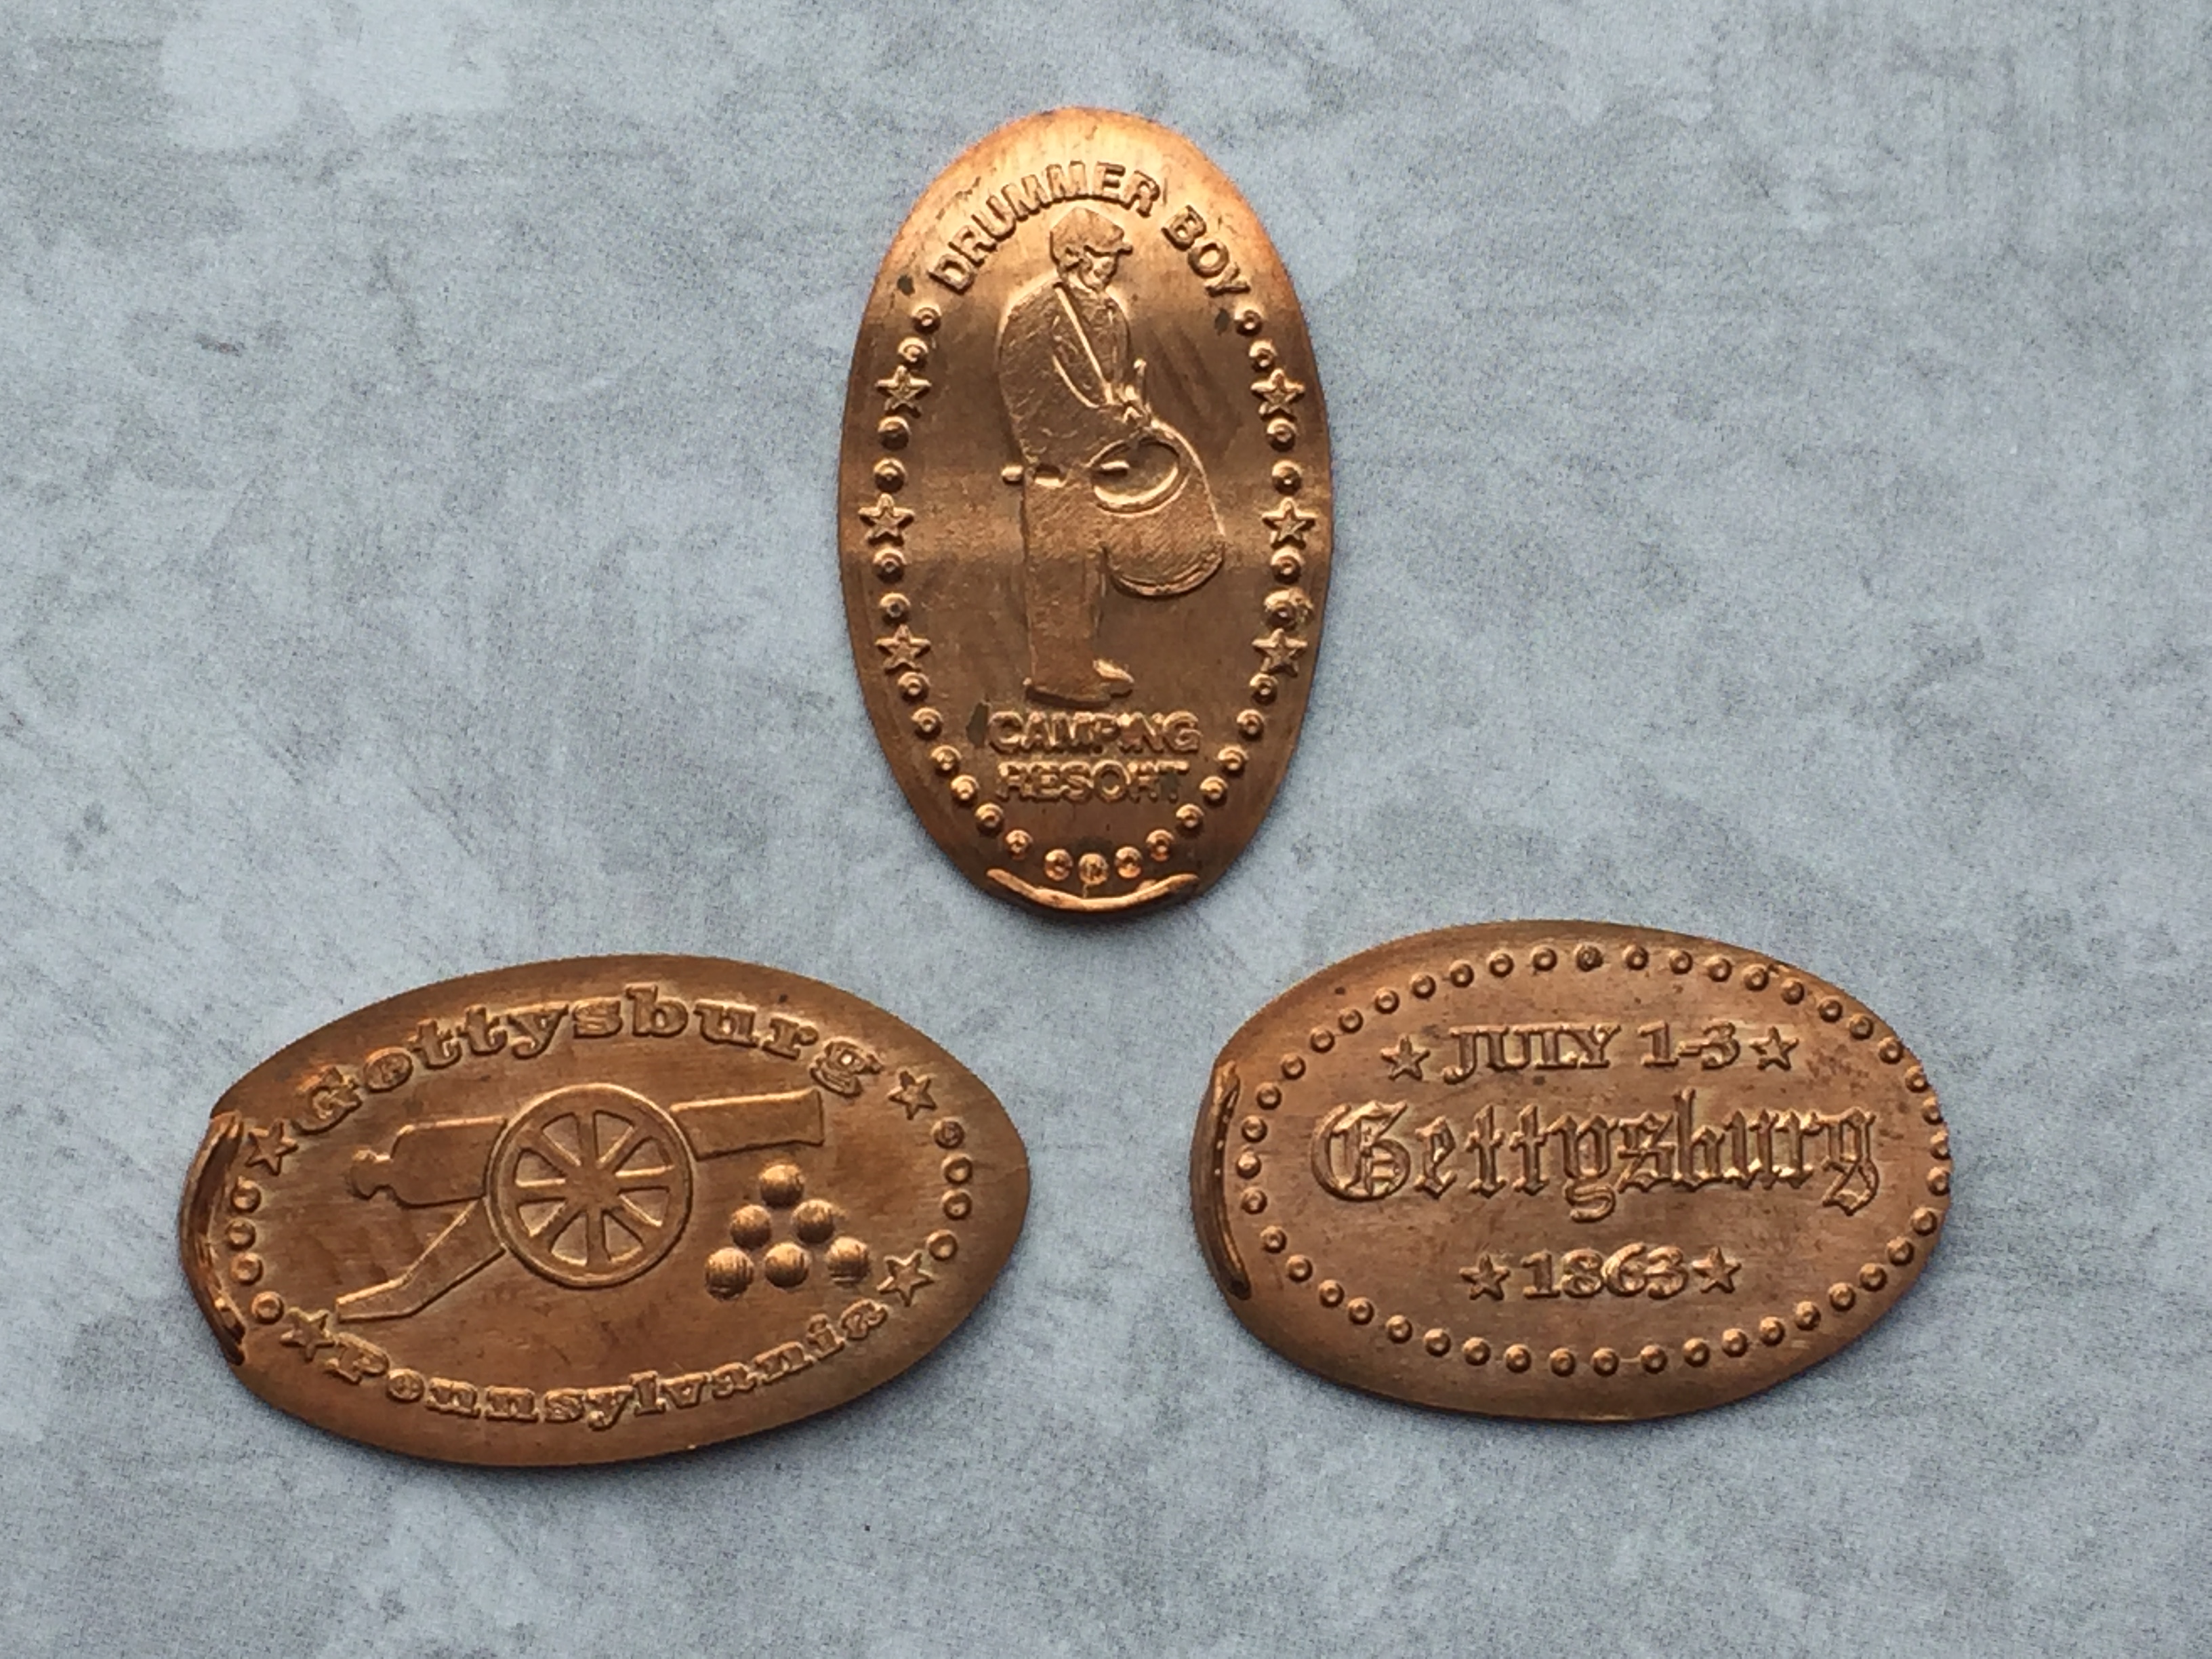
The Drummer Boy Camping Resort was only a few miles away and was right off the highway.  I took the exit and made my way into the woods towards the General Store.

Drummer Boy Camping Resort 02

As soon as I walked in I was greeted by a very friendly women that asked if she could help me.  I told her I was there to use the penny machine and she walked me back to where it was.

Drummer Boy Camping Resort

The machine had three designs to press: the Drummer Boy, a Cannon and July 1-3, 1863 Gettysburg.  I thanked her for her help and hopped back in my car.  My very short stop over in Gettysburg had been quite a success at least when it came to the pennies.  In the near future I hope to come back here and be able to spend more time exploring all the history and stories this place has to offer.

Gettysburg, PA – Part 1

A recent work trip had me passing through a town I had been interested in visiting for quite a while.  With my family recently going through the US Citizenship process we had lots of American History to read up on.  One of the most important battles in our country’s history was the Civil War and one of the battlefields was not only a turning point but the location of President Lincolns most important speeches.

Gettysburg 01

Gettysburg Pennsylvania is a few hours away from where we live in Jersey.  As I planned out my trip for work I noticed that one of the routes had me passing right through the center of town.  I wasn’t going to have a lot of spare time on my trip but not knowing when I would be able to come back gave me enough incentive to stop for a bit and collect some pressed pennies.  Going through my usual preparations I checked online for a complete list of machine locations, marked them on a map and started organizing the appropriate change needed for each machine.

The day of my trip came and after my meetings I headed into the heart of Gettysburg which had me drive through the famous battlefields.

Gettysburg 02

Most of the penny machine locations were located along two streets that connected like a “Y”.  This made it quite a bit easier to start at one end and make my way around.  My first stop was the Lincoln Train Museum.

Lincoln Train Museum 02

I parked in their lot and headed to the front door but as my luck would have it I was there on the one day of the week they weren’t open.  The penny machine was located just inside the door teasing me.

PA - Lincoln Train Museum 01

I took the above picture of the machine from outside which is why it looks a little far away.  After I got home I put together a package with a letter and some coins mentioning I had stopped by when they were closed, and asking if someone would press a set for me.  A week or so later the coins arrive back along with some nice reading material about the museum.

Lincoln Train Museum

The designs included President Lincoln, a Steam Engine and the 1899 Maryland & Pennsylvania Bobber Caboose that is available at the museum to explore (ahem when it’s open of course).

Gettysburg Heritage Center 01

I left my card at the Train Museum and started walking since everything now was pretty close together.  Located on the next block was the Gettysburg Heritage Center.  I had read online this used to be a Wax Museum with animated scenes from the Civil War but those were all long gone.  There was a tour you could take but due to time constraints I just stuck to the gift shop.

PA - Gettysburg Heritage Center 01

The machine was located near the admission counter right next to the tour entrance.  I have come across these style of machines from time to time and always find them a little hard to use and the pennies usually press short.

Gettysburg Heritage Center

However this machine actually surprised me and worked very nicely.  The staff member that was at the counter told me they had just serviced this machine which may have been why it worked so well.  These pennies have images of Two crossed Civil War swords with Gettysburg across the top, the Lord’s Prayer, My Lucky Penny with four-leaf clovers, and a special coin to cash in for a Free Hug and Kiss anytime … anywhere.  I really should have pressed more of that one!

Gettysburg Diorama 01

A short ways away was my next stop the Gettysburg Diorama.  As the name says this place has a scale model of the Battle of Gettysburg.  It is over 800 square feet and includes a light and sound show.  You get a bird’s-eye view of the entire battlefield which is a really cool way to see it all at once.

PA - Gettysburg Diorama 01

Just inside the front door is the penny machine.  No admission is required to use the machine, but the cost to see the diorama is only about $7 and I would recommend taking a look at it really is pretty impressive.

PA - Gettysburg Diorama Pennies

This machine has only three designs which include Gettysburg 150th Anniversary, Civil War Soldiers, and Abraham Lincoln.  After I was done with the diorama I headed out to my next stop.

Gettysburg Ghost Tours 01

The Gettysburg Ghost Tours as you can see from the sign in the above picture is a Candlelight Walking Tour at night.

PA - Gettysburg Ghost Tours 01

In case a Ghost Tour isn’t your thing, worry not the penny machine is located outside so you don’t even need to go in.

Gettysburg Ghost Tours

Four coin designs are available at this location which include: The Gettysburg Ghost Tour logo, a Cannon, the United States & Confederate flags, and Abraham Lincoln (this is a popular design here).  The next machine was literally right next door.

Bases Loaded 01

It’s a little store called Bases Loaded.  Just like the Ghost Tours their machine is located right outside and can be used even when the store isn’t open.

PA - Basses Loaded 01

The machine is a Penny Pincher four design model.  It was a little squeaky as I turned the handle to press my designs but the end results came out pretty good.

Bases Loaded Pennies

My last stop before taking a break was a little more of a hike.  Only a few blocks but I ended up spending much more time inside than I had anticipated.

Antique Center 02

The Antique Center of Gettysburg was an amazing trip back in time.  But first a little business, as soon as I walked inside the penny machine was located to the left.

PA - Antique Center Machine 01

The machine only had one design available, but as you can see in the picture above they also had 2×2 elongated cardboard coin holders.  I thought this was actually pretty clever by the store especially since I had yet to see a pressed penny booklet anywhere.

Antique Center of Gettysburg

The penny had an image of the National Tower Gettysburg with a cannon and the United States and Confederate Flags.  With the penny safely stored away I was initially going to head back outside, but the draw of the antique items in this store drew me further inside.  I was just mesmerized by the things they had in there that were all from the Battlefield.  From musket balls and other civil war weaponry, to union army metal plates and canteens.  I probably could have stayed in there for an hour at least, but kept my visit to about 20 minutes and I had only scratched the surface of what they had available for purchase.

Eventually I did head back outside and started to visit the last half of my stops before I needed to head home.